EPDM roofs are famous for their low maintenance and impressive durability, but even these rugged membranes are not invincible. One small tear or poorly sealed seam can lead to big headaches, especially since just an inch of rainfall can dump over 600 gallons of water on a 1,000-square-foot roof. Most people focus on patching the obvious holes and think the job is done, yet it turns out the real difference comes down to what you do before and after the patch goes on.
Table of Contents
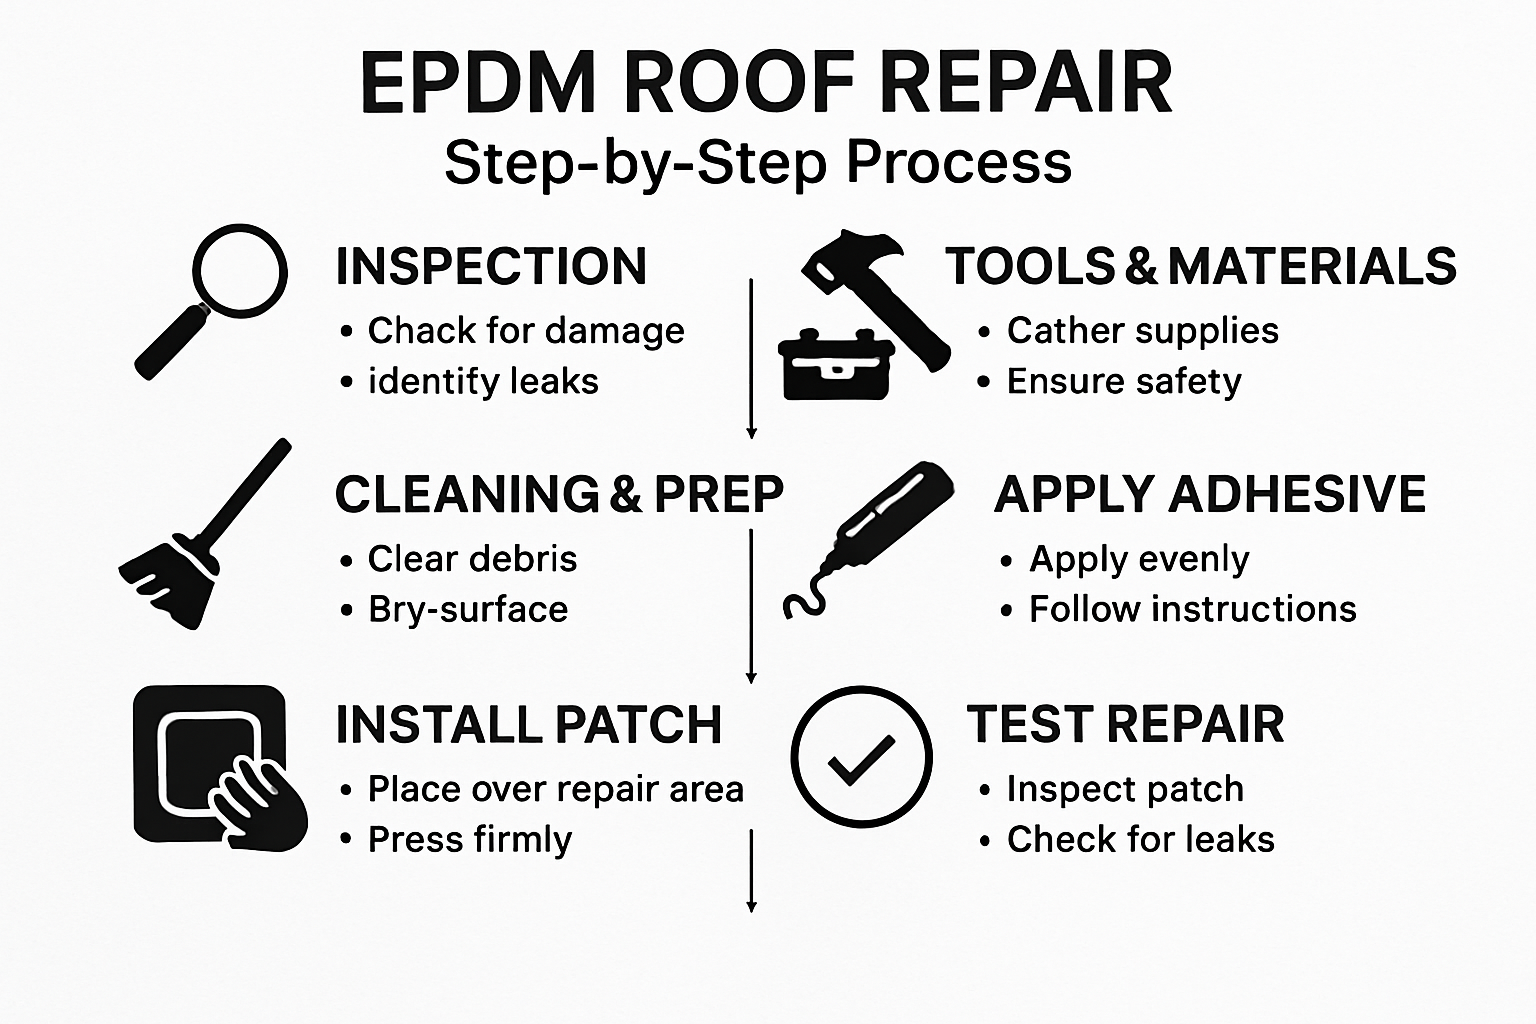
- Step 1: Assess Your Roof Damage
- Step 2: Gather Necessary Tools and Materials
- Step 3: Clean and Prepare the Repair Area
- Step 4: Apply EPDM Adhesive or Sealant
- Step 5: Install Repair Patches
- Step 6: Inspect and Test Repair Effectiveness
Quick Summary
| Key Point | Explanation |
|---|---|
| 1. Thoroughly assess roof damage | Carefully inspect for tears, bubbles, and structural issues to determine repair strategy and prevent further damage. |
| 2. Gather the right tools and materials | Prepare necessary EPDM repair materials and safety equipment before starting to ensure a smooth repair process. |
| 3. Clean the repair area properly | Remove all dirt and debris from the damaged surface to maximize patch adhesion and ensure a long-lasting repair. |
| 4. Apply adhesive correctly | Use EPDM-specific adhesive, applying it evenly and allowing it to become tacky for a watertight seal. |
| 5. Test the repaired area after curing | Inspect for leaks and validate repair effectiveness by simulating rainfall to ensure water resistance before considering the job complete. |
Step 1: Assess Your Roof Damage
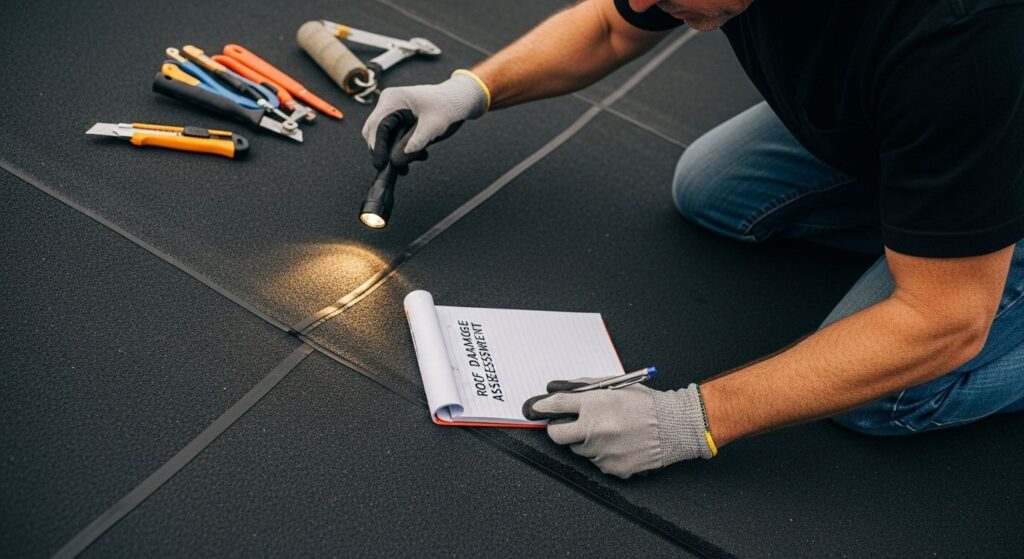
When dealing with EPDM roofing repair, the first and most critical step is thoroughly assessing the damage to your roof. Understanding the extent and nature of potential issues will determine your repair strategy and help prevent more extensive damage down the line. A comprehensive roof assessment requires careful observation and systematic examination.
Visual Inspection Techniques
Begin your roof damage assessment by conducting a meticulous visual inspection from multiple vantage points. Start from the ground level, looking for obvious signs of damage such as visible tears, bubbling, or areas where the EPDM membrane appears distorted or separated. Use binoculars to get a closer view without risking personal safety. Look for tell-tale signs of membrane degradation: discoloration, cracks, or sections where the roofing material seems to be pulling away from seams or edges.
If you can safely access your roof, perform a closer examination. Check for punctures, seam separations, and areas of standing water which can indicate underlying structural issues. Pay special attention to roof penetrations like vents, chimneys, and HVAC units, as these are common sites for potential leaks. You might want to learn more about roof repair strategies to understand the complexities of your specific situation.
While conducting your assessment, document everything. Take clear, well-lit photographs of any damage you discover. These images will be crucial for both your own records and potential communication with roofing professionals. Note the size, location, and apparent severity of each identified issue. Measurements and precise descriptions can help determine whether you’re dealing with a simple patch job or a more extensive repair requirement.
Step 2: Gather Necessary Tools and Materials
Successful EPDM roofing repair hinges on having the right tools and materials prepared before you begin. Proper preparation prevents frustrating interruptions and ensures a smoother, more professional repair process. Gathering your equipment in advance will save time and reduce potential complications during the actual repair work.
For your EPDM roofing repair, you will need several specialized tools and materials. Start by collecting high-quality EPDM repair materials: a tube of EPDM compatible seam primer, EPDM rubber repair tape, a sharp utility knife with replacement blades, and EPDM rubber patch material. Your cleaning supplies are equally important, so gather rubbing alcohol, clean rags, and a soft-bristled brush to prepare the repair surface. Protective gear is non-negotiable safety equipment includes work gloves, safety glasses, and non-slip shoes to ensure your personal protection while working on potentially slippery roof surfaces.
Precision tools will make your repair more effective. Get professional insights on roof repair techniques to understand the nuanced approach. Include a tape measure for accurate measurements, a roller for smoothing out patches and eliminating air bubbles, and a clean bucket for mixing any required adhesives. Consider having a caulking gun and roofing sealant on hand for additional sealing needs. Professional tip: Always purchase materials specifically designed for EPDM roofing to guarantee compatibility and long-lasting results. Organize your tools in a portable container or tool belt before climbing onto the roof, ensuring everything you need is within easy reach and securely stored.
To help you prepare for your EPDM roofing repair, here is a table that summarizes the essential tools and materials you will need, along with their purposes.
| Tool/Material | Purpose |
|---|---|
| EPDM-compatible seam primer | Prepares membrane edges for repair adhesion |
| EPDM rubber repair tape | Covers seams or damaged roof sections |
| EPDM rubber patch material | Provides durable coverage for tears or punctures |
| Utility knife (with extra blades) | Cuts patch materials to desired size and shape |
| Rubbing alcohol | Cleans and degreases repair area |
| Clean rags | Wipes down and dries surfaces before repair |
| Soft-bristled brush | Removes stubborn dirt or residue |
| Tape measure | Ensures accurate sizing of patches |
| Roller | Presses patches flat, removes air bubbles |
| Work gloves & safety glasses | Protects hands and eyes during repair |
| Non-slip shoes | Improves safety while working on the roof |
| Caulking gun & roofing sealant | Seals additional cracks or vulnerable seams |
| Clean bucket | Holds or mixes adhesives as needed |
Step 3: Clean and Prepare the Repair Area
Cleaning and preparing the EPDM roofing surface is a critical step that directly impacts the success of your repair. Proper surface preparation ensures maximum adhesion and long-lasting repair results. Skipping or rushing through this stage can compromise the entire repair process, leading to potential future leaks and additional damage.
Begin by thoroughly cleaning the damaged area and surrounding surface. Use rubbing alcohol and clean rags to remove dirt, debris, and any loose contaminants from the EPDM membrane. Crucial cleaning tip: Work in a systematic manner, wiping in one direction to prevent redepositing dirt or debris. Pay special attention to the edges of the damaged area, ensuring you create a completely clean surface that will allow proper patch adhesion. If you encounter stubborn dirt or residue, use a soft-bristled brush to gently scrub the surface without damaging the EPDM membrane.
After cleaning, allow the area to dry completely. Moisture is the enemy of proper patch adhesion, so take your time to ensure the surface is entirely dry and at an appropriate temperature. Ideal repair conditions typically require surface temperatures between 40 and 80 degrees Fahrenheit. Learn more about professional repair techniques to understand the nuanced approach to surface preparation. Inspect the cleaned area carefully, checking for any remaining debris or potential additional damage that might have been hidden by dirt. Run your gloved hand over the surface to feel for any irregularities or remaining contaminants. Final preparation step: Use EPDM primer along the edges of the repair area to enhance adhesion and create a strong bonding surface for your patch. Apply the primer evenly and allow it to become tacky before proceeding with the actual patch application.
Step 4: Apply EPDM Adhesive or Sealant
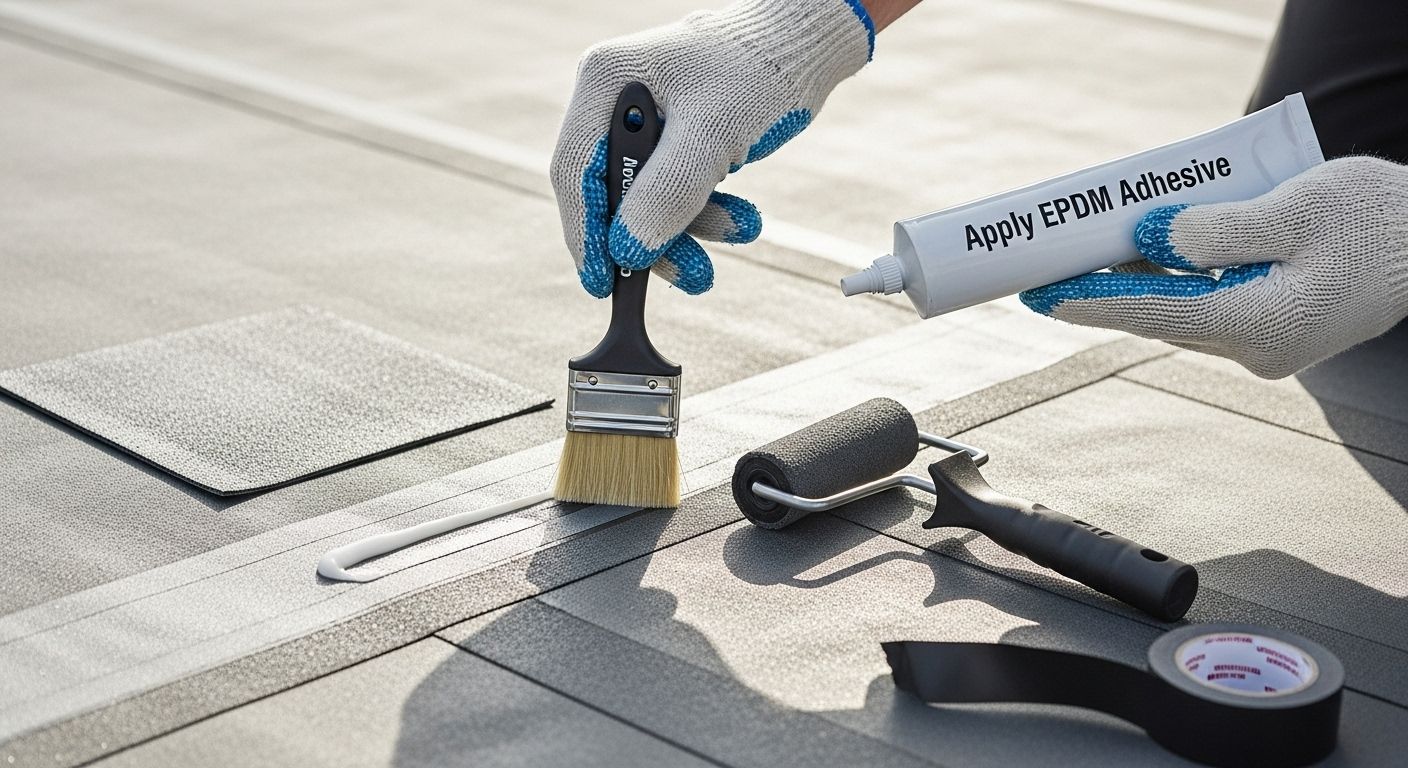
Applying adhesive or sealant is a precision task that requires patience and careful technique. The success of your EPDM roof repair depends heavily on proper adhesive application, which creates a watertight seal and prevents future leaks. This step transforms your prepared surface into a durable, protected roofing membrane.
Begin by selecting an EPDM-specific adhesive that matches your membrane type and repair requirements. Open the adhesive container carefully and stir thoroughly to ensure consistent texture. Using a clean, disposable brush or roller, apply a thin, even layer of adhesive around the edges of the repair area and across the surface where the patch will be placed. Critical application tip: Work in smooth, consistent strokes to avoid creating air pockets or uneven coverage. Allow the adhesive to become tacky – this typically takes 10 to 15 minutes, depending on temperature and humidity. Explore professional repair techniques for advanced insights into proper application methods.
Once the adhesive reaches the proper tackiness, carefully position your prepared EPDM patch over the damaged area. Start from one edge and slowly lower the patch, using a soft roller to eliminate air bubbles and ensure complete contact. Apply firm, consistent pressure across the entire patch, working from the center outward to push out any trapped air. Pay extra attention to the patch edges, using the roller to create a smooth, sealed transition between the patch and existing membrane. After application, allow the repaired area to cure completely according to the adhesive manufacturer’s recommended time frame, which typically ranges from 24 to 48 hours depending on environmental conditions.
Step 5: Install Repair Patches
Installing repair patches is a precision process that requires careful attention to detail and technique. The quality of your patch installation directly determines the long-term effectiveness of your EPDM roof repair. This step transforms your prepared surface into a durable, watertight roofing solution.
Begin by measuring the damaged area and cutting your EPDM patch material with precision. The patch should extend at least 2 inches beyond the damaged area on all sides, creating a robust repair zone. Pro tip: Use a sharp utility knife and a straight edge to ensure clean, straight cuts. Round the corners of your patch slightly to reduce the risk of future lifting or peeling. When positioning the patch, ensure it is large enough to cover the entire damaged area with adequate overlap, but not so large that it creates unnecessary bulk or uneven surface tension.
Carefully align the patch over the prepared repair area, starting from one edge and slowly lowering it onto the adhesive-covered surface. Discover advanced repair techniques for professional-level results. Use a soft rubber roller to press the patch firmly, working from the center outward to eliminate air bubbles and ensure complete adhesion. Apply consistent, firm pressure, paying special attention to the patch edges. Use the roller to create a smooth transition between the patch and the existing membrane, checking for any potential air pockets or areas of incomplete adhesion. After installation, allow the patch to cure completely according to the manufacturer’s recommended timeframe, typically 24 to 48 hours, depending on environmental conditions. Avoid walking on the repaired area during this curing period to prevent disrupting the patch or compromising the adhesive bond.
Step 6: Inspect and Test Repair Effectiveness
Testing and inspecting your EPDM roof repair is the critical final step that confirms the success of your maintenance efforts. A thorough inspection ensures your repair will protect your home from potential water damage and extend your roof’s overall lifespan. This verification process is not just about confirming the current repair but also identifying any potential future maintenance needs.
Wait at least 48 hours after patch installation before conducting your inspection, allowing sufficient time for the adhesive to fully cure. Begin your evaluation by visually examining the repaired area under good lighting conditions. Look for key indicators of a successful repair: smooth patch edges, no visible air bubbles, and a seamless transition between the patch and existing membrane. Run your gloved hand gently over the repair, feeling for any raised edges or uneven surfaces that might compromise the seal. Explore professional roof maintenance strategies to enhance your understanding of long-term roof care.
To test the water resistance of your repair, simulate rainfall conditions by carefully spraying the repaired area with a garden hose. Start with a gentle spray, gradually increasing water pressure to mimic moderate rainfall. Observe the repair area closely from both the roof surface and inside your attic or ceiling, looking for any signs of water penetration. Watch for water droplets, moisture lines, or any indication of leakage. If you notice any water seepage, it may indicate that the repair needs additional attention or professional intervention. Document your findings with clear photographs, which can serve as a reference for future maintenance or potential professional consultation. Remember that while DIY repairs can be effective, complex or extensive roof damage might require expert assessment.
For your convenience, the following table outlines each step in the EPDM roofing repair process, along with the main objective and important notes for each stage.
| Step | Main Objective | Important Notes |
|---|---|---|
| 1. Assess Roof Damage | Determine type and extent of damage | Document issues with photos and measurements |
| 2. Gather Tools & Materials | Prepare all necessary repair items | Use materials specifically for EPDM |
| 3. Clean & Prepare Repair Area | Ensure patch will adhere by removing debris & dirt | Let area dry completely before proceeding |
| 4. Apply Adhesive or Sealant | Create watertight bond between patch and membrane | Allow adhesive to become tacky before patch |
| 5. Install Repair Patches | Securely cover damaged section for long-lasting fix | Overlap patch by at least 2 inches on all sides |
| 6. Inspect & Test Repair | Verify repair success and spot possible leaks | Wait 48 hours for curing before testing |
Protect Your Home with Expert EPDM Roofing Solutions
If you have just discovered damage to your EPDM membrane or are worried about small leaks turning into bigger headaches, this guide has shown how detailed each repair step is. But climbing onto your roof, gathering the right materials, and following precise repair techniques can quickly become stressful. Missing even a single step—like proper surface preparation or adhesive application—can result in costly water damage and future repairs no homeowner wants to face.
Why put your home at risk when the skilled professionals at Liberty Roofworks can deliver guaranteed results? Our team uses advanced EPDM repair strategies and has years of experience restoring roofs just like yours. We provide everything from professional roofing repairs to complete EPDM roofing and repair, ensuring your investment is protected for years to come. Do not wait for a small problem to become a major issue. Schedule your free inspection with Liberty Roofworks today and get priority service from Charlotte’s trusted roofing experts.
Frequently Asked Questions
What is EPDM roofing?
EPDM (Ethylene Propylene Diene Monomer) roofing is a durable synthetic rubber roofing membrane commonly used for flat or low-slope roofs. Its resilience, weather resistance, and longevity make it a preferred choice for many homeowners.
How do I know if my EPDM roof needs repair?
Signs of EPDM roof damage include visible tears, cracking, bubbling, or seam separation. Additionally, areas of standing water, discoloration, or any leaks inside your home are indications that your roof may need repair.
What materials and tools are required for EPDM roofing repair?
Essential tools and materials for EPDM roofing repair include EPDM compatible seam primer, EPDM rubber repair tape, a utility knife, cleaning supplies (such as rubbing alcohol and rags), a soft-bristled brush, a roller, and safety equipment like gloves and eye protection.
How long does it take for EPDM adhesive to cure after repair?
Typically, EPDM adhesive takes about 24 to 48 hours to fully cure, depending on temperature and humidity conditions. It’s important to avoid walking on the repaired area during this curing period to ensure a proper bond.
