Each year, severe storms cause billions in property damage across American neighborhoods, leaving homeowners with urgent decisions to make. After the winds die down, the safety of your family and home depends on a clear, step-by-step plan. This guide gives American homeowners straightforward actions for storm damage assessment, documentation, and roof restoration so you can recover quickly and avoid costly mistakes.
Table of Contents
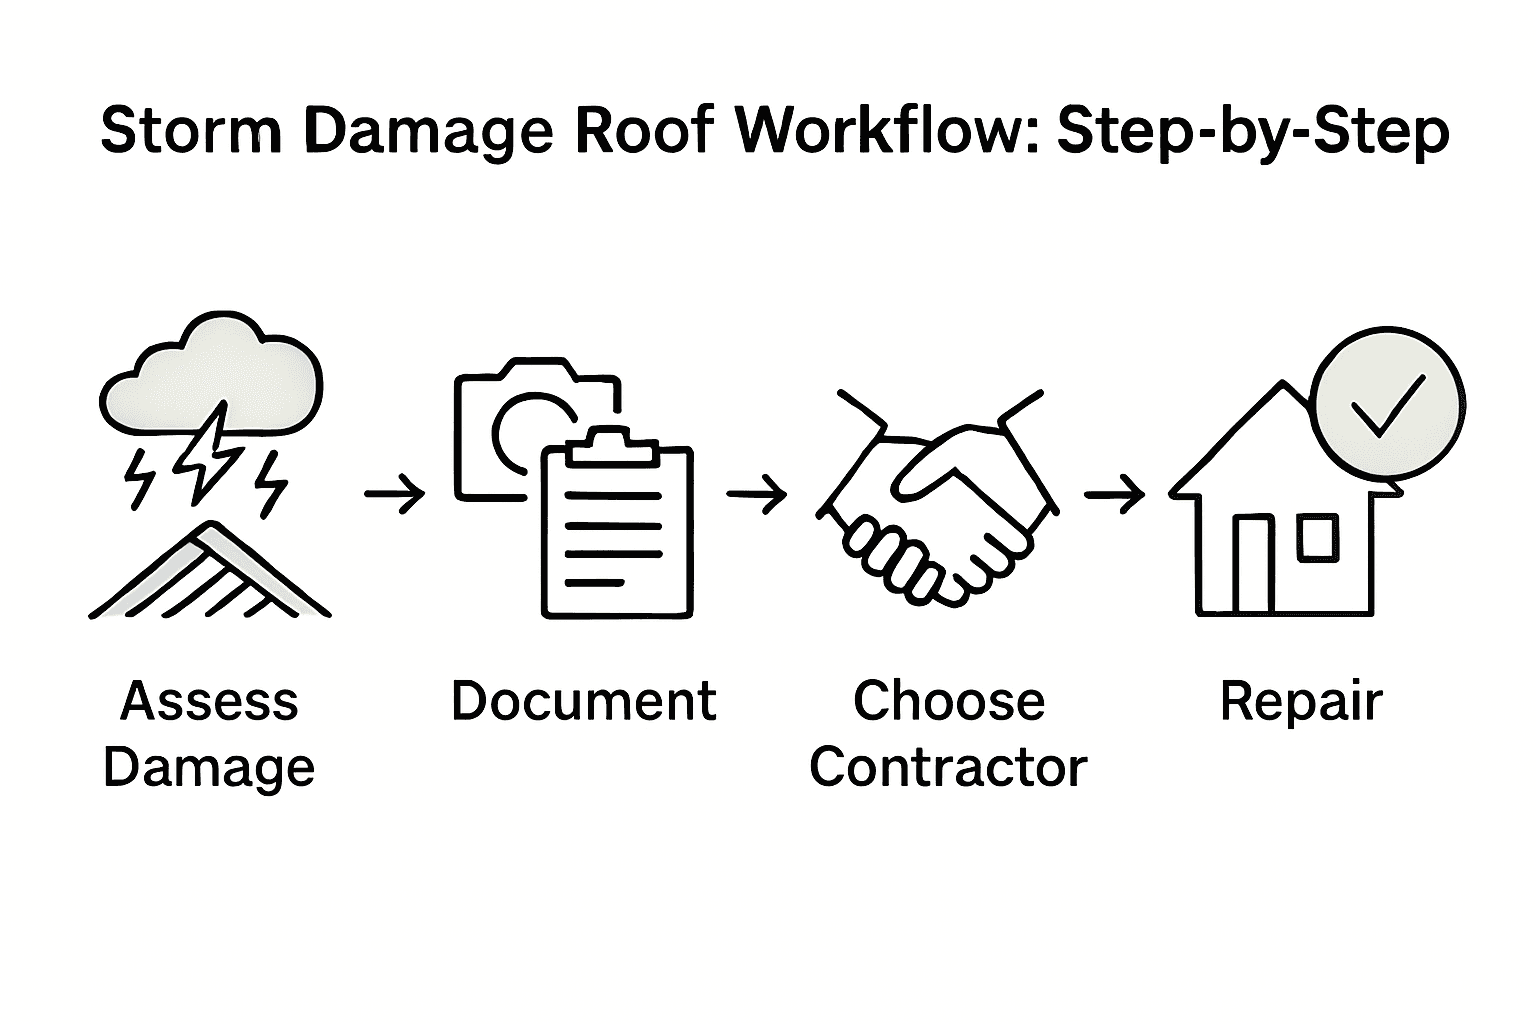
- Step 1: Assess Storm Damage and Ensure Safety
- Step 2: Document Roof Damage for Insurance
- Step 3: Choose a Trusted Roofing Contractor
- Step 4: Plan and Execute Roof Repairs
- Step 5: Verify Repairs and Complete Cleanup
Quick Summary
| Key Point | Explanation |
|---|---|
| 1. Assess Storm Damage Safely | Start with a visual inspection from the ground to identify any hazards without risking personal injury. |
| 2. Document Damage for Insurance | Take clear, date-stamped photographs and detailed notes of the damage to support your insurance claim. |
| 3. Choose a Qualified Contractor | Verify the contractor’s credentials and experience to ensure high-quality repairs are made following storm damage. |
| 4. Develop a Repair Plan | Work with your contractor to create a repair strategy that addresses both visible and underlying issues effectively. |
| 5. Verify Repairs and Clean Up | Inspect the completed repairs thoroughly and ensure the site is clean of any debris, confirming overall safety and quality. |
Step 1: Assess Storm Damage and Ensure Safety
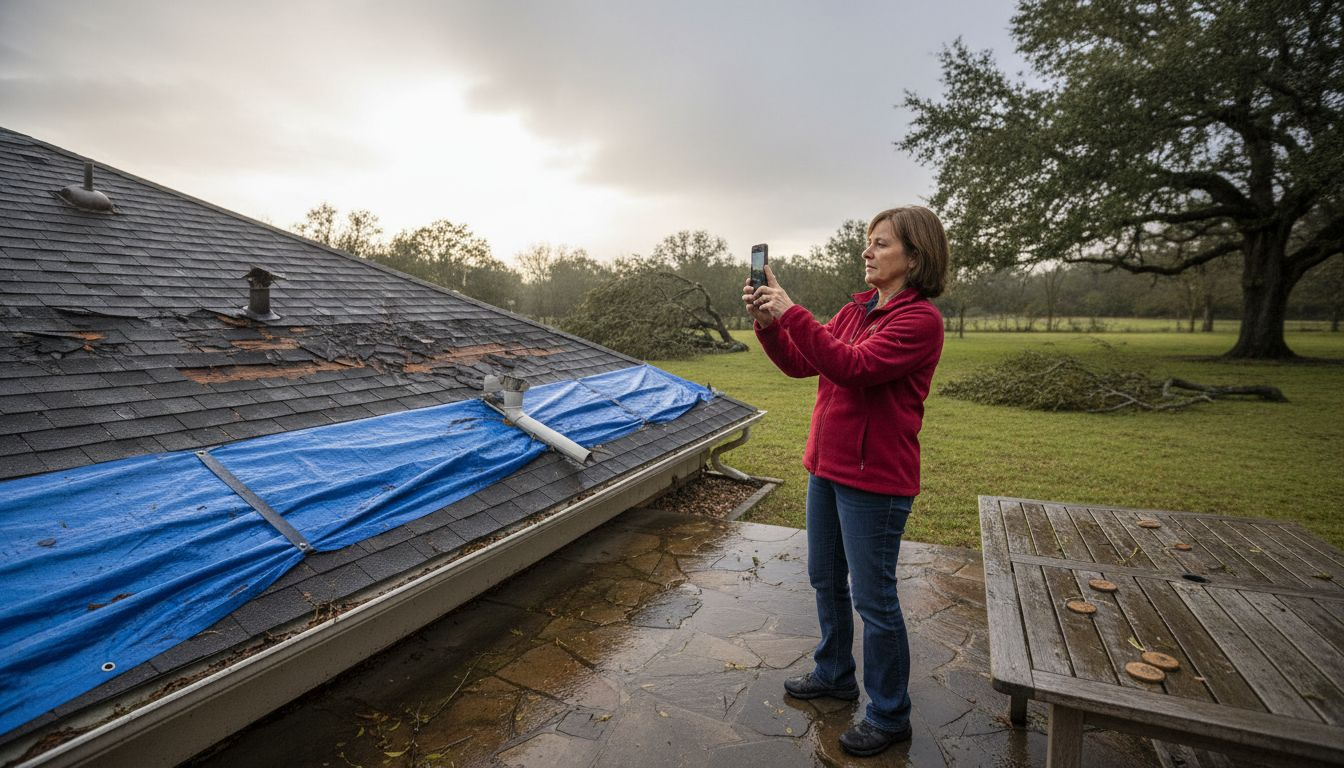
Ensuring personal safety and understanding storm damage requires a systematic approach. After a severe storm, your first priority is protecting yourself while carefully evaluating potential roof damage without putting yourself at unnecessary risk.
Begin by conducting a visual inspection from ground level using careful hazard identification techniques recommended by emergency management experts. Look for visible signs of damage such as missing shingles, dented metal flashing, cracked tiles, or debris scattered around your property. Check your yard and surrounding areas for fallen branches, which might indicate potential roof impact zones. Never climb onto a damaged roof immediately after a storm as structural integrity could be compromised.
If you notice significant damage or suspect structural issues, contact professional roofing contractors who can safely perform a comprehensive inspection. Professionals have the equipment and expertise to assess storm damage thoroughly without risking personal injury.
Pro Tip: Always take photographs of storm damage from a safe distance for insurance documentation and future reference, ensuring you capture clear images that highlight the extent of potential roof damage.
Step 2: Document Roof Damage for Insurance
Documenting storm damage is a critical step in successfully navigating your insurance claim process. Your goal is to create a comprehensive and clear record of the damage that will support your insurance claim and help you receive appropriate compensation.
Start by systematically documenting roof damage through detailed photographic evidence and written descriptions, which serves as crucial documentation for your insurance claim. Take multiple high resolution photographs from different angles capturing the full extent of the damage. Focus on specific areas like missing shingles, cracked tiles, dented metal flashing, and any visible structural compromises. Ensure your photos are date stamped and include wide angle shots that provide context of the overall roof condition. Supplement your visual documentation with written notes detailing the date of the storm, specific damage observations, and potential impact areas.
Secure all relevant documentation including previous maintenance records, roof inspection reports, and contractor assessments. Contact your insurance provider promptly to initiate the claims process, providing them with your comprehensive damage documentation. Professional roofing contractors can often assist you in preparing a thorough damage report that meets insurance company requirements.
Pro Tip: Create a digital backup of all damage documentation and store copies in multiple secure locations to ensure you have accessible evidence throughout the insurance claim process.
Step 3: Choose a Trusted Roofing Contractor
Selecting the right roofing contractor is a critical step in successfully addressing storm damage and ensuring your roof receives professional, high quality repairs. Your choice will directly impact the long term integrity and performance of your roof restoration project.
Verifying a contractor’s professional credentials and safety protocols is essential when evaluating potential roofing professionals. Start by requesting proof of licensing, insurance, and professional certifications that demonstrate their expertise in storm damage repair. Look for contractors with specific experience handling storm related roof restoration who can provide references from previous clients with similar damage scenarios. Pay attention to their communication style, willingness to provide detailed written estimates, and transparency about their repair process.
Research potential contractors thoroughly by checking online reviews, requesting multiple estimates, and verifying their local business standing. Confirm they have experience working with insurance companies and can help navigate the claims process. A reputable contractor should be able to provide a comprehensive assessment of your roof damage and offer clear recommendations for repair or replacement.
The following table compares the advantages of using a professional roofing contractor versus DIY after storm damage:
| Factor | Professional Contractor | DIY Approach |
|---|---|---|
| Safety | Trained in safety protocols | Higher risk of personal injury |
| Damage Assessment | Thorough, uses specialized tools | Limited by homeowner’s expertise |
| Insurance Documentation | Provides insurer-approved reports | May lack accepted documentation |
| Repair Quality | Industry-standard repair practices | Quality may be inconsistent |
Pro Tip: Request to see photographic evidence of their previous storm damage repair work and ask about their specific approach to handling unexpected complications during roof restoration projects.
Step 4: Plan and Execute Roof Repairs
Planning and executing roof repairs requires careful strategy and systematic approach to ensure comprehensive restoration of your storm damaged roof. Your primary goal is to restore structural integrity while preventing future potential damage.
Strategic planning for roof repairs involves understanding structural vulnerabilities and selecting appropriate repair materials, which are essential for long term roof performance. Begin by working with your selected roofing contractor to develop a detailed repair strategy that addresses both visible damage and potential underlying issues. Prioritize repairs that prevent water infiltration, structural weakening, and further deterioration. This may include replacing damaged shingles, repairing compromised flashing, addressing membrane tears, and reinforcing vulnerable roof sections.
Coordinate closely with your insurance provider and roofing contractor to ensure all necessary documentation is completed and the repair process follows recommended guidelines. Discuss the full scope of repairs, expected timeline, materials to be used, and potential complications that might arise during the restoration process. Ensure you understand each stage of the repair workflow and maintain open communication with your contractor throughout the project.
Pro Tip: Request a detailed written repair plan from your contractor that includes specific materials, estimated completion time, and warranty information for all proposed roof repairs.
Step 5: Verify Repairs and Complete Cleanup
Verifying roof repairs and completing final cleanup represent the critical concluding stages of your storm damage restoration process. These final steps ensure your roof meets professional standards and your property returns to a safe, fully functional condition.
Post repair site cleanup and comprehensive inspection protocols are essential for confirming the quality and integrity of roofing work, requiring careful and systematic attention. Work alongside your roofing contractor to conduct a thorough walkthrough, examining every repaired section for proper installation, material alignment, and potential overlooked issues. Check that all new materials are securely fastened, flashings are correctly sealed, and there are no gaps or potential water entry points. Request the contractor demonstrate the repairs and explain the specific improvements made to your roofing system.
Carefully inspect the surrounding property for any remaining construction debris, nails, or materials that might have fallen during the repair process. Ensure all tools have been removed and the work area is completely cleaned. Photograph the completed repairs for your personal records and insurance documentation, capturing clear images that show the quality of the restoration work. Obtain and carefully review all warranty documentation, repair receipts, and any specific maintenance recommendations from your roofing contractor.
Pro Tip: Request a written report detailing all repairs completed, including specific materials used, areas addressed, and recommended future maintenance steps for your newly restored roof.
Here’s a quick summary of key actions and their benefits at each stage of storm damage roof restoration:
| Stage | Main Action | Key Benefit | Who Should Perform |
|---|---|---|---|
| Initial Assessment | Visual inspection from ground level | Identifies obvious hazards | Homeowner |
| Documentation | Take photos and detailed notes | Provides evidence for insurance | Homeowner/Professional |
| Contractor Selection | Verify credentials and experience | Ensures repair quality | Homeowner |
| Repair Planning | Create a detailed repair strategy | Restores structural integrity | Contractor with homeowner input |
| Final Verification & Cleanup | Inspect repairs and remove debris | Confirms quality, ensures safety | Contractor with homeowner review |
Experience Expert Storm Damage Roof Repairs with Liberty Roofworks
Storm damage can leave your roof vulnerable and your home at risk. The step-by-step guide highlights key challenges like safely assessing damage, documenting for insurance, selecting a trusted contractor, and ensuring quality repairs. These are critical concerns that demand professional attention to protect your property and peace of mind. At Liberty Roofworks, we understand the urgency of restoring your roof’s structural integrity and preventing future issues after a storm.
Trust our experienced team in Charlotte, NC, to handle everything from detailed inspections and insurance documentation to expert repairs using top-quality materials. We specialize in storm damage repair for both residential and commercial roofs. Discover our full range of services including Storm Damage Repair and Residential Roof Repair & Replacements. Don’t wait to safeguard your home with trusted experts who put your safety and satisfaction first. Visit Liberty Roofworks today and schedule your comprehensive roof evaluation for lasting results.
Frequently Asked Questions
What steps should I take first after a storm to assess roof damage?
Begin by conducting a visual inspection of your roof from the ground level. Look for visible signs of damage like missing shingles or fallen branches, and avoid climbing onto the roof to prevent injury.
How do I properly document roof damage for my insurance claim?
Document roof damage by taking multiple high-resolution photographs from various angles, focusing on specific damage areas. Include written descriptions with dates and details to create a comprehensive record that supports your insurance claim.
What should I look for when choosing a roofing contractor?
Verify the contractor’s professional credentials, including licensing and insurance. Research their experience with storm damage repairs and read client reviews to ensure they have a reputable track record.
How can I effectively plan roof repairs after storm damage?
Work closely with your roofing contractor to develop a detailed repair strategy that addresses both visible damage and potential underlying issues. Prioritize repairs that prevent water infiltration and structural weaknesses.
What should I do after the repairs are completed to ensure quality?
Conduct a thorough walkthrough with your contractor to inspect all repairs for proper installation and secure materials. Make sure to document the completed work with photographs and review all warranty documentation provided by the contractor.
How can I maintain my roof after repairs to prevent future damage?
Request specific maintenance recommendations from your contractor after roof repairs. Regularly inspect your roof for wear and address small issues before they escalate, ideally on a seasonal basis to maintain its integrity.
