Keeping a commercial roof in top shape can feel overwhelming. Surprise, over 70 percent of premature roof failures come from missed maintenance steps. Most people think small tasks like clearing debris or regular inspections do not make much difference. The truth is these simple habits are the only thing standing between you and expensive repairs down the road.
Table of Contents
- Step 1: Inspect Your Roof For Damage
- Step 2: Clear Debris And Obstructions
- Step 3: Perform Necessary Repairs
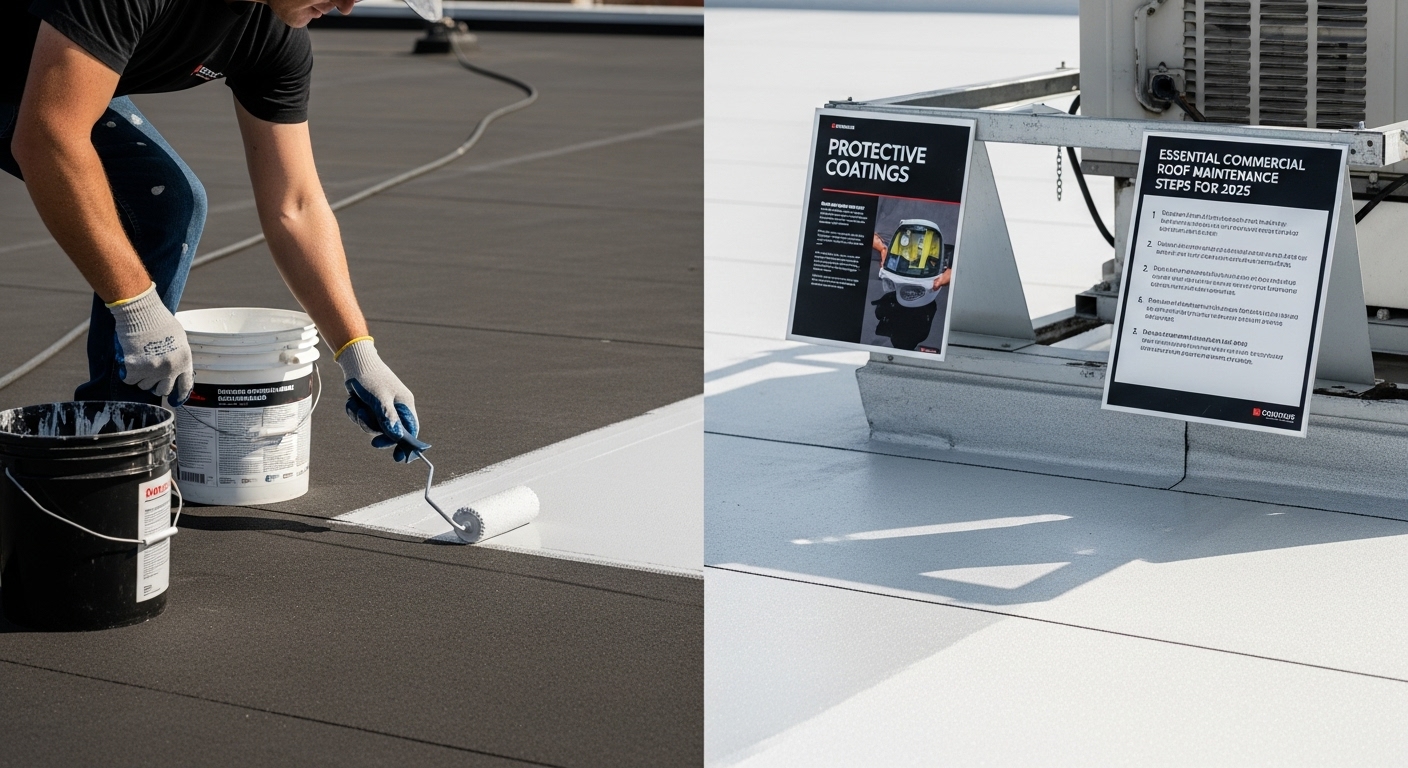
- Step 4: Apply Protective Coatings
- Step 5: Schedule Regular Maintenance Checks
Quick Summary
| Key Point | Explanation |
|---|---|
| 1. Conduct Regular Roof Inspections | Schedule inspections twice a year to identify issues early. Inspect for damages, leaks, and general wear to prevent major repairs. |
| 2. Remove Debris Thoroughly | Clear debris from the roof and drainage systems regularly. This prevents moisture accumulation and extends the roof’s lifespan. |
| 3. Document Findings and Repairs | Keep detailed records of inspections, repairs, and maintenance actions. This provides a valuable history and aids in future assessments. |
| 4. Perform Timely Repairs | Address minor damages immediately to avoid escalation into costly structural problems. Use the right materials and techniques for effective repairs. |
| 5. Apply Protective Coatings | Consider applying protective coatings to enhance durability and energy efficiency. Ensure the roof surface is clean and compatible with the coating used. |
Step 1: Inspect Your Roof for Damage
Roof inspections are the foundation of proactive commercial roof maintenance, acting as your first line of defense against potential structural damage and costly repairs. A comprehensive roof inspection allows you to identify potential issues before they escalate into significant problems that could compromise your building’s integrity and safety.
To begin your roof inspection, you will need several key tools and equipment. Gather a sturdy ladder, non-slip shoes, safety harness, flashlight, measuring tape, and a notebook for documentation. Safety is paramount during roof inspections, so always ensure you have proper protective gear and preferably work with a partner who can assist you or call professional help if needed.
Visual Examination Techniques
Start your inspection by carefully walking the roof surface, paying close attention to specific areas prone to damage. Look for signs of wear such as cracked or blistered membranes, loose or missing fasteners, pooling water, and damaged flashing. Check around roof penetrations like vents, skylights, and HVAC units where potential leaks commonly develop. Note any areas with visible stress, discoloration, or unusual texture changes in the roofing material.
According to the International Standards of Practice for Inspecting Commercial Properties, comprehensive roof assessments should include examining the membrane, slopes, gutters, downspouts, and other critical roof components. Beyond surface-level observations, pay attention to subtle indicators of potential issues such as interior water stains, which might suggest hidden roof damage.
For a thorough inspection, document everything meticulously. Take clear photographs of suspicious areas, measure the dimensions of any damage, and create a detailed report. This documentation serves multiple purposes: tracking the roof’s condition over time, providing evidence for potential insurance claims, and guiding future maintenance decisions. Read more about roof repair strategies to complement your inspection process.
If you encounter extensive damage, significant structural concerns, or feel uncomfortable performing the inspection, contact a professional roofing contractor immediately. Professional inspectors can provide a comprehensive assessment and recommend appropriate repair or maintenance strategies tailored to your specific roofing system.
Below is a table summarizing the essential tools and materials you will need for conducting thorough commercial roof inspections and repairs, along with their main purposes.
| Tool/Material | Purpose |
|---|---|
| Sturdy ladder | Safe access to the roof |
| Non-slip shoes | Ensure safety while walking on the roof |
| Safety harness | Fall protection during inspections and repairs |
| Flashlight | Illuminate dark or hard-to-see areas |
| Measuring tape | Measure damage dimensions and repair patches |
| Notebook | Document findings and track inspection details |
| Roof sealant/patch kits | Seal and repair minor punctures or tears |
| Gloves and safety glasses | Protect hands and eyes during cleaning and repairs |
| Soft bristle broom | Remove debris without damaging roofing membrane |
Step 2: Clear Debris and Obstructions
Clearing debris and obstructions is a critical maintenance step that prevents potential roof damage and ensures proper water drainage. Accumulated debris can trap moisture, cause premature roof deterioration, and create conditions that lead to costly repairs. This step involves a systematic approach to removing potential blockages and maintaining a clean roof surface.
Begin by gathering appropriate safety equipment including non slip work boots, gloves, safety glasses, and a sturdy ladder. Inspect your ladder before use and ensure it provides stable access to the roof surface. If the roof is steep or you feel uncomfortable with heights, consider hiring professional roofing technicians who can safely perform this maintenance.
Debris Removal Process
Start your debris removal process by carefully walking the roof and manually removing large objects like branches, leaves, construction materials, and any loose items. Use a soft bristle push broom to sweep away smaller debris without damaging the roofing membrane. Pay special attention to areas around roof penetrations such as HVAC units, vents, and skylights where debris tends to accumulate. Avoid using metal tools or sharp implements that could puncture or scratch the roofing surface.
According to the Insurance Institute for Business & Home Safety, special focus should be placed on clearing interior roof drains, gutters, and downspouts to prevent potential water blockages.
Check these drainage systems thoroughly, removing any accumulated leaves, twigs, or sediment that might impede water flow. Clean gutters and downspouts completely, ensuring water can move freely away from the roof structure.
After clearing debris, conduct a final visual inspection to verify that all areas are clean and no potential obstructions remain. Look for any signs of damage that might have been hidden by the debris, such as small tears in the roofing membrane or loose flashings. Learn more about comprehensive roof maintenance to enhance your understanding of this critical process.
If you discover significant debris buildup or notice any damage during cleaning, document the findings and consider consulting a professional roofing contractor. Regular debris removal not only extends your roof’s lifespan but also prevents more expensive repairs down the line.
Step 3: Perform Necessary Repairs
Performing necessary repairs is a critical step in maintaining the integrity and longevity of your commercial roof. This phase transforms the insights gained from your initial inspection into targeted actions that prevent minor issues from developing into costly structural problems. Timely and precise repairs can significantly extend your roof’s lifespan and protect your building’s overall infrastructure.
![]()
Prepare for repairs by gathering appropriate materials specific to your roofing system. Different roofing materials require unique repair approaches, so ensure you have compatible sealants, patches, and tools matching your roof’s membrane type. Common repair materials include roof sealant, reinforcement fabric, roofing cement, and specialized patches designed for EPDM, TPO, or modified bitumen surfaces.
Repair Execution Strategies
Begin by cleaning the damaged area thoroughly, removing any debris, moisture, or loose materials that could compromise the repair. For small punctures or tears, use a compatible patch that extends at least two inches beyond the damaged zone. Apply roofing sealant carefully, ensuring complete coverage and smooth adhesion. Avoid temporary fixes that might mask underlying structural issues or create additional complications.
According to the National Renewable Energy Laboratory, proactive maintenance and prompt repairs are essential for ensuring long-term roof performance. Focus on addressing critical areas such as seam separations, membrane tears, flashing damage, and areas around roof penetrations. When repairing around vents, skylights, or HVAC units, pay extra attention to creating watertight seals that prevent potential moisture infiltration.
For more complex repairs involving significant membrane damage or structural concerns, professional intervention becomes crucial. Check out our comprehensive flat roof repair guide for additional insights into navigating more challenging repair scenarios. While some minor repairs can be completed by building maintenance staff, complex issues require specialized knowledge and equipment.
After completing repairs, conduct a final inspection to verify the repair’s quality. Look for smooth patch application, consistent sealant coverage, and no visible gaps or bubbles. Document the repairs with photographs and notes, tracking the location, date, and materials used. This documentation serves as a valuable reference for future maintenance and can help identify potential recurring issues in specific roof areas.
Step 4: Apply Protective Coatings
Applying protective coatings represents a crucial preventative maintenance strategy that significantly extends your commercial roof’s durability and performance. These specialized layers act as a robust shield against environmental stressors, UV radiation, moisture penetration, and potential structural degradation. By investing in high-quality protective coatings, you can potentially add years to your roof’s functional lifespan while improving its overall energy efficiency.
Before beginning the coating application, thoroughly clean and prepare the roof surface. Ensure the roof is completely dry and free from debris, removing any loose materials, dust, or remnant sealants that might interfere with coating adhesion. Use appropriate cleaning solutions compatible with your specific roofing membrane to avoid potential chemical interactions that could compromise the coating’s effectiveness.
Coating Application Techniques
Select a protective coating that matches your specific roofing material type. Different roof membranes like EPDM, TPO, or modified bitumen require unique coating formulations. Silicone, acrylic, and polyurethane coatings each offer distinct advantages, so consult manufacturer specifications and professional recommendations to choose the most appropriate solution. Wear protective equipment including safety glasses, gloves, and non-slip footwear during the application process.
According to the National Renewable Energy Laboratory, protective roof coatings can dramatically improve building energy performance while providing critical membrane protection. Apply the coating using professional-grade rollers, sprayers, or brushes, ensuring even and consistent coverage. Work systematically across the roof surface, maintaining a wet edge to prevent visible lines or uneven application. Multiple thin layers typically provide better protection than a single thick layer.
The following table compares popular types of protective coatings for commercial roofs discussed in the article, outlining their suitable membrane types and primary advantages.
| Coating Type | Suitable Membranes | Primary Advantages |
|---|---|---|
| Silicone | EPDM, TPO, Modified Bitumen | Superior UV protection, resists ponding water |
| Acrylic | TPO, Modified Bitumen | Cost-effective, reflective, easy to apply |
| Polyurethane | Modified Bitumen, Metal | High durability, excellent chemical resistance |
Pay special attention to critical areas such as seams, flashings, and roof penetrations where water infiltration is most likely. These zones require extra coating material and careful application to create a seamless protective barrier. Explore our comprehensive roof coating strategies for additional professional insights into maximizing coating effectiveness.
After application, allow sufficient curing time as specified by the manufacturer.
 Avoid foot traffic or additional work on the newly coated surface during the recommended drying period. Conduct a final visual inspection to verify complete and uniform coverage, checking for any missed spots or uneven areas that might require touch-up application.
Step 5: Schedule Regular Maintenance Checks
Scheduling regular maintenance checks is the cornerstone of proactive roof management, transforming reactive repair strategies into a systematic approach that prevents costly structural damage. Consistent professional inspections can identify potential issues before they escalate, ultimately saving significant time and financial resources for your commercial property.
Develop a comprehensive maintenance calendar that outlines routine inspection intervals. Professional roofing contractors recommend conducting thorough roof assessments at least twice annually seasonal transitions are ideal times for these evaluations. Schedule inspections during spring and fall to assess potential damage from summer heat and winter weather conditions. Additionally, plan extra evaluations following severe weather events like intense storms, heavy snowfall, or significant wind incidents that might compromise your roof’s structural integrity.
Maintenance Documentation and Tracking
Create a detailed roof maintenance log that tracks every inspection, repair, and coating application. This documentation serves multiple purposes documentation provides a comprehensive history of your roof’s condition, helps identify recurring issues, and can be invaluable for insurance claims or future property assessments. Include specific details such as inspection dates, observed conditions, repairs performed, materials used, and recommendations from professional roofing technicians.
According to the Insurance Institute for Business & Home Safety, a preventative maintenance program should encompass comprehensive roof inspections that go beyond surface-level observations. Ensure your maintenance checks include examining roof membranes, flashings, drainage systems, and potential stress points around mechanical equipment and roof penetrations. Learn more about comprehensive flat roof maintenance strategies to enhance your understanding of thorough roof care.
Consider establishing a relationship with a professional roofing contractor who can provide consistent, reliable maintenance services. Many reputable companies offer maintenance contracts that include scheduled inspections, priority repair services, and comprehensive reporting. These partnerships can provide peace of mind and ensure your commercial roof receives expert attention throughout its lifecycle.
Finalize your maintenance strategy by setting digital and physical reminders for upcoming inspections. Utilize calendar applications, create physical files, and communicate the maintenance schedule with key building management personnel. Consistent follow through is crucial in transforming routine maintenance from a theoretical concept into a practical, effective roof preservation strategy.
Take the Next Step Toward Worry-Free Commercial Roof Maintenance
Routine roof inspections and timely repairs are mission critical for protecting your investment. You have learned how debris, water pooling, and overlooked membrane damage can quickly lead to expensive structural issues. When it comes to applying protective coatings or setting up a maintenance plan, commercial property owners often ask, “How can I make sure I am doing this the right way and not missing hidden threats?” The truth is, without a trusted expert by your side, small oversights can turn into major headaches.
Let Liberty Roofworks take the burden off your shoulders. Our team specializes in comprehensive commercial roof repair and complete maintenance tailored for businesses in Charlotte. We deliver detailed inspections, lasting repairs, and high-performance coatings that extend the life of your roofing system. Ready to stay ahead of leaks and damage this year? Visit Liberty Roofworks now to request your customized maintenance plan. Act today and gain the peace of mind your property deserves all year long.
Frequently Asked Questions
What are the main steps in commercial roof maintenance?
The essential steps for commercial roof maintenance include inspecting your roof for damage, clearing debris and obstructions, performing necessary repairs, applying protective coatings, and scheduling regular maintenance checks.
How often should I inspect my commercial roof?
It is recommended to conduct thorough inspections at least twice a year, preferably during spring and fall, as well as after severe weather events to assess potential damage and ensure the roof’s integrity.
What tools do I need for a roof inspection?
Key tools for a roof inspection include a sturdy ladder, non-slip shoes, a safety harness, flashlight, measuring tape, and a notebook for documentation of any findings.
Why is applying protective coatings important for a commercial roof?
Applying protective coatings helps extend the lifespan of your roof by shielding it from environmental stressors, UV radiation, and moisture penetration, ultimately enhancing its durability and energy efficiency.
