Nearly one in five American homes will face a significant roof leak at some point, according to recent survey results. Water seeping through the roof can quickly lead to expensive damage and health hazards like mold. Understanding the key steps to safely identify, patch, and seal leaks empowers American homeowners to act before minor issues become costly disasters. This guide simplifies the process with clear strategies used by professionals, helping you protect your home with confidence.
Table of Contents
- Step 1: Inspect The Roof For Leak Sources
- Step 2: Prepare The Work Area And Gather Materials
- Step 3: Apply Temporary Or Permanent Patch To Leak
- Step 4: Seal The Patched Area For Waterproof Protection
- Step 5: Test And Verify The Repair Effectiveness
Quick Summary
| Key Point | Explanation |
|---|---|
| 1. Inspect for leak sources | Check ceilings, vents, and roofing for signs of water damage and structural issues. |
| 2. Gather necessary materials | Prepare your workspace with tools and safety equipment before starting repairs. |
| 3. Apply the patch correctly | Clean the damaged area and follow specific techniques for effective patching based on material type. |
| 4. Seal with appropriate sealant | Use compatible sealants around patches to create a waterproof barrier and protect repairs. |
| 5. Test repair effectiveness | Simulate rain to ensure repairs are watertight and monitor for leaks during subsequent rainfalls. |
Step 1: Inspect the roof for leak sources
Identifying potential leak sources is a critical first step in addressing roof damage. Effective roof inspection requires a systematic approach that checks both external and internal areas for signs of water infiltration and structural compromise.
Start your inspection by carefully examining the interior ceiling and walls for telltale signs of water damage. Look for discolored patches, water stains, peeling paint, or bubbling wallpaper that might indicate ongoing leaks. In your attic or crawl space, search for moisture marks, dark spots, or areas where wooden structures appear warped or discolored. These visual cues can help pinpoint the general location of potential roof breaches.
Next, move to an exterior roof assessment. Using the National Roof Certification and Inspection Association’s LeakFREE4 inspection process, systematically check the roof’s surface for visible damage. Inspect shingles or roofing material for cracks, missing pieces, curling edges, or areas where the protective coating appears compromised. Pay special attention to roof valleys, flashing around chimneys, vents, and skylights, as these are common leak entry points. Look for signs of standing water, which can indicate poor drainage and potential future leak risks.
Professional tip: When inspecting your roof, always prioritize personal safety. Use a sturdy ladder, wear non slip shoes, and consider having a partner present to stabilize the ladder and assist you. If the roof appears steep or you feel uncomfortable with heights, it is always recommended to hire a professional roofing inspector.
The following table summarizes critical roof inspection checkpoints and what each helps detect:
| Inspection Area | What to Look For | Main Purpose |
|---|---|---|
| Interior Ceilings | Stains, peeling, bubbles | Pinpoint leak entry from inside |
| Attic/Crawl Space | Dark spots, warping, moisture | Identify hidden leaks or dampness |
| Roof Valleys | Debris, ponding, wear | Detect high-risk leak zones |
| Flashing & Vents | Rust, gaps, loose sections | Prevent leaks around roof features |
Step 2: Prepare the work area and gather materials
Preparing your workspace and collecting the right materials is essential for a safe and efficient roof repair process. Proper preparation will help you work more effectively and minimize potential complications during your roof patching project.
Following the National Roof Certification and Inspection Association’s property preparation guidelines, start by clearing the area around your home. Remove any outdoor furniture, potted plants, or decorative items that might obstruct your workspace or get damaged during the repair. If you have vehicles parked near the work area, move them to prevent potential damage from falling debris. Inside your home, ensure clear access to the attic and any interior spaces where you might need to inspect or work on ceiling areas related to the roof leak.
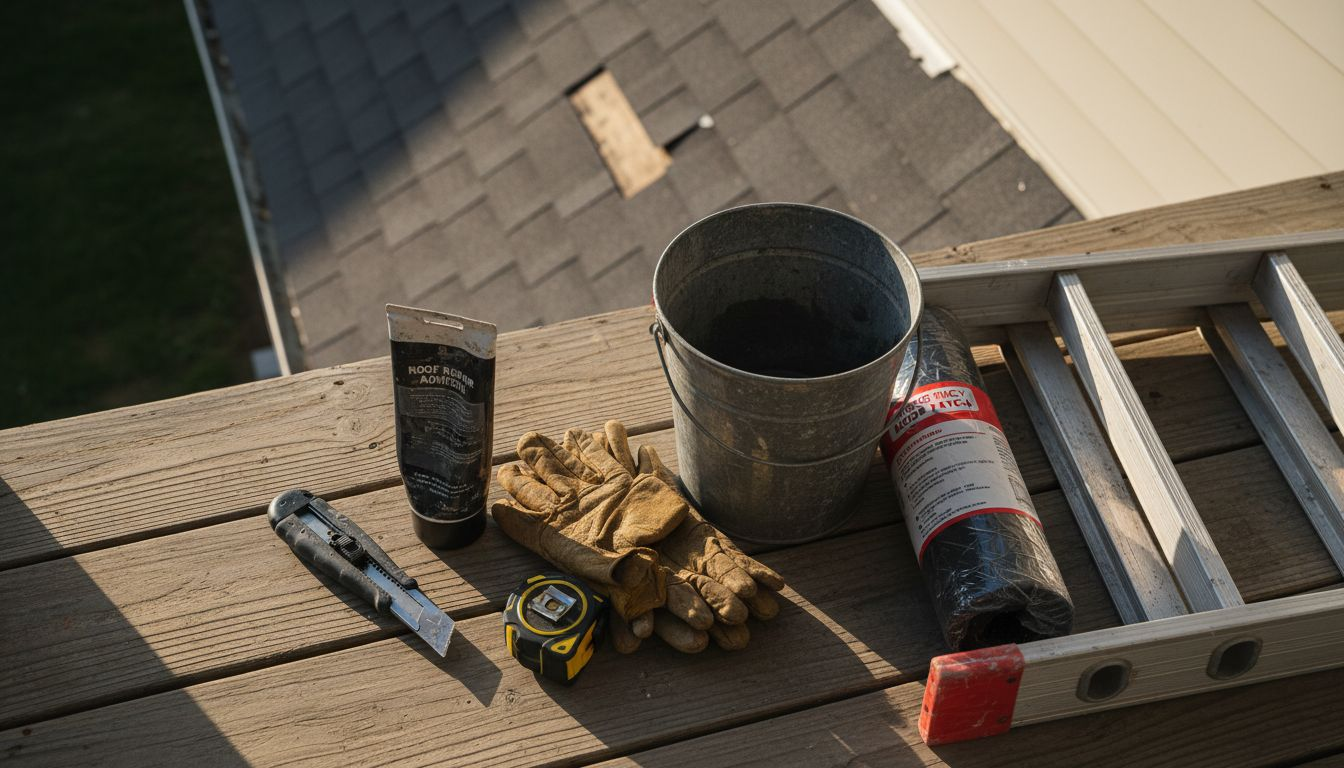
Gather all necessary materials and safety equipment before starting your repair. You will need items such as roofing cement, roofing patches, a utility knife, measuring tape, work gloves, safety glasses, a sturdy ladder, non slip shoes, and a helper to stabilize the ladder and assist you. Check that all your tools are in good condition and that you have the specific type of patching material appropriate for your roof type whether it is asphalt shingles, metal roofing, or another material.
Professional tip: Always conduct a thorough inventory of your materials before climbing onto the roof. Having everything within reach will reduce the number of trips up and down the ladder, minimizing your risk of accidents and making the repair process more streamlined and efficient.
Step 3: Apply temporary or permanent patch to leak
Patching a roof leak requires careful preparation and precise application to ensure a lasting repair that prevents further water damage. Understanding the right technique for your specific roof type is crucial to achieving an effective seal.
Following detailed roof repair procedures from technical documentation, begin by thoroughly cleaning the damaged area. Remove any debris, dirt, or loose materials around the leak site. For dry and dusty surfaces, apply a primer to help the patching material adhere more effectively. If you are working with a small leak, you can use roofing cement and a patch material specifically designed for your roof type such as asphalt shingles, metal roofing, or rubber membrane.
When applying the patch, carefully trim the damaged area to create a clean edge. Cut the patch material slightly larger than the damaged section to ensure complete coverage. Press the patch firmly into place, making sure there are no air bubbles or gaps that could allow water to seep through. Apply roofing sealant around the edges of the patch to create a watertight seal. For temporary repairs, use a roofing tape or patch that can withstand weather conditions until a permanent solution can be implemented.
Here is a quick comparison of common roof patching materials and their key characteristics:
| Material Type | Durability | Best Used For |
|---|---|---|
| Asphalt Shingle | Moderate (10–20 yrs) | Standard residential roofs |
| Metal Patch | High (20+ yrs) | Metal and flat roofs |
| Rubber Membrane | High (15–25 yrs) | Low-slope or flat roofs |
| Roofing Tape | Temporary (months) | Quick, short-term fixes |
Professional tip: Always inspect your patch after application by simulating rain conditions with a garden hose. Spray water over the repaired area to verify that the leak has been completely sealed and no water penetrates through the new patch.
Step 4: Seal the patched area for waterproof protection
Creating a robust waterproof seal is the final critical step in ensuring your roof repair remains effective and prevents future water infiltration. The right sealing technique will protect your repair and extend the overall longevity of your roof.
Following industry recommendations for effective roof leak solutions, begin by selecting a high quality sealant compatible with your specific roofing material. Different roof types require different sealing compounds such as silicone based sealants for metal roofs or asphalt based products for shingle roofing. Apply the sealant generously around the edges of your patch using a caulking gun or putty knife, ensuring complete coverage and smooth application without gaps or air bubbles.
Work methodically to cover all potential entry points around the repaired area. Pay special attention to seams, edges, and any protrusions like vents or chimneys where water might potentially penetrate. Use a consistent motion to spread the sealant evenly, creating a smooth surface that will effectively redirect water away from the patched section. Allow sufficient time for the sealant to cure according to manufacturer instructions before exposing the area to moisture or extreme weather conditions.
Professional tip: Purchase a slightly larger quantity of sealant than you think you will need. Having extra material on hand allows you to perform touch ups and ensures you do not interrupt the sealing process if you run out midway through the repair.
Step 5: Test and verify the repair effectiveness
Verifying the success of your roof repair is a crucial final step that ensures your hard work has effectively stopped water infiltration. Taking time to thoroughly test your repair can save you from potential future water damage and costly additional repairs.
Based on professional roof inspection recommendations, begin by conducting a comprehensive water test to confirm your patch is watertight. Wait for a dry day when you can safely simulate rainfall using a garden hose. Start by gently spraying water directly onto the repaired area, working systematically from the bottom of the roof upward. Pay close attention to how water flows over the patched section and watch carefully for any signs of moisture penetration inside your home.
Allow sufficient time between water testing stages to carefully inspect both the exterior repair site and interior ceiling areas. Check the attic and interior rooms adjacent to the repair for any signs of moisture such as water stains, dampness, or discoloration. If possible, have someone inside the house during the water test to immediately identify any potential leaks. Remember that some leaks might not become apparent immediately, so plan to monitor the area during the next few rainfalls to ensure complete repair effectiveness.
Professional tip: Document your repair process with clear photographs taken before and after the patch. These images can be valuable for future reference, insurance purposes, and tracking the long term performance of your roof repair.
Protect Your Home with Expert Roof Leak Repairs from Liberty Roofworks
A leaking roof can cause serious damage if not properly addressed. This article highlights the importance of precise inspection, careful patching, and thorough sealing to stop leaks and protect your home from water damage. If you are feeling overwhelmed by the complex steps like inspecting roof valleys, selecting the right patching materials, or ensuring a watertight seal, you are not alone. Many homeowners struggle with ensuring a permanent fix without risking safety or causing further issues.
At Liberty Roofworks, we understand the challenges of roof repairs and offer trusted solutions tailored to your needs. Whether you need a quick patch or a full roof replacement, our skilled team in Charlotte, NC provides reliable residential and commercial roof repair services including asphalt shingle roofing and storm damage repair. Don’t wait for leaks to worsen and cause costly damage. Visit our main website today to learn more about how we can help you achieve lasting results. Take the first step toward peace of mind by contacting Liberty Roofworks for a professional roof inspection and expert repair you can depend on.
Frequently Asked Questions
How can I identify potential leak sources in my roof?
To identify potential leak sources, inspect both the interior and exterior of your roof. Look for water stains, discolorations, or warped areas inside your home and check for damaged shingles or flashing outside.
What materials do I need to patch a leaking roof?
Gather essential materials like roofing cement, utility knives, measuring tape, and a sturdy ladder before starting your repair. Ensure you have patching materials appropriate for your roof type, such as asphalt shingles or metal roofing.
What steps should I follow to apply a patch to my roof?
To apply a patch, first clean the damaged area and trim it for a clean edge. Then, use roofing cement and apply a patch material over the leaks, ensuring a tight seal without air bubbles.
How do I seal the patched area for waterproof protection?
Seal the patched area by applying a compatible high-quality sealant around the edges. Ensure you cover all seams and edges evenly to create a watertight barrier that will last for years.
How can I test my roof repair for effectiveness?
Test your roof repair by simulating rainfall with a garden hose and observing for any signs of moisture penetration. Monitor the area for leaks during the next few rainfalls to ensure the patch holds effectively.
What safety precautions should I take while inspecting my roof?
Always prioritize safety by using a sturdy ladder, wearing non-slip shoes, and having someone assist you. Only proceed if you feel comfortable with the height and slope of your roof.
Recommended
- The 7 Most Common Roof Leaks | Causes & How to Repair – Liberty Roofworks
- 7 Common Roofing Problems and How to Fix Them – Liberty Roofworks
- Flat Roof Repair Guide: Fix Your Roof Easily – Liberty Roofworks
- 7 Essential Roof Repair Tips for Homeowners – Liberty Roofworks
- How To Patch Pool Plaster: Step-by-Step Guide For Homeowners
