Getting a new roof is one of the biggest upgrades you can make for your home, not just for looks but for safety and value. Most people focus on shingle colors or trendy materials, thinking that is what really matters. But missing just one critical step in the installation process can shave years off your roof’s lifespan and cost you thousands in repairs. The part you skip might be the most important of all.
Table of Contents
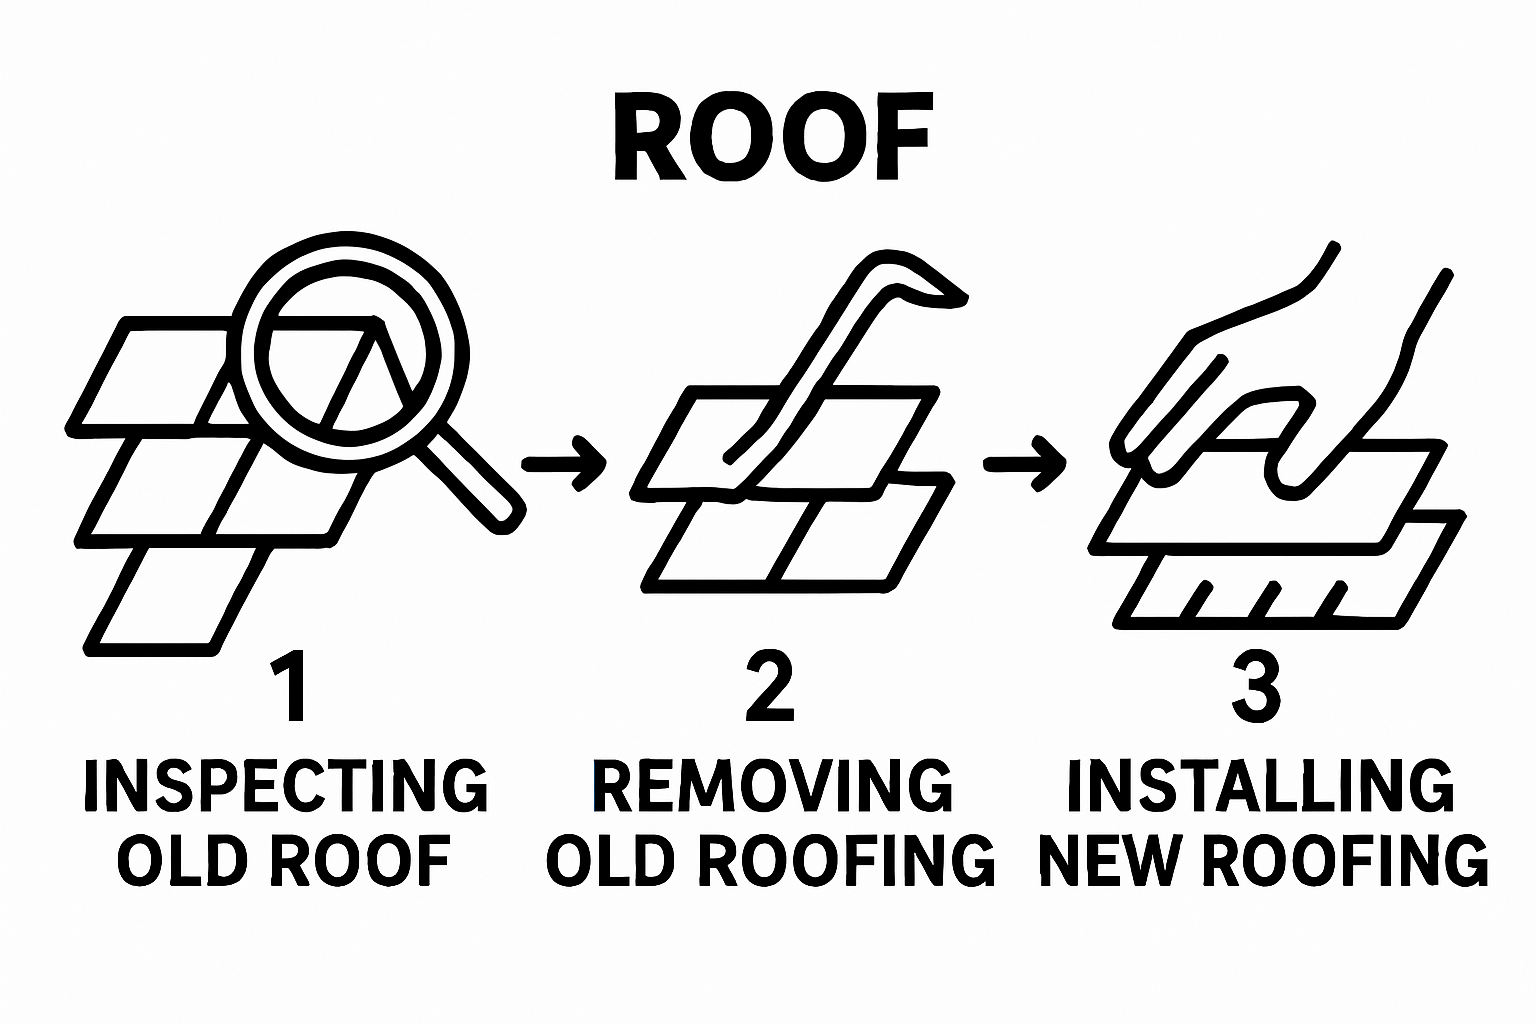
- Step 1: Assess Your Current Roof Condition
- Step 2: Choose The Right Roofing Material
- Step 3: Prepare Your Workspace And Tools
- Step 4: Remove Old Roofing Materials
- Step 5: Install New Roofing Materials
- Step 6: Inspect And Seal The Roof
Quick Summary
| Key Point | Explanation |
|---|---|
| 1. Assess Your Roof Thoroughly | Conduct a detailed inspection to identify damage or deterioration before starting installation. This helps prevent unexpected costs and issues during the project. |
| 2. Choose Durable Materials Wisely | Selecting the right roofing material affects longevity and maintenance. Consider factors like climate, budget, and style for the best choice. |
| 3. Prioritize Safety During Installation | Prepare a safe workspace and gather essential tools to reduce risks. Use safety gear, and ensure proper ladder placement to avoid accidents. |
| 4. Systematic Removal is Key | Remove old roofing materials carefully to create a solid foundation and prevent hiding issues like rot or leaks in the roof deck. |
| 5. Inspect and Seal for Longevity | After installation, check for gaps and properly seal all roof penetrations. This step safeguards against leaks and structural damage over time. |
Step 1: Assess Your Current Roof Condition
Starting a roof installation project begins with a comprehensive assessment of your current roof’s condition. This critical first step determines the entire trajectory of your roofing project, helping you understand what repairs or complete replacement might be necessary. Professional roof inspection is key to making informed decisions about your upcoming installation.
Begin by conducting a thorough visual examination of your roof from multiple vantage points. Look for clear signs of wear and damage such as curling or missing shingles, exposed underlayment, sagging areas, or visible water stains on the roofing surface. Exterior indicators like granule buildup in gutters or around your property can signal significant roof deterioration. Pay special attention to areas around chimneys, vents, and skylights where water intrusion commonly occurs.
Understanding the age and material of your existing roof provides crucial context for your installation plan. Asphalt shingle roofs typically last 15-30 years, while metal roofing can extend beyond 50 years. Roofing materials degrade differently, so knowing your roof’s specific composition helps determine whether repair or full replacement makes the most sense. Consider factors like local climate, previous maintenance history, and visible structural integrity when evaluating your roof’s overall condition.
If you are not comfortable performing a detailed inspection or notice complex damage, consulting a professional roofing contractor can provide a comprehensive assessment. Professional roofers use specialized tools and expertise to identify subtle issues that might escape an untrained eye. They can provide a detailed report highlighting potential problems, estimated remaining roof lifespan, and recommended next steps for your specific roofing situation.
Key verification checklist for roof condition assessment:
- No visible water stains or leaks
- Uniform shingle alignment
- No significant granule loss
- Structurally sound decking
- No signs of moss or algae growth
By meticulously examining your roof’s current state, you set a solid foundation for a successful roof installation project.
Step 2: Choose the Right Roofing Material
Selecting the appropriate roofing material is a critical decision that impacts your home’s protection, energy efficiency, and long-term maintenance costs. Your roof is more than just a covering it is a significant investment that requires careful consideration of multiple factors including climate, budget, architectural style, and personal preferences.
Asphalt shingles remain the most popular roofing material for residential properties due to their affordability and versatility. These materials come in various styles and colors, providing homeowners with flexibility in aesthetic choices. Standard asphalt shingles typically last 15-30 years and offer solid protection against typical weather conditions. However, they may not be ideal for regions experiencing extreme temperature fluctuations or severe storm environments.
For homeowners seeking more durable alternatives, metal roofing presents an excellent option. Metal roofs can withstand harsh weather conditions, provide superior energy efficiency, and often last 50 years or more. While initial installation costs are higher than traditional asphalt, the long-term benefits include reduced energy bills and minimal maintenance requirements. According to the Metal Roofing Alliance, metal roofing can reduce cooling costs by up to 25% in some residential settings.
Other compelling roofing materials include clay tiles, which offer exceptional durability and a distinctive aesthetic for homes in warmer climates, and slate roofing, known for its natural beauty and potential to last over 100 years. Synthetic roofing materials are also gaining popularity, offering the appearance of traditional materials with enhanced durability and lower maintenance requirements.
Key considerations when selecting roofing materials:
- Local climate and weather patterns
- Budget constraints
- Home architectural style
- Long-term maintenance requirements
- Energy efficiency potential
Ultimately, the right roofing material balances aesthetic preferences, budgetary limitations, and practical performance requirements. Consult with professional roofing contractors who can provide personalized recommendations based on your specific home and regional conditions.
Below is a comparison table of common roofing materials discussed in this guide to help you evaluate factors like durability, cost, climate suitability, and typical lifespan.
| Roofing Material | Durability | Estimated Lifespan | Cost Range | Climate Suitability |
|---|---|---|---|---|
| Asphalt Shingles | Moderate | 15-30 years | Low to Medium | Most climates, not extreme temps |
| Metal Roofing | High | 50+ years | Medium to High | Extreme weather, variable temps |
| Clay Tiles | Very High | 50+ years | High | Hot, dry climates |
| Slate Roofing | Very High | 100+ years | Highest | Varies (requires strong support) |
| Synthetic Roofing | High | 30-50 years | Medium | Most climates, low maintenance |
Step 3: Prepare Your Workspace and Tools
Preparing your workspace and gathering the right tools is a critical phase that sets the foundation for a successful roof installation. Proper preparation prevents potential complications and ensures a smooth, efficient roofing project. Before climbing onto your roof, take time to organize your work area and collect all necessary equipment.
Begin by creating a safe, organized staging area near your work site. This space should be clear of obstacles, provide easy access to your tools, and allow for safe movement of materials. Protect surrounding landscaping and property by laying down tarps or protective coverings to catch debris and prevent damage. Clear the area around your home’s perimeter, removing vehicles, outdoor furniture, and any items that could be damaged during the installation process.
Equipping yourself with the right tools is fundamental to a successful roof installation. Essential equipment includes a sturdy extension ladder with stabilizers, safety harness, roofing hammer, utility knife, tape measure, chalk line, and appropriate personal protective gear. Safety should always be your primary concern. Invest in high-quality work boots with good traction, safety glasses, work gloves, and a hard hat. If you are working at height, a properly secured safety harness is non-negotiable.
According to the Occupational Safety and Health Administration (OSHA), falls are the leading cause of construction worker fatalities, making proper safety equipment and preparation absolutely crucial. Ensure your ladder is placed at the correct angle, typically a 4:1 ratio (for every four feet of height, the base should be one foot away from the wall). Double-check all equipment for wear and damage before beginning your project.
Critical tools for roof installation:
- Extension ladder with stabilizers
- Safety harness and fall protection gear
- Roofing hammer
- Utility knife
- Tape measure
- Chalk line
- Protective work clothing
By meticulously preparing your workspace and tools, you create a safe, efficient environment that sets the stage for a successful roof installation project.
The table below summarizes essential tools and their purposes to help you prepare a safe and efficient workspace before starting your roof installation.
| Tool/Equipment | Purpose |
|---|---|
| Extension Ladder | Safe access to roof area |
| Ladder Stabilizers | Prevent ladder movement and increase safety |
| Safety Harness | Protects from falls while working at heights |
| Roofing Hammer | Fastening roofing nails and removing old nails |
| Utility Knife | Cutting roofing materials and underlayment |
| Tape Measure | Ensuring measurements are accurate |
| Chalk Line | Creating straight alignment lines for materials |
| Protective Clothing | Safety from debris, sharp edges, and weather |
| Work Gloves | Protect hands from injury |
Step 4: Remove Old Roofing Materials
Removing old roofing materials is a critical phase of roof installation that requires careful planning, precision, and systematic approach. This step determines the quality of your new roof’s foundation, making it essential to execute with thoroughness and attention to detail. Proper removal prevents future structural issues and ensures a clean, solid surface for new roofing materials.
Begin by protecting your property and creating a safe work zone. Cover ground areas with heavy-duty tarps to catch falling debris and protect landscaping, vehicles, and surrounding structures. Start at the roof’s peak and systematically work downward, removing shingles, underlayment, and flashing in a controlled manner. Use specialized roofing removal tools like roofing shovels or scrapers designed to lift materials without causing unnecessary damage to the underlying roof deck.
Carefully inspect the roof deck once materials are removed. Look for signs of water damage, rot, or structural weakness that might compromise your new roof’s integrity. Wood decking with soft spots, significant discoloration, or visible deterioration will need replacement before installing new roofing materials. Pay special attention to areas around chimneys, vents, and valleys where water intrusion commonly occurs. Addressing these potential weak points now prevents future leaks and structural problems.
According to the National Roofing Contractors Association, complete removal of existing roofing materials allows for a comprehensive inspection of the roof’s structural components. This process enables roofers to identify and repair hidden damage that might otherwise go unnoticed, ultimately extending the lifespan of your new roof.
Key verification steps for material removal:
- Entire roof surface is clear of old materials
- Roof deck is clean and free from debris
- No visible structural damage or rot
- All fasteners from previous roofing are removed
- Surface is smooth and ready for new installation
By meticulously removing old roofing materials and preparing the surface, you create a solid foundation for a durable, long-lasting roof installation.
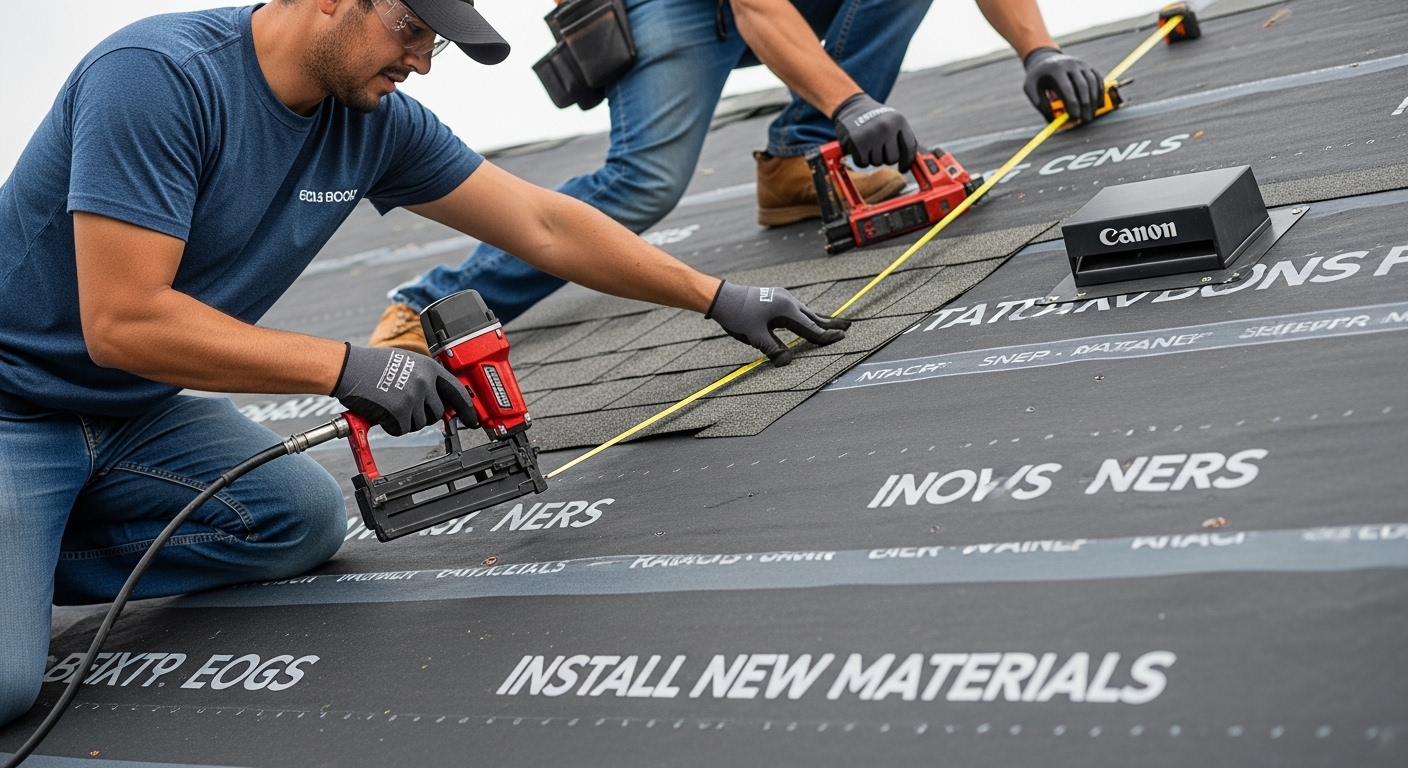
Step 5: Install New Roofing Materials
Installing new roofing materials represents the critical transformation point of your roof installation project. This stage determines the long-term performance and protection of your entire structure, requiring precision, patience, and systematic implementation. The process begins with laying a robust foundation that will support and protect your home for decades to come.
Start by installing a high-quality waterproof underlayment across the entire roof deck. This protective barrier serves as your roof’s first line of defense against moisture intrusion. Carefully overlap each section of underlayment, ensuring complete coverage with no gaps or exposed areas. Use roofing nails specifically designed for underlayment installation, spacing them according to manufacturer recommendations to create a secure, uniform base for your primary roofing materials.
Next, begin installing your chosen roofing materials from the bottom edge of the roof upward. This method allows each subsequent row to overlap the previous one, creating a water-shedding surface that prevents moisture penetration. For asphalt shingles, align the first row precisely at the roof’s edge, using a chalk line to maintain a straight, consistent starting point. Metal roofing and other materials will have slightly different installation techniques, but the fundamental principle of working from bottom to top remains consistent.
According to the National Roofing Contractors Association, proper installation requires meticulous attention to detail, especially around complex architectural features like chimneys, vents, and valleys. These areas demand special flashing techniques to ensure complete water resistance and prevent potential leakage points.
Critical installation verification checklist:
- Underlayment is fully and correctly installed
- Roofing materials are aligned straight and uniform
- Proper overlap between material rows
- No visible gaps or exposed deck areas
- Flashing is correctly applied around roof penetrations
By executing each installation step with care and precision, you create a robust roofing system designed to protect your home against environmental challenges for years to come.
Step 6: Inspect and Seal the Roof
Inspecting and sealing your newly installed roof represents the final critical phase of ensuring long-term protection and performance. This step transforms your roof from a collection of materials into a comprehensive weatherproof system, requiring meticulous attention to detail and systematic evaluation of every potential vulnerability.
Begin with a comprehensive visual inspection, methodically examining every section of the roof surface. Look for any inconsistencies in material alignment, potential gaps between roofing components, or areas where flashing might not be perfectly integrated. Pay special attention to roof valleys, edges, and penetration points like chimneys, vents, and skylights where water intrusion most commonly occurs. Use a professional-grade sealant specifically designed for your roofing material to address any minor gaps or potential weak points.
Seal all critical junctures using high-quality exterior-grade sealants that match your roofing material’s composition. For asphalt shingle roofs, this might involve applying specialized roofing cement under shingle edges. Metal roofing requires specific metal sealants that provide flexibility and long-term adhesion. Ensure that all sealing compounds are applied smoothly, without excess buildup that could create uneven surfaces or potential water trapping areas. Work methodically, moving from one section to another, creating a continuous protective barrier.
According to the National Roofing Contractors Association, proper sealing is not just about preventing water intrusion but also about maintaining the roof’s structural integrity against wind uplift and environmental stress. A well-sealed roof can significantly extend the lifespan of your roofing materials and protect your home’s underlying structure.
Critical sealing and inspection verification checklist:
- All roof penetrations are properly sealed
- No visible gaps between roofing materials
- Flashing is secure and watertight
- Sealant is smoothly and consistently applied
- No areas of potential water accumulation
By executing a thorough inspection and precise sealing process, you create a robust roofing system designed to withstand years of environmental challenges.
Ready for a Flawless Roof Installation? We Have Your Back
After reviewing every step in the roof installation process, it is clear that attention to detail, material choice, and expert workmanship are essential for lasting results. Many homeowners struggle with hidden roof damage, selecting the right materials, or making sure their new roof is sealed against weather risks. There is a lot of pressure to get each phase right, from safe removal of worn-out shingles to selecting underlayment and ensuring a watertight finish. If these challenges feel overwhelming or you want true peace of mind, you do not have to go it alone.
Turn to Liberty Roofworks for a stress-free roofing experience. Whether you need new roof installation or help with storm damage repair, our team of experienced professionals will deliver the quality and attention your home or business deserves. Take control of your roofing project with expert support and competitive pricing. Schedule your free consultation today and let us protect your home for years to come.
Frequently Asked Questions
What is the first step in the roof installation process?
The first step is to assess the current roof condition, which includes a thorough visual inspection to identify any signs of damage or wear. This helps determine if repairs are needed or if a complete replacement is necessary.
How do I choose the right roofing material for my home?
Selecting roofing material depends on several factors, including your local climate, budget, architectural style, and long-term maintenance requirements. Common materials include asphalt shingles, metal roofing, and clay tiles, each with its own benefits and lifespan.
What tools are essential for a roof installation?
Essential tools include a sturdy extension ladder, safety harness, roofing hammer, utility knife, tape measure, chalk line, and protective gear such as safety glasses and gloves. Proper preparation and safety equipment are crucial for a successful installation.
How can I ensure my new roof is sealed properly?
After installation, perform a comprehensive inspection to check for gaps or inconsistencies. Use high-quality sealants at critical junctures, especially around roof penetrations, to create a watertight barrier, ensuring long-term protection against water intrusion.
