Managing several commercial properties across Charlotte means every maintenance detail can affect your bottom line. When roof issues go unnoticed, small defects quickly escalate into expensive repairs and threaten tenant safety. A comprehensive roof maintenance checklist keeps every routine inspection organized, helps you spot early problem signs, and supports a proactive approach so your buildings stay secure through the stormiest Carolina weather.
Table of Contents
- Step 1: Gather Essential Roof Maintenance Tools
- Step 2: Inspect Roof Surface for Visible Damage
- Step 3: Evaluate Drainage and Gutter Performance
- Step 4: Check Flashing, Seals, and Roof Edges
- Step 5: Document Findings and Schedule Repairs
Quick Summary
| Key Point | Explanation |
|---|---|
| 1. Gather Essential Tools | Compile the right equipment like ladders, safety gear, and inspection tools to ensure safety and efficiency during roof maintenance inspections. |
| 2. Conduct Thorough Roof Inspections | Systematically check for visible damage and potential issues like membrane cracks or ponding areas to prevent costly repairs later. |
| 3. Evaluate Drainage and Gutters | Ensure gutters are free of debris and properly sloped to prevent water pooling, which can lead to roof deterioration and structural issues. |
| 4. Check Flashing Integrity | Inspect all flashing and seals around roof penetrations to avoid leaks and water intrusion, as these areas are prone to failure. |
| 5. Document Findings for Planning | Record all inspection results, prioritize repairs, and schedule maintenance based on urgency to maintain clear records and drive timely action. |
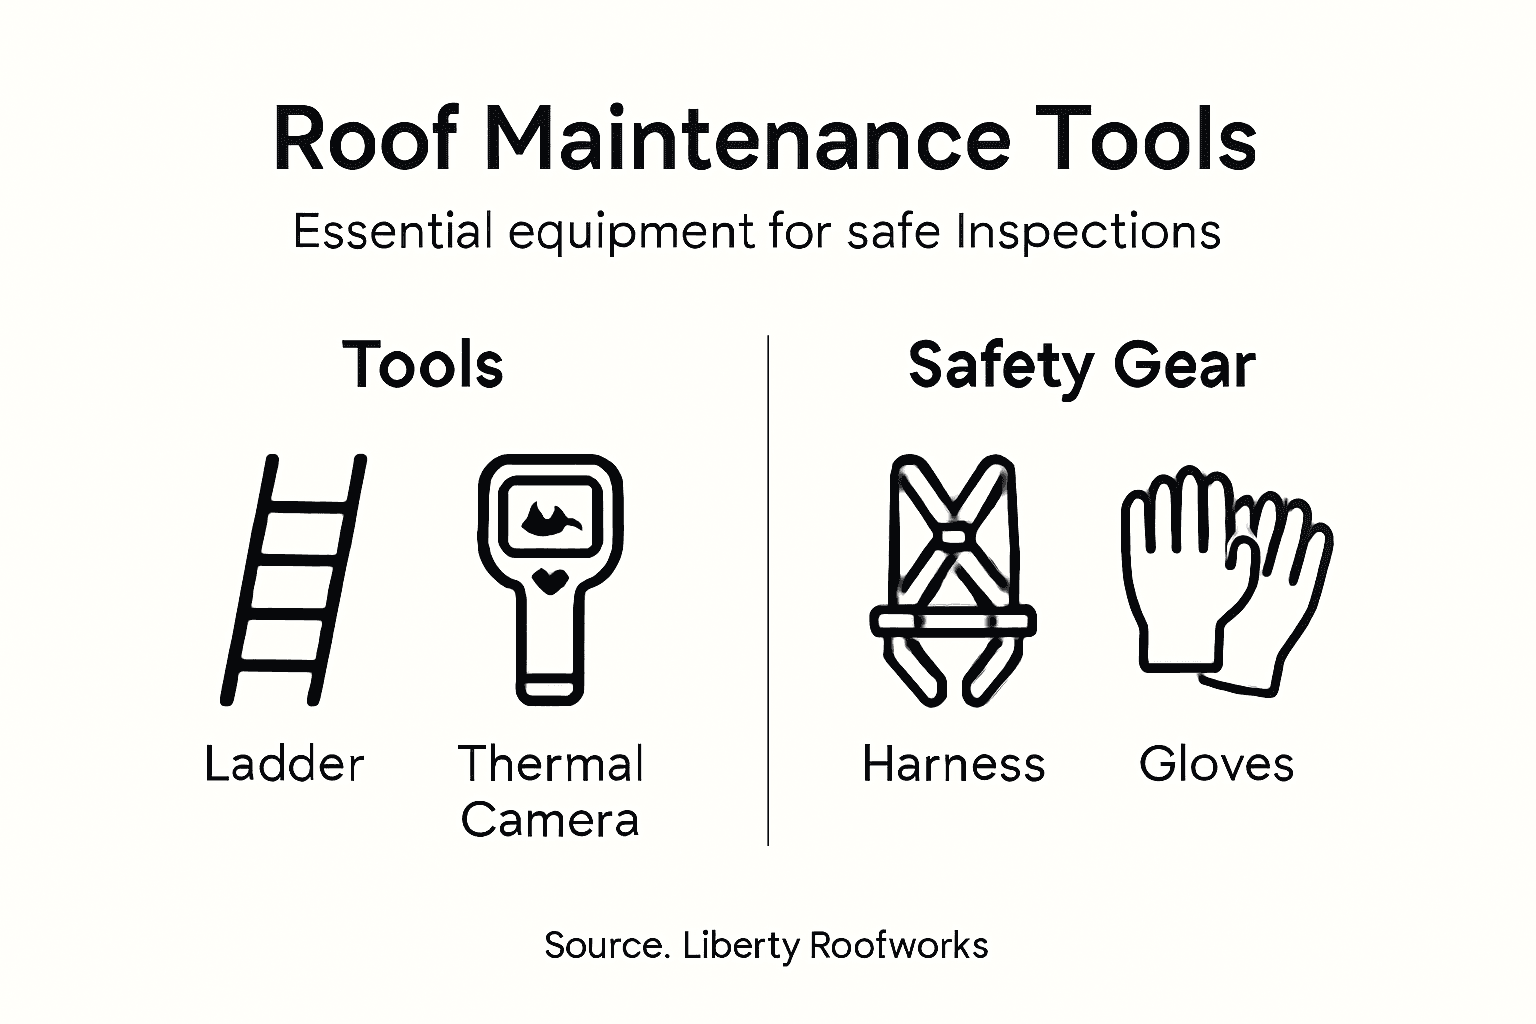
Step 1: Gather Essential Roof Maintenance Tools
Before you climb onto any commercial roof in Charlotte, you need the right equipment. Think of this step as preparing your toolkit before surgery—having everything within reach means you work faster, safer, and more efficiently. Building a proper maintenance kit prevents you from making repeat trips up and down, wastes valuable time, and most importantly, reduces the chance of accidents on the job.
Start with the fundamentals. You’ll need a sturdy ladder rated for commercial use, along with safety harnesses and fall protection equipment. Your team should carry a flashlight or headlamp because roof conditions change dramatically depending on lighting, and you cannot spot early damage in shadows. A binocular or telephoto lens helps you inspect areas from ground level before climbing. Add a clipboard or tablet for documentation since proper planning and preparation are critical for facilities maintenance, and you cannot trust memory alone when managing multiple properties. Include a measuring tape, marker, and camera to document existing conditions. Moisture meters detect hidden water intrusion that your eyes will miss. Basic hand tools like a hammer, screwdriver set, utility knife, and caulking gun handle minor repairs on the spot.
Do not overlook the safety gear. Wear gloves rated for roofing work, non-slip boots with ankle support, and weather appropriate clothing that allows full movement. A first aid kit should travel with you to every inspection. Consider adding specialized equipment based on your roof type. Inspection equipment and proper documentation tools form the foundation of any preventative maintenance program, so invest in quality items that your team will actually use. A weather meter helps you understand how environmental factors affect your specific roof, and a thermal imaging camera catches temperature variations that signal insulation problems or moisture pockets.
Use this summary to better understand essential maintenance tools and their benefits:
| Tool / Equipment | Primary Use | Business Benefit |
|---|---|---|
| Thermal Imaging Camera | Detects hidden moisture | Prevents costly hidden damage |
| Moisture Meter | Finds water intrusion | Reduces future emergency repairs |
| Fall Protection Gear | Ensures worker safety | Decreases liability risks |
| Documentation Tools | Records all findings | Improves maintenance planning |
| Camera | Captures visual evidence | Supports insurance claims |
Pro tip: Create a laminated checklist for your toolkit and mount it inside your inspection vehicle so every team member knows exactly what equipment leaves with them, eliminating the frustration of discovering missing tools halfway through an inspection.
Step 2: Inspect Roof Surface for Visible Damage
Now that you have your tools ready, it’s time to walk the roof systematically and document what you find. This step separates property managers who catch small problems early from those who discover expensive emergencies too late. Your goal is to identify visible defects like membrane damage, cracks, blisters, punctures, and any deterioration before weather compounds the issue into a major repair.
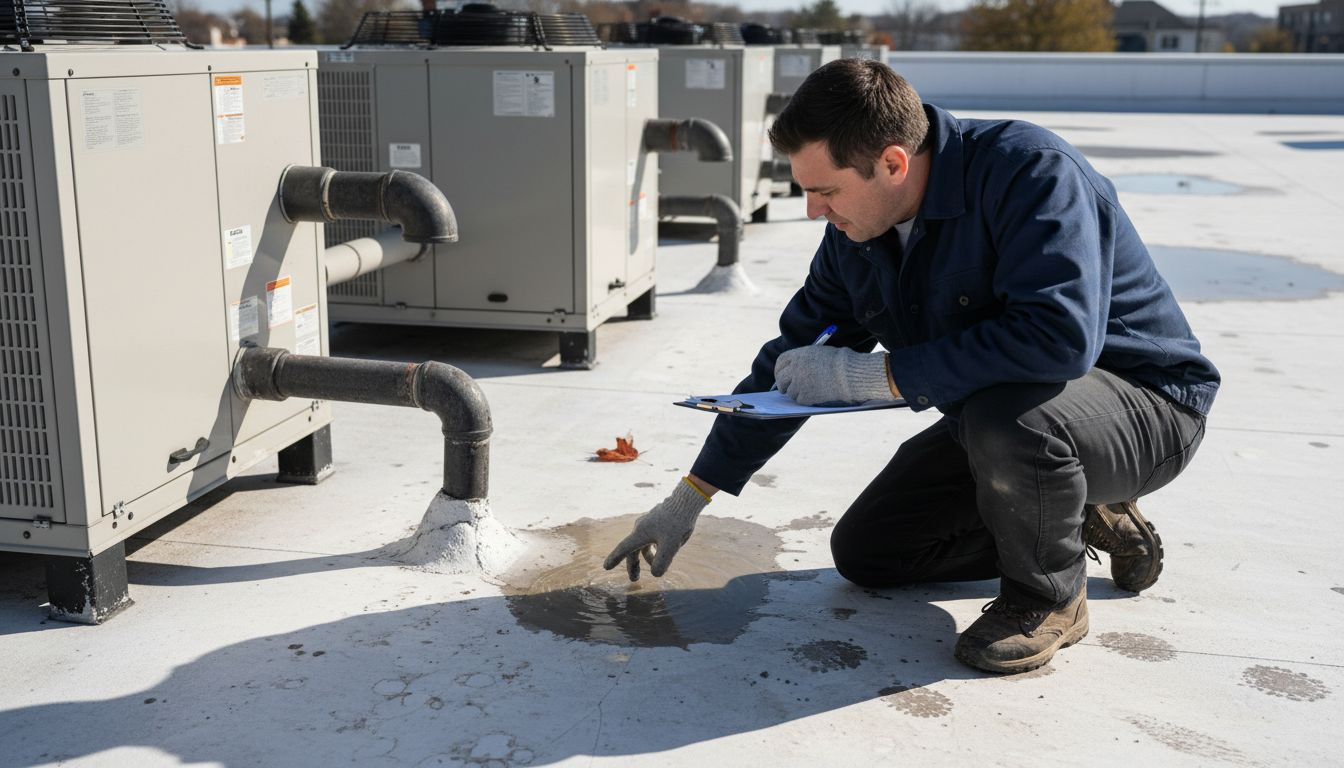
Start at one corner and move methodically across the entire roof surface rather than jumping around randomly. Pay attention to areas where water naturally pools or where foot traffic concentrates, as these spots deteriorate faster. Look for membrane damage including cracks, blisters, and punctures that compromise the roof’s ability to shed water. Membrane blisters appear as raised bubbles on flat roofing surfaces, and while small ones might seem harmless, they indicate that moisture has penetrated the layers beneath. Cracks in EPDM or TPO roofing expand and contract with temperature changes, so even hairline fractures deserve attention. Check seams carefully since these joints fail before the rest of the membrane. Look for any areas where the membrane pulls away from flashing around penetrations like pipes or vents. Document everything with photos taken from multiple angles so you have a clear record of conditions over time.
Beyond the membrane itself, scan for ponding areas where water sits for extended periods after rain. These soft spots indicate structural sagging or drainage failures. Check your flashings around roof edges, valleys, and equipment. Look for rust stains, deterioration, or separation that suggests water is finding its way underneath. Inspect any exposed fasteners or seams for exposed nails or corrosion. Regular proactive inspection helps catch minor defects before they become serious problems, potentially saving your company thousands in emergency repairs. If you spot anything questionable, take a close-up photo and mark the location on your roof map so your maintenance team knows exactly where to focus when planning repairs.
Pro tip: Conduct roof inspections twice yearly, ideally in spring after winter damage and in fall before harsh weather arrives, then document your findings in the same location each time so you can easily spot patterns and track whether damage is spreading or remaining stable.
Step 3: Evaluate Drainage and Gutter Performance
Water management is everything when it comes to roof longevity. If your drainage system fails, even a perfect membrane will deteriorate quickly as water pools and penetrates every weak point. This step focuses on ensuring your gutters and downspouts actually do their job of moving water away from your building as fast as it arrives.
Start by visually inspecting your entire gutter system from the ground and from the roof itself. Look for debris accumulation, leaves, dirt, or sediment that blocks water flow. Gutters clogged with organic material become heavy and sag, which prevents proper drainage and creates the exact ponding conditions that destroy roofs. Clear out everything by hand or with a gutter vacuum, then run water through the system to confirm it flows freely. Check that gutters and downspouts have adequate slope and capacity to handle rainfall based on your roof area and local rainfall intensity. If water pools in any section of the gutter rather than flowing toward downspouts, that gutter has either lost its slope or become undersized for your building. Verify all fastening brackets are secure and tight since loose gutters pull away from the roof edge and allow water to seep behind them. Look for rust, corrosion, or holes in metal gutters and patches or cracks in plastic gutters. Even small holes act like fountains during heavy rain, directing water down your building exterior instead of safely away.
Trace your downspouts to their termination points and confirm water flows completely away from the foundation. Short downspouts that dump water at ground level allow it to infiltrate around your foundation or worse, run back toward the building. Most commercial buildings require downspouts to extend at least 4 to 6 feet away from the structure, and longer is better during Charlotte’s heavy summer storms. Check that downspout joints remain sealed and fastened properly. Proper gutter sizing and slope prevent overflow and backup issues, protecting your entire structure from water intrusion. If you discover undersized gutters or improper drainage paths, document this for your maintenance plan since fixing drainage problems now prevents catastrophic roof failures later.
Pro tip: After heavy rain events, climb up and inspect your gutters within 24 hours to confirm water flowed properly and settled debris shows where flow patterns move, then adjust your cleaning schedule accordingly for your building’s specific conditions.
Step 4: Check Flashing, Seals, and Roof Edges
Flashing is your roof’s last line of defense against water intrusion at all the vulnerable spots where the membrane meets other building elements. Without proper flashing around penetrations, edges, and intersections, water finds its way inside no matter how perfect the rest of your roof looks. This step involves systematically checking every flashing detail to catch problems before they cause costly interior damage.
Start at the roof edges and work your way around the entire perimeter. Look at where your membrane meets the parapet wall or eaves, checking that flashing overlaps properly and has no gaps or separations. Properly installed roof flashing prevents water infiltration at roof edges, penetrations, and intersections, so any flashing that pulls away from its intended position is a red flag. Examine the condition of metal flashings for corrosion, rust stains, or discoloration that indicates deterioration. Corroded flashing loses its ability to shed water and becomes brittle. Check all fasteners securing flashing to ensure they remain tight and haven’t backed out. Loose fasteners create pathways for water to migrate underneath. Move to every roof penetration including pipes, vents, mechanical units, and equipment. Water loves these spots because the membrane must transition from flat to vertical around curved objects. Verify all seals around penetrations remain intact and flexible. Hardened or cracked caulk has lost its waterproofing ability and needs replacement. Look for any gaps between flashing and the membrane that would allow water to enter.
Pay special attention to roof valleys and areas where roof planes intersect. These geometric complexities concentrate water flow and create multiple opportunities for leaks. Inspect every seam in the flashing for gaps, overlaps, or improper connections. Check that flashing at roof edges transitions smoothly into gutters without creating dams or pockets where water pools. Document any areas where flashing materials show corrosion or damage so your team knows exactly what needs repair priority. If your flashing is near the end of its serviceable life or shows multiple problem areas, plan replacement as part of your annual maintenance budget rather than waiting for leaks to develop.
Pro tip: After any heavy rain or wind event, inspect flashing immediately while you can see evidence of water movement through stains or settled debris, then photograph any issues to track whether they worsen over time or remain stable.
Step 5: Document Findings and Schedule Repairs
Your inspection is only valuable if you capture what you found and actually use that information to drive maintenance decisions. Documentation creates a permanent record of your roof’s condition, tracks changes over time, and gives your team clear direction on what needs repair and when. Without proper records, you lose continuity between inspections and cannot demonstrate due diligence if problems develop later.
Start by organizing your photos and observations into a clear inspection report that anyone on your team can understand. Include detailed descriptions of every issue you found, noting their location, severity, and whether they require immediate attention or can be scheduled for future maintenance. Professional roof inspection reports document all findings with photographs and recommendations to help building managers prioritize repairs and budget for preventive measures effectively. Photograph every problem area from multiple angles and distances so future team members can locate issues without confusion. Include reference photos of the overall roof and specific zones so context is clear. Create a roof map or diagram marking all findings by location, using symbols or colors to distinguish between urgent repairs, routine maintenance, and monitoring items. Rate each finding by urgency. Immediate repairs include active leaks, significant membrane damage, missing flashing, or any condition that allows water inside right now. Scheduled maintenance includes worn sealants, minor cracks, or equipment that functions but shows early signs of wear. Monitoring items are minor issues that do not yet require repair but need attention in future inspections to ensure they do not worsen.
Once you complete documentation, systematically record your inspection results and schedule subsequent maintenance or repairs according to a preventative maintenance calendar. Contact Liberty Roofworks or your qualified roofing contractor immediately for items requiring urgent repair rather than waiting for the next inspection cycle. For routine maintenance tasks, schedule them during favorable weather windows and avoid clustering multiple projects when your building cannot tolerate extended roof access. Set calendar reminders for your next inspection at the appropriate interval, typically every six months for Charlotte properties given our variable weather. Store your inspection records digitally so you can compare conditions year over year and demonstrate consistent maintenance practices to insurance carriers and potential tenants.
Here’s a quick reference to the impact of different roof inspection findings:
| Finding Type | Risk if Ignored | Maintenance Priority |
|---|---|---|
| Membrane Damage | Leads to leaks, mold growth | Immediate repair required |
| Drainage Issues | Causes structural sagging | High, address promptly |
| Flashing Deterioration | Allows water infiltration | High, prioritize fix |
| Surface Ponding | Reduces roof lifespan | Schedule for urgent review |
| Minor Sealant Cracks | Can worsen over time | Monitor for progression |
Pro tip: Create a simple spreadsheet tracking each repair completion with dates and contractor information so you build a maintenance history that proves you have managed the roof proactively, which strengthens your negotiating position with insurance companies and protects your building’s value.
Ensure Your Commercial Roof Stands Strong with Expert Care
Managing a commercial roof in Charlotte means facing challenges like hidden moisture damage, failing drainage, and deteriorating flashing that can quickly escalate into costly repairs. This article highlights the importance of thorough inspections, proper documentation, and timely maintenance to protect your building’s value and safety. If you want to eliminate concerns about overlooked damage or ineffective repairs, understanding these pain points is the first step toward smarter roof management.
At Liberty Roofworks, we specialize in comprehensive commercial roof repair and replacement solutions tailored to your property’s unique needs. Whether you require minor roof repairs or a full roof replacement, our skilled team uses proven expertise in TPO, EPDM, and asphalt shingle roofing to deliver lasting results. Don’t wait for visible damage to worsen or drainage issues to threaten your roof’s integrity. Visit Liberty Roofworks to discover our full range of commercial roofing services and schedule a professional inspection today. Protect your investment and enjoy peace of mind with expert roof maintenance you can trust.
Frequently Asked Questions
What tools should I include in my roof maintenance checklist?
To effectively maintain your roof, include tools like a sturdy ladder, fall protection gear, moisture meters, and a thermal imaging camera. Assemble these tools before inspections to ensure efficiency and safety throughout the process.
How often should I conduct roof inspections for commercial properties?
Conduct roof inspections at least twice a year, ideally in the spring and fall. This timing helps identify damage from winter and prepares the roof for harsh weather conditions ahead, ensuring the roof remains in good condition year-round.
What should I look for during a roof inspection?
During a roof inspection, examine for visible damage such as cracks, blisters, or missing flashing. Document these findings with photographs and notes to track changes over time and prioritize repairs that need to be addressed immediately.
How can I evaluate my roof’s drainage system?
Check your gutters and downspouts for debris, ensuring they are clear and properly sloped to facilitate water flow. Inspect downspouts to confirm they direct water at least 4 to 6 feet away from your building’s foundation to prevent water intrusion.
What maintenance actions should I prioritize after finding flashing issues?
Address any flashing deterioration immediately, as compromised flashing can lead to significant water intrusion. Plan to replace or repair flashing within the next maintenance cycle to protect your building from leaks and water damage.
How should I document my roof inspection findings?
Organize your inspection findings into a clear report, including detailed descriptions and photographs of each issue. Create a roof map marking the locations of these findings, making it easier to prioritize repairs and manage future maintenance tasks.
