Roof problems can sneak up on any homeowner, so it’s no surprise that over 75 percent of roof repairs begin with homeowner discoveries instead of professional inspections. Most people think a few missing shingles mean simple fixes and smooth sailing. The real surprise is that the small stuff you spot now can hide major issues that cost thousands if you miss them. Getting smart about your repair process at the start could change everything.
Table of Contents
- Step 1: Assess The Roof Damage
- Step 2: Gather Necessary Tools And Materials
- Step 3: Execute Repairs On The Roof
- Step 4: Inspect For Additional Issues
- Step 5: Verify Repair Quality And Clean Up
Quick Summary
| Key Point | Explanation |
|---|---|
| 1. Assess Damage Thoroughly | Begin with a detailed visual inspection to identify visible and hidden damage, documenting findings for reference and insurance. |
| 2. Prepare Essential Tools | Gather all necessary tools and materials before starting repairs to ensure a smooth process and maintain safety standards. |
| 3. Execute Repairs with Care | Perform repairs systematically, replacing damaged materials and ensuring watertight seals to prevent future issues. |
| 4. Inspect for Hidden Problems | Conduct a thorough follow-up inspection to identify overlooked damage or vulnerabilities requiring attention to ensure longevity. |
| 5. Clean Up and Document Repair | Properly clean the workspace and document repairs with photographs as a reference for future maintenance and inspections. |
Step 1: Assess the Roof Damage
Assessing roof damage is the critical first step in your roof repair process, serving as the foundation for all subsequent repair actions. This initial evaluation will determine the extent of damage, potential risks, and the most appropriate repair strategy. Effective roof damage assessment requires careful observation, systematic checking, and a keen eye for subtle signs of deterioration.
Begin by conducting a comprehensive visual inspection from ground level. Look for obvious signs like missing shingles, visible sagging, exposed roof deck, or areas with discoloration. Pay special attention to edges, corners, and areas around chimneys or vents where damage tends to concentrate. If you notice significant damage or feel uncertain about your assessment, check out our detailed roof inspection guide for professional insights.
For a more thorough examination, you’ll need proper safety equipment and careful approach. Use a sturdy ladder and wear non-slip shoes if you plan to inspect closer. Check for these critical indicators of roof damage:
- Cracked or curling shingles
- Dark streaks or algae growth
- Granule loss on asphalt shingles
- Soft or spongy feeling when walking on the roof
- Water stains on interior ceilings
Document everything you find through photographs and detailed notes.
These will be crucial for insurance claims and helping roofing professionals understand the full scope of repair needed. Remember that some damage might not be immediately visible, so dont hesitate to seek professional assessment if you suspect underlying issues.
The goal of this first step is to gather comprehensive information about your roofs condition. By meticulously examining every aspect of your roof, youll create a clear roadmap for the repair process, potentially saving significant time and money in future restoration efforts.
![]()
Step 2: Gather Necessary Tools and Materials
Now that youve completed your initial roof damage assessment, preparing the right tools and materials becomes crucial for a successful repair process. Proper preparation can make the difference between a smooth repair and a complicated, frustrating experience. The goal of this step is to ensure you have everything needed to address the specific type of roof damage youve identified.
Your toolkit will vary depending on the extent and type of roof damage, but certain core items are universally essential. For most residential roof repairs, youll want to collect safety gear first. This includes a sturdy ladder with stabilizers, non-slip work boots, safety harness, protective eyewear, and work gloves. Safety should always be your primary concern when performing any roof repair.
Next, gather your primary repair materials. Depending on your previous assessment, youll need specific supplies. For shingle repairs, collect replacement shingles that match your existing roof, roofing nails, roofing hammer, pry bar, and roofing cement. If youre dealing with more extensive damage, consider consulting our comprehensive guide on roof insurance claims to understand potential coverage options.
Here are the essential tools you should have prepared before starting your roof repair:
- Roofing hammer
- Utility knife
- Measuring tape
- Chalk line
- Roofing nails
- Replacement shingles or roofing materials
- Roofing cement
- Caulking gun
- Ladder
- Safety harness
Additional materials like tarps can be crucial for protecting your roof and home during repairs, especially if youre dealing with significant damage or working during uncertain weather conditions. Pro tip: Always purchase about 10% more materials than you initially estimate to account for unexpected complications or measurement errors.
Before beginning your repair, double-check that all your tools are in good working condition. Inspect ladder stability, ensure your safety harness is intact, and verify that replacement materials are appropriate for your specific roof type. A careful preparation stage sets the foundation for a successful and safe roof repair process.
Below is a handy table summarizing the essential tools and materials you should gather before starting your roof repair for safety and efficiency.
| Tool/Material | Purpose | Safety Consideration |
|---|---|---|
| Sturdy ladder | Access the roof safely | Ensure stability and secure footing |
| Non-slip work boots | Maintain grip while moving on the roof | Prevents slips and falls |
| Safety harness | Protect yourself from falls | Always attach to secure anchor |
| Protective eyewear | Shield eyes from debris | Reduces risk of eye injury |
| Work gloves | Protect hands from sharp materials | Prevents cuts and abrasions |
| Roofing hammer | Drive nails and remove old fasteners | Use carefully to avoid injury |
| Utility knife | Cut shingles and roofing materials | Keep blade retractable when not in use |
| Measuring tape | Accurately measure repair areas | Double-check measurements for safety |
| Chalk line | Mark straight lines for precise cuts | Keep away from roof edge |
| Roofing nails | Secure shingles or roofing materials | Use appropriate size for material |
| Replacement shingles | Restore damaged or missing shingles | Match existing roof type |
| Roofing cement | Seal edges and prevent leaks | Use in well-ventilated area |
| Caulking gun | Apply roofing cement or sealant accurately | Clean tip after each use |
| Tarp (optional) | Protect exposed roof during repairs | Secure edges to prevent wind lift |
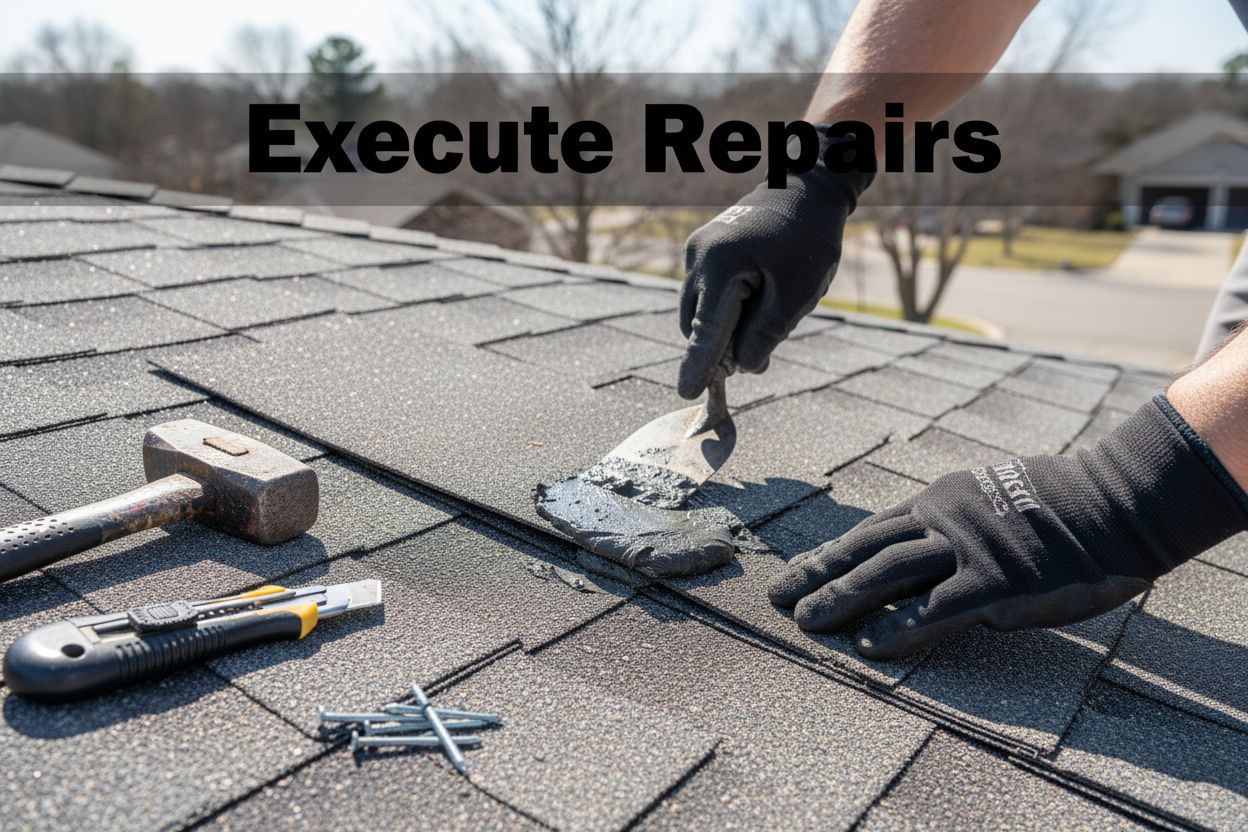
Step 3: Execute Repairs on the Roof
With your assessment complete and tools prepared, its time to execute the actual roof repairs. This critical stage requires precision, patience, and careful technique. Your previous damage assessment will guide the specific repair approach, whether youre addressing minor shingle damage or more extensive structural issues.
Begin by setting up your safety equipment thoroughly. Secure your ladder on stable ground, wear your safety harness, and ensure you have a clear path of movement on the roof surface. Work methodically from the damaged area outward, which helps prevent additional damage during the repair process. If youre uncertain about any aspect of the repair, explore our comprehensive roof repair tips for additional guidance.
For shingle repairs, start by carefully removing damaged shingles. Use your pry bar to lift the edges of surrounding shingles, then remove nails holding the damaged section. Slide new shingles into place, ensuring they align perfectly with existing roof lines. Secure each replacement shingle with roofing nails, positioning them to prevent water infiltration. Apply roofing cement along the edges to create a watertight seal, which helps prevent future leaks and potential water damage.
When dealing with more significant damage, you might need to replace entire sections of roofing material. This requires carefully cutting out damaged areas, preparing the underlying roof deck, and installing new materials with precise alignment. Pay close attention to seams and edges, as these are common points of potential water entry.
Here are critical verification steps to ensure your repair is successful:
- All replacement materials are securely fastened
- No gaps exist between old and new roofing materials
- Roofing cement creates smooth, continuous seals
- Surrounding areas show no signs of additional damage
- Roof surface feels firm and consistent
Timing and weather conditions are crucial during roof repairs. Avoid working during wet, windy, or extremely hot conditions, as these can compromise repair quality and personal safety. Ideal repair conditions include mild temperatures and dry surfaces. Take your time, work carefully, and dont hesitate to pause if you feel uncertain about any aspect of the repair process.
Step 4: Inspect for Additional Issues
After completing your initial repairs, a comprehensive follow-up inspection is crucial to ensure no underlying problems remain unaddressed. This step is about detecting subtle damages that might have been overlooked during the initial repair process. Think of it as a final quality check that could save you significant time and money in future roof maintenance.
Begin by systematically examining the entire roof surface, moving beyond the areas you initially repaired. Look for signs of potential future issues like minor cracks, slight material deterioration, or early indicators of structural stress. According to professional roof inspection guidelines, paying attention to seemingly minor details can prevent major problems down the line.
Carefully inspect key roof components, focusing on areas prone to water infiltration and structural weakness. Check around chimneys, vents, skylights, and roof edges where seals might have weakened. Look for subtle signs like slight discoloration, minor granule loss on shingles, or slight lifting of roofing materials. These could indicate emerging problems that might not be immediately apparent but could develop into significant issues if left unaddressed.
Pay special attention to your roof’s drainage system. Gutters and downspouts play a critical role in protecting your roof and home from water damage. Examine them for:
- Debris accumulation
- Signs of rust or corrosion
- Loose or misaligned sections
- Water staining on exterior walls
- Improper water flow or pooling
Pro tip: Use binoculars for a detailed ground-level examination if you are uncomfortable climbing back onto the roof. This can provide a comprehensive view without compromising your safety. Take photographs of any areas of concern, which can be useful for future reference or professional consultation.
Finally, conduct an interior inspection. Check your attic and ceiling for any signs of water intrusion, such as water stains, mold growth, or unusual dampness. These interior indicators can reveal roof issues that might not be visible from the exterior. By thoroughly examining both the roof surface and interior spaces, you create a comprehensive understanding of your roof’s overall condition and potential future maintenance needs.
Step 5: Verify Repair Quality and Clean Up
The final stage of your roof repair process involves meticulous quality verification and thorough cleanup, which are crucial steps in ensuring the longevity and effectiveness of your repair work. This step is about confirming your repair meets professional standards and leaving your workspace immaculate. If youre working on specific roof types, our flat roof repair guide offers additional specialized insights.
Begin your quality verification by conducting a comprehensive visual inspection of the repaired area. Walk carefully across the repaired sections, feeling for consistent firmness and checking that new materials blend seamlessly with existing roofing. Pay close attention to seams, edges, and attachment points. Any slight unevenness or gaps could compromise your entire repair, so precision is key. Gently press down on newly installed shingles or patches to ensure they are securely fastened and lying flat.
Next, perform a water test to validate the repairs effectiveness. Using a garden hose, systematically spray water over the repaired area, watching carefully for any signs of leakage or water penetration. This simulation helps identify potential weak points that might not be immediately visible. Remember to have someone inside the house or attic to monitor for any water intrusion during this test.
Cleanup is equally important and requires careful attention. According to OSHA safety guidelines, proper site management prevents potential injuries and maintains a professional work environment. Here are critical cleanup steps:
- Collect and dispose of all used materials
- Remove loose nails and roofing debris
- Clean surrounding areas thoroughly
- Check ground area for any dropped materials
- Organize and store remaining tools
Final verification involves documenting your repair. Take clear, dated photographs of the repaired area from multiple angles. These images serve as a valuable reference for future maintenance and can be useful for insurance purposes. If you encountered any unexpected challenges during the repair, note them down for future reference.
The following checklist table helps ensure you have completed all verification and cleanup steps after your roof repair is finished.
| Task | Action Required | Purpose |
|---|---|---|
| Visual inspection of repaired area | Check for firmness, alignment, and seamless blending | Confirm repair quality |
| Inspect seams and attachment points | Look for gaps, unevenness, or loose nails | Prevent leaks and weak spots |
| Water test | Spray water over repaired area, monitor for leaks | Validate repair effectiveness |
| Remove used materials and debris | Collect and dispose of old shingles, nails, debris | Maintain safety and neat workspace |
| Clean ground and surrounding areas | Check for dropped nails and leftover materials | Prevent injuries and property damage |
| Organize and store tools | Return all tools to proper storage | Ready for future use, avoid accidents |
| Photograph repairs | Take dated photos from multiple angles | Documentation for maintenance/insurance |
| Note unexpected challenges | Write down any repair difficulties | Reference for future repairs |
| Consider professional inspection | Schedule if unsure about repair or complex issues | Obtain expert verification |
Consider scheduling a professional follow-up inspection, especially for complex repairs. An expert can provide an additional layer of verification and catch any subtleties you might have missed. Your meticulous approach ensures not just a repair, but a comprehensive restoration of your roofs integrity and protective capabilities.
Get Professional Roof Repairs With Peace of Mind
Have you finished a detailed roof inspection only to discover more problems than you expected? From missing shingles to unexpected leaks or hidden water damage, fixing your roof can turn stressful fast. While our guide walks you through each repair step, sometimes the damage needs more than a DIY approach. If you are already feeling overwhelmed after checking your attic for stains or when you see complex issues on your flat roof, it is time to let a trusted expert step in.
Let Liberty Roofworks turn your roof worries into lasting protection. Our team in Charlotte, NC is highly experienced in residential and commercial roof repairs, from storm damage to shingle replacement and complete roof installations. Stop putting off the peace of mind you deserve. Visit Liberty Roofworks now and request a professional inspection or repair. Do not wait for minor problems to become expensive headaches. Take the first step to a safer and stronger roof today at Liberty Roofworks.
Frequently Asked Questions
How do I assess roof damage?
Begin by conducting a visual inspection from ground level, looking for missing shingles, sagging areas, discoloration, or damage around chimneys and vents. If significant damage is suspected, consult a professional.
What tools do I need for roof repair?
Essential tools include a sturdy ladder, safety gear (harness, non-slip shoes), roofing hammer, utility knife, measuring tape, replacement shingles, roofing nails, and roofing cement. Always prioritize safety when working on a roof.
What steps should I follow to repair shingles?
Start by removing damaged shingles with a pry bar, replace them with new shingles, and secure them with roofing nails. Apply roofing cement along the edges for a watertight seal.
How can I verify the quality of my roof repair?
Conduct a visual inspection of the repaired areas, ensuring everything feels firm and aligned. A water test can further validate repair effectiveness by checking for leaks when spraying water over the area.
