Storms in Charlotte, NC, can leave asphalt shingle roofs battered and vulnerable, raising urgent concerns for homeowners about safety and costly repairs. Addressing roof storm damage calls for both caution and a clear plan, especially when tackling assessment and debris removal. This guide walks you through each step, drawing from trusted sources like FEMA and the American Red Cross to highlight safe storm damage assessment and practical repairs, so you can restore your roof with confidence and protect your home for years to come.
Table of Contents
- Step 1: Assess Storm Damage and Prepare Workspace
- Step 2: Remove Damaged Shingles and Debris
- Step 3: Repair Roof Decking and Critical Areas
- Step 4: Install New Underlayment and Shingles
- Step 5: Inspect Work and Ensure Quality Results
Quick Summary
| Key Point | Explanation |
|---|---|
| 1. Assess Storm Damage Thoroughly | Conduct a systematic evaluation of roof damage to identify all issues before starting repairs. |
| 2. Safely Remove Damaged Materials | Wear protective gear and clear away debris, including damaged shingles, to prevent further complications. |
| 3. Repair Roof Decking Carefully | Inspect and replace any compromised roof decking to ensure the structural integrity of your roof. |
| 4. Install Underlayment and Shingles with Precision | Follow local building codes while applying underlayment and aligning new shingles correctly for optimal protection. |
| 5. Perform a Detailed Final Inspection | Thoroughly examine completed repairs for any defects to ensure quality and prevent future leaks. |
Step 1: Assess Storm Damage and Prepare Workspace
Assessing storm damage is your first critical move toward successful roof restoration. You will systematically evaluate the extent of damage and set up a safe workspace that protects both you and your property during the repair process.
Begin by thoroughly examining roof damage zones using a methodical approach. Start from ground level first. Look for visible signs like missing shingles, exposed roof decking, dented metal flashing, or debris scattered around your property. Wear protective gear including sturdy boots with good traction, work gloves, safety glasses, and a hard hat. Walk around your home perimeter slowly scanning for fallen branches, damaged gutters, or roof sections with obvious punctures or breaks.
Before climbing onto the roof, prepare a safe workspace by clearing the area around your home. Remove loose debris, set up stable ladders on flat ground, and ensure you have a partner who can assist and monitor your safety. Secure any loose items that might become projectiles in windy conditions. If damage appears extensive or you feel uncertain about your ability to assess safely, contact professional roofing experts who can provide a comprehensive damage evaluation.
Here’s a summary of common roof damage indicators and what they may imply:
| Damage Indicator | Possible Cause | Recommended Action |
|---|---|---|
| Missing shingles | High winds, storm impact | Replace with new shingles |
| Exposed roof decking | Severe wind, debris | Repair or reseal immediately |
| Dented metal flashing | Hail, falling branches | Inspect and replace if needed |
| Water stains inside attic | Roof leaks | Investigate and repair quickly |
| Sagging roof sections | Structural compromise | Consult a professional promptly |
Professional Tip: Always take clear photographs of storm damage from multiple angles for insurance documentation and future reference.
Step 2: Remove Damaged Shingles and Debris
Now that you have assessed storm damage, the next critical phase is safely removing damaged shingles and roof debris. This step prepares your roof for comprehensive repair and prevents further structural complications from existing damage.
Begin by clearing storm debris systematically using proper safety protocols. Wear thick work gloves, protective eyewear, and a sturdy hard hat. Start by removing large debris like fallen branches from your roof surface, working carefully to avoid additional damage. Use a wide roof rake or specialized debris removal tool to gently clear away loose materials. Look for shingles with significant cracking, curling, or missing sections these will need complete removal.
Carefully lift damaged shingles using a pry bar, working from the top edge and moving downward to expose the underlying roofing membrane. Remove nails holding damaged shingles and place them in a secure metal container. Sort debris into separate piles for potential recycling and disposal, focusing on sustainable waste management practices. If the damage appears extensive or you encounter complex removal challenges, consider consulting professional roofing experts who can ensure safe and thorough debris removal.
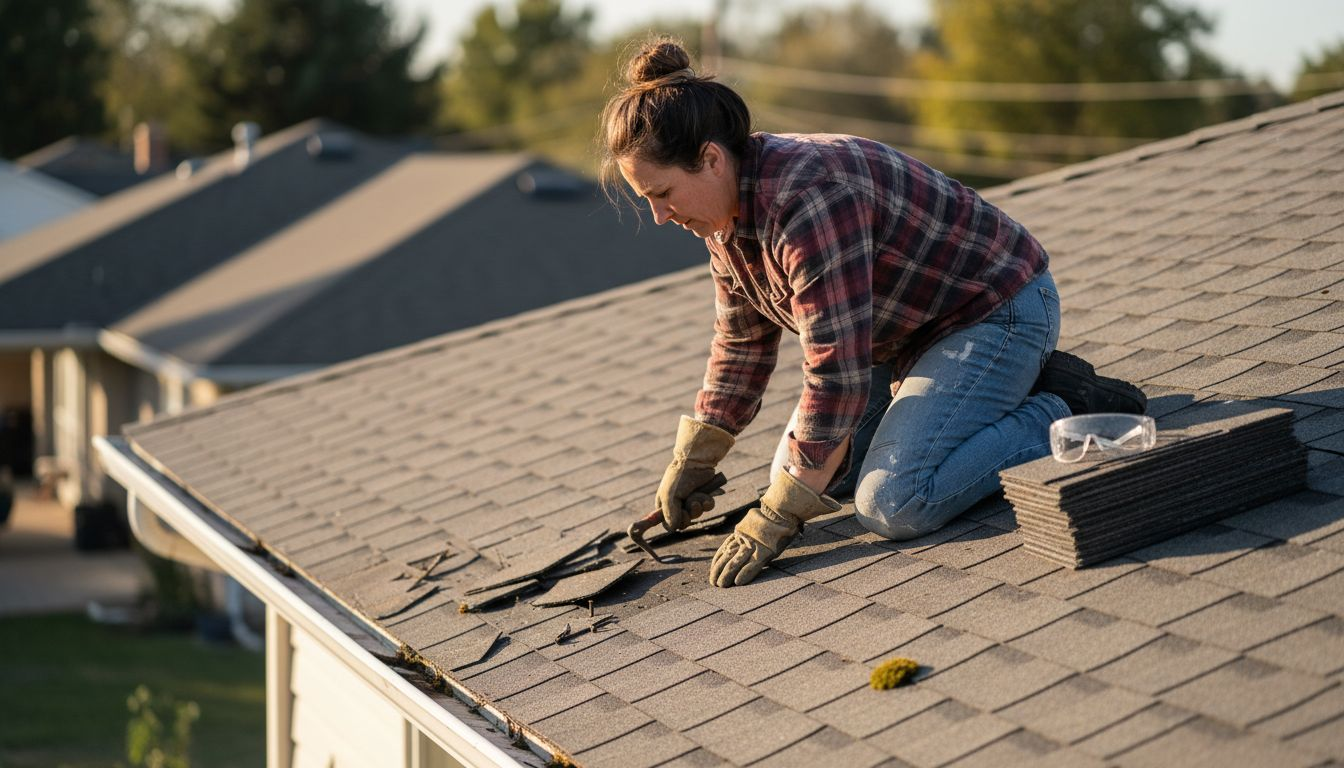
Professional Tip: Photograph each stage of shingle removal for insurance documentation and to help track your repair progress.
Step 3: Repair Roof Decking and Critical Areas
After removing damaged shingles, you will now focus on repairing the underlying roof decking and addressing critical structural areas that may have been compromised during the storm. This crucial step ensures the long term integrity and protection of your home.
Begin by systematically inspecting roof decking vulnerabilities to identify potential weak points. Look for signs of water damage, wood rot, soft spots, or structural separation at roof edges and valleys. Use a pry bar to gently probe suspicious areas and assess the extent of damage. Replace any plywood or oriented strand board sections that show significant deterioration with new, high quality exterior grade sheathing. Pay special attention to areas around roof penetrations like chimneys, vents, and skylights where water intrusion commonly occurs.
Secure the roof decking using galvanized ring shank nails placed every six inches along the edges and every twelve inches in the field of the panel. Apply waterproof roofing tape or sealant to joints and seams to prevent potential moisture infiltration. When replacing decking sections, ensure the new material matches the existing thickness and is properly aligned with surrounding panels. If the damage appears extensive or you are uncomfortable performing these repairs, consult a professional roofing contractor who can comprehensively assess and restore your roof structure.
Professional Tip: Always wear protective work gloves and safety glasses when handling damaged roofing materials and performing structural repairs.
Step 4: Install New Underlayment and Shingles
With the roof decking repaired, you are now ready to install new underlayment and shingles that will restore your roof’s protective barrier and prevent future water damage. This critical phase requires precision and attention to detail to ensure a weathertight seal.
Begin by selecting appropriate roofing materials that meet local building code requirements. Roll out a high quality synthetic underlayment across the entire roof deck, starting at the lowest point and working upward. Overlap each row by at least four inches, ensuring water can flow smoothly down the roof without penetrating underneath. Use roofing staples or plastic caps to secure the underlayment every 12 to 16 inches, creating a smooth and uniform base for your new shingles.
Install starter shingles along the roof edges first, then begin laying standard shingles from the bottom edge upward. Align each row carefully, making sure the seams are staggered to prevent water infiltration. Use galvanized roofing nails placed just below the tar strip on each shingle, driving them flush with the surface but not so deep that they tear the shingle material. Trim shingles as needed around roof features like vents and chimneys to create a clean and professional finish. If the installation process seems overwhelming or complex, consider consulting a professional roofing contractor who can ensure proper installation.
Professional Tip: Check weather forecasts carefully and choose a dry period with moderate temperatures for your roof installation to ensure optimal material performance and adhesion.
Step 5: Inspect Work and Ensure Quality Results
After completing your roof restoration, a thorough final inspection is crucial to verify the quality and effectiveness of your repair work. This step ensures that all your hard work provides lasting protection for your home and prevents potential future issues.
Start by systematically examining roof restoration details from multiple angles. Walk around your property and view the roof from ground level first, looking for any obvious irregularities in shingle alignment, color consistency, or visible gaps. Then use a sturdy ladder to get a closer view, checking that each shingle is properly secured and lies flat against the underlayment. Pay special attention to areas around roof penetrations like chimneys, vents, and skylights where water might potentially leak. Verify that all flashing is correctly installed and sealed, with no visible gaps or lifting edges that could compromise water resistance.
Document your inspection carefully by taking clear photographs from different perspectives. These images serve as important records for potential insurance claims and future reference. Check that nail heads are properly seated and not protruding, which could indicate improper installation. Ensure all ridge caps are correctly positioned and sealed, and that your gutter system remains clear and properly attached. If you notice any concerns or are uncertain about specific details, consider hiring a professional roof inspector who can provide an expert third party assessment of your restoration work.
Professional Tip: Perform your final inspection on a clear day with good natural lighting to help you spot even subtle imperfections in your roof restoration.
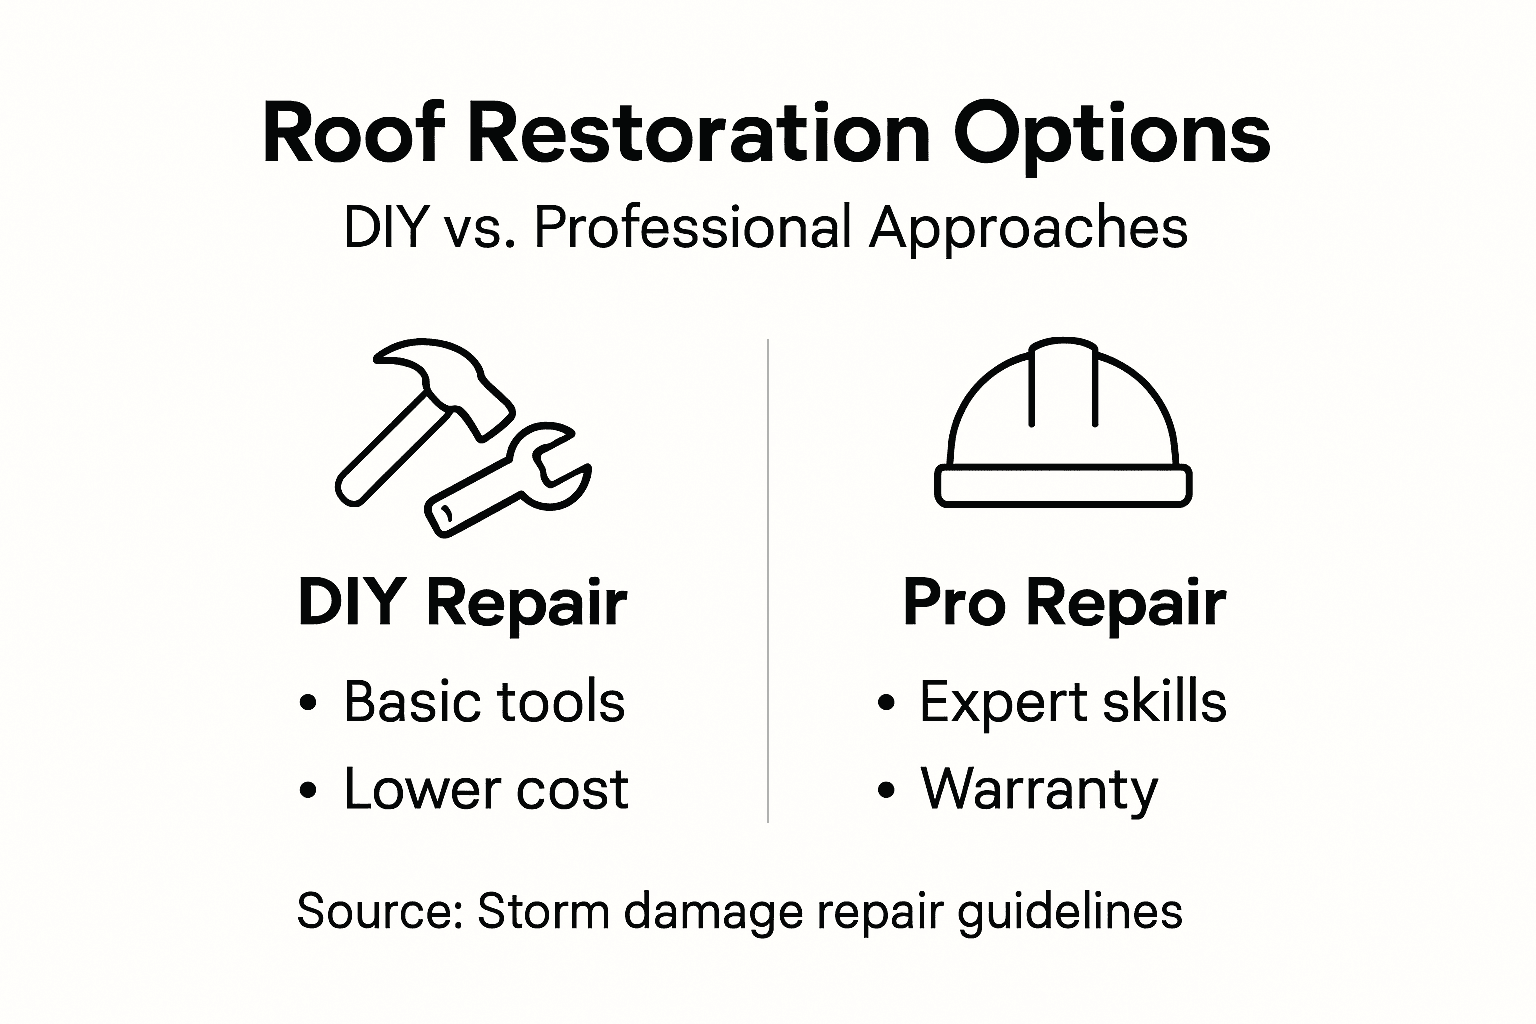
This table highlights key differences between DIY and professional roof repairs:
| Aspect | DIY Roof Repair | Professional Roof Repair |
|---|---|---|
| Cost | Lower up-front, more DIY effort | Higher, but includes labor warranty |
| Safety | Greater personal risk | Managed by trained professionals |
| Quality Control | May vary based on skill level | Consistent, meets building codes |
| Insurance Claims | Requires thorough documentation | Often provides full documentation |
Protect Your Home with Expert Storm Damage Roof Restoration
Storm damage can leave your roof vulnerable and your home at risk of leaks or structural issues. This article outlines key steps such as assessing damage, removing debris, repairing roof decking, and installing new shingles to restore your roof effectively. We understand that tackling these tasks yourself can be overwhelming and sometimes unsafe without professional tools and experience.
At Liberty Roofworks, we specialize in comprehensive storm damage repair and roof restoration services tailored to protect your home and give you peace of mind. Whether you need residential roof repair and replacements or a more extensive restoration after severe weather, our team delivers quality workmanship that meets all local building codes. Do not wait for minor damage to become a costly problem. Contact us today to schedule a free inspection and let our experts restore your roof with precision using trusted materials and proven techniques.
Visit our homepage to learn more about how we can help or call us now to protect your investment before the next storm arrives.
Frequently Asked Questions
What are the first steps in roof restoration after storm damage?
Begin roof restoration by assessing storm damage and preparing your workspace. Carefully examine your roof from ground level for visible damage and ensure you wear safety gear before proceeding to the roof.
How do I safely remove damaged shingles after a storm?
To remove damaged shingles, wear protective gloves and eyewear, then use a pry bar to carefully lift and remove the shingles starting from the top edge. Ensure you sort the debris for recycling and double-check for any remaining nails before cleaning the area.
What should I look for when inspecting roof decking after removing shingles?
Inspect roof decking for signs of water damage, such as soft spots and wood rot, especially around roof edges and valleys. Replace any compromised sections with new materials to maintain structural integrity before laying down new underlayment.
How do I ensure my new shingles are installed correctly?
Install new shingles by staggering the seams and securing them with nails just below the tar strip. Carefully follow any local building code requirements and pay attention to areas around vents and chimneys for a proper seal.
What should I do after completing the roof restoration?
After finishing the restoration, perform a thorough inspection to verify that all shingles are aligned and secured properly. Document your work with photographs for future reference and check for any potential leaks around critical areas such as chimneys and vents.
Can I do roof restoration myself, or should I hire a professional?
You can choose to do roof restoration yourself if you feel comfortable and have the necessary skills. However, if the damage is extensive or complex, hiring a professional may provide a more reliable and safer option.
