Did you know that improper roof preparation is one of the leading causes of membrane failure in commercial buildings? Installing a TPO roof requires careful attention to detail at every stage to avoid costly mistakes and future repairs. With the right steps, you can protect your investment and enjoy years of leak free performance. This guide breaks down the most critical phases of successful TPO membrane installation, helping you achieve a strong and weather resistant roof.
Table of Contents
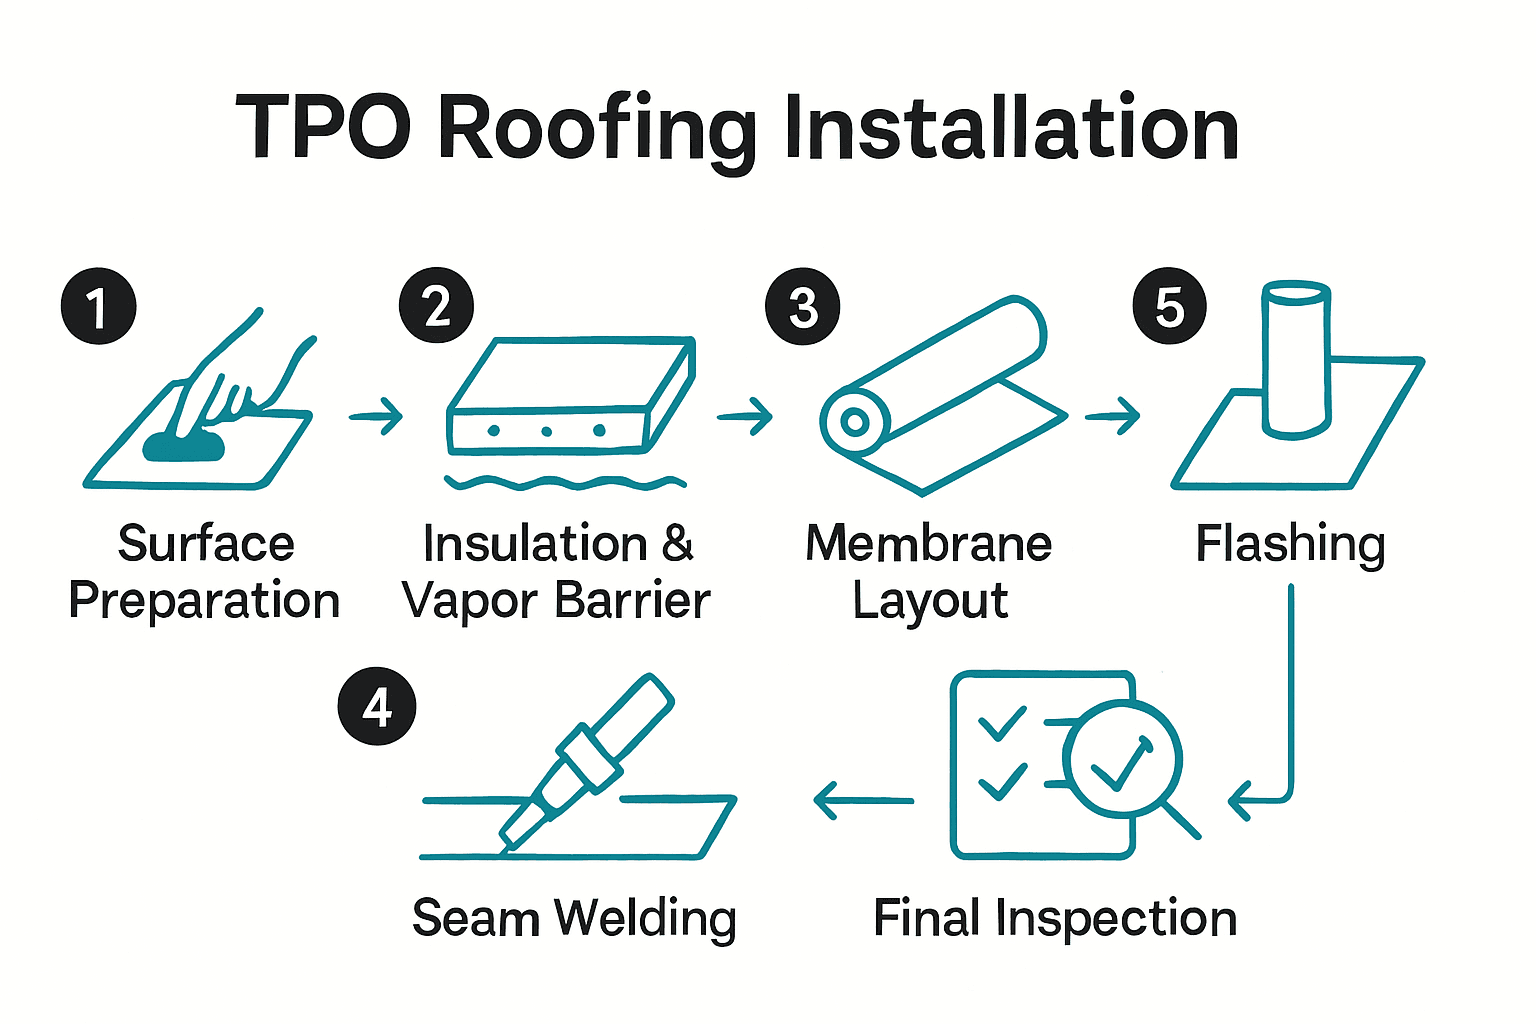
- Step 1: Assess And Prepare The Roof Surface
- Step 2: Install Insulation And Vapor Barrier
- Step 3: Lay Out And Position TPO Membrane
- Step 4: Secure Membrane And Weld Seams
- Step 5: Flash Penetrations And Perimeters
- Step 6: Inspect, Test, And Finalize Installation
Quick Summary
| Key Point | Explanation |
|---|---|
| 1. Prepare Roof Surface Thoroughly | Ensure the roof is clean, dry, and free from damage to prevent installation issues. |
| 2. Properly Install Insulation and Vapor Barrier | Secure insulation boards tightly to support thermal efficiency and prevent moisture problems. |
| 3. Achieve Accurate TPO Membrane Layout | Lay the TPO membrane with correct overlaps for optimal water drainage and performance. |
| 4. Secure Membrane and Weld Seams | Use bonding adhesive and heat welding to prevent leaks and secure the roofing system effectively. |
| 5. Conduct Comprehensive Final Inspection | Inspect seams and membrane for issues ensuring long-term performance and avoiding costly repairs. |
Step 1: Assess and Prepare the Roof Surface
Preparing your roof surface is the critical foundation for successful TPO membrane installation. In this step, you will thoroughly evaluate and ready your roof surface to ensure optimal adhesion and long lasting performance.
According to purchasing.hcpss.org, the initial phase requires ensuring the roof surface is clean, dry, smooth, and completely free from any contamination. Start by conducting a comprehensive surface inspection to identify any existing damage, uneven areas, or potential structural issues that could compromise the TPO membrane installation.
Next, determine the existing roofing material. As roofresource.org recommends, if the current surface is not a membrane, you will need to remove it down to the roof deck. Thoroughly clean the substrate by removing all debris, dust, and potential contaminants. This meticulous preparation creates an ideal foundation for your new TPO roofing system.
Warning: Skipping proper surface preparation can lead to premature membrane failure and costly repairs. Take your time and ensure every inch of the roof surface meets the necessary installation requirements.
Once your surface is fully prepared, you are ready to move forward with the next critical stage of TPO membrane installation.
Step 2: Install Insulation and Vapor Barrier
With your roof surface thoroughly prepared, you will now install the critical insulation and vapor barrier that provides the foundation for your TPO roofing system. This step ensures thermal efficiency and creates a stable base for membrane installation.
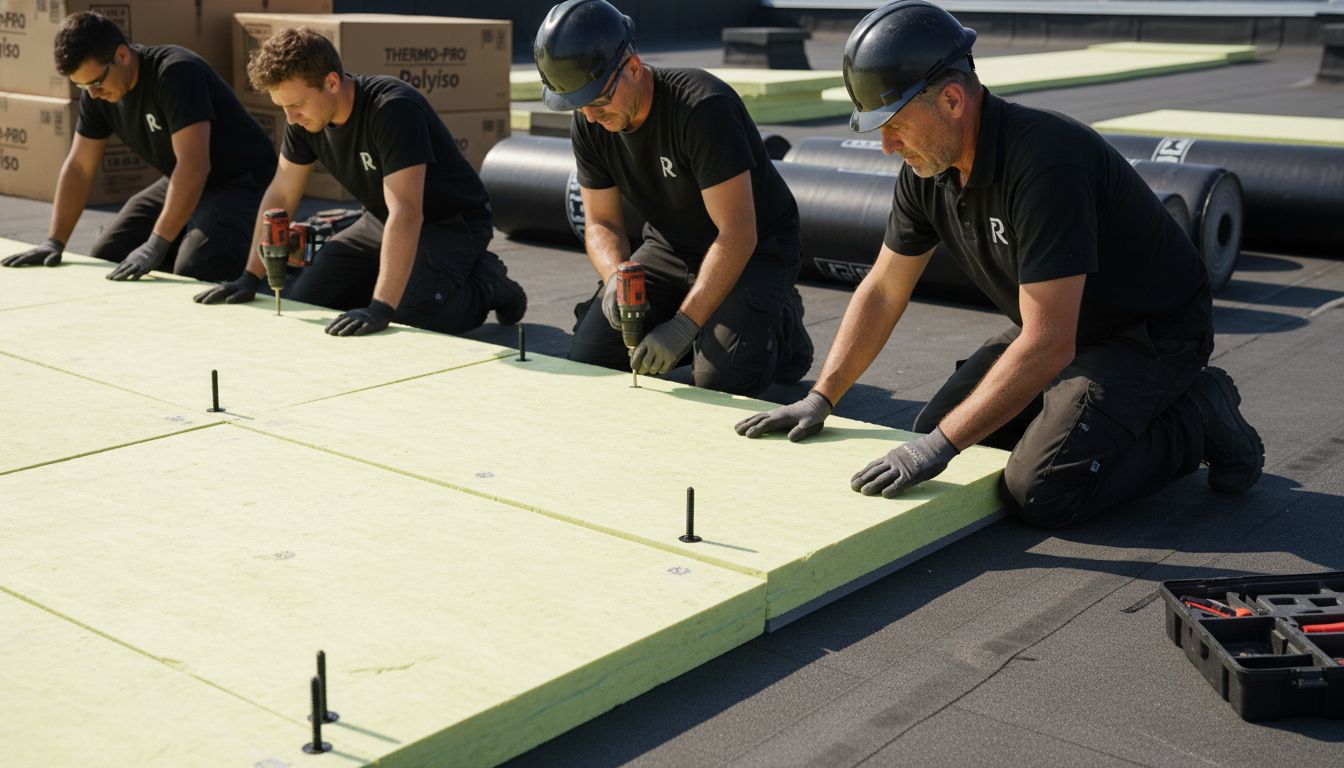
According to oa.mo.gov, the process begins by installing insulation boards over the prepared substrate. These boards must be properly secured, with special attention to filling any gaps exceeding 1/4 inch. When installing the insulation, work methodically across the entire roof surface to ensure complete coverage.
As roofresource.org recommends, carefully cut and place the insulation boards across the surface. Secure each board using specialized screws designed to provide maximum stability. Pay close attention to the board edges and corners, ensuring tight placement and minimal gaps. For the best performance, consider using polyiso roofing materials that offer superior thermal resistance and durability.
Warning: Improper insulation installation can compromise your roof’s thermal performance and lead to potential moisture issues. Take time to ensure each board is correctly positioned and securely fastened.
Once the insulation and vapor barrier are properly installed, you are now ready to move forward with the next critical stage of TPO membrane application.
Step 3: Lay Out and Position TPO Membrane
With the insulation and vapor barrier in place, you are now ready to carefully lay out and position the TPO membrane that will protect your roof for years to come. This critical step requires precision and attention to detail to ensure optimal performance and water resistance.
According to purchasing.hcpss.org, begin by unrolling the TPO membrane and allowing it to relax on the prepared surface. The membrane should be positioned with a minimum 3 inch overlap, ensuring the laps are strategically shingled or run parallel to the roof slope to facilitate effective water drainage. When learning more about the intricacies of this process, our TPO roofing installation process guide can provide additional insights.
As roofresource.org recommends, carefully align the membrane over the insulation boards. Take your time to ensure consistent overlaps that will promote optimal water shedding and prevent potential moisture penetration. Work systematically across the roof surface, smoothing out any wrinkles or air pockets as you go.
Warning: Improper membrane positioning can compromise your roof’s water resistance and lead to premature wear. Always double check your overlap measurements and alignment before proceeding to the next installation stage.
Once the TPO membrane is precisely laid out and positioned, you are now prepared to move forward with the critical seaming and securing process.
Step 4: Secure Membrane and Weld Seams
With the TPO membrane carefully positioned, you are now entering the critical phase of securing the membrane and creating watertight seams that will protect your roof for years to come. This step requires precision and specialized techniques to ensure maximum protection.
According to purchasing.hcpss.org, begin by applying bonding adhesive to both the substrate and the underside of the TPO membrane. Allow the adhesive to become tacky before carefully adhering the membrane, ensuring a firm and consistent bond. After adhesion, use a heat welding technique to create watertight joints between membrane sections. If you need additional guidance on managing roof seams, check out our guide to repairing seams on flat roofs.
As roofresource.org recommends, for adhered TPO roofs, pay special attention to the application of bonding adhesive on the insulation board and each TPO sheet. After applying the adhesive, use a pressure roller to ensure a proper and complete seal. Move systematically across the roof surface, taking care to eliminate any air pockets or potential weak points in the membrane.
Warning: Improper seam welding can lead to water infiltration and significant roof damage. Always use professional grade welding equipment and maintain consistent heat and pressure throughout the seaming process.
Once the membrane is fully secured and seams are welded, you are prepared for the final inspection and finishing touches of your TPO roofing installation.
Step 5: Flash Penetrations and Perimeters
With the TPO membrane secured, you now enter a crucial phase of waterproofing your roof by flashing all penetrations and perimeter areas. This step ensures that every potential entry point for water is meticulously sealed and protected.
According to fcps.edu, the process begins by installing sheet flashings and preformed flashing accessories. Carefully apply bonding adhesive to both the substrate and the flashing sheet, following the manufacturer’s precise instructions. When working around complex roof features, you might want to explore understanding the role of TPO roofing for additional insights into best practices.
As roofresource.org recommends, pay special attention to flashing penetrations such as vents, pipes, and HVAC units. Use unsupported membrane or manufacturer recommended preformed flashing accessories to create watertight seals around inside and outside corners. Work methodically around each penetration, ensuring complete coverage and smooth transitions between the membrane and flashing materials.
Warning: Incomplete or improper flashing can create vulnerable points that compromise your entire roofing system. Take extra time to ensure each penetration and perimeter edge is thoroughly sealed and integrated with the TPO membrane.
Once all penetrations and perimeters are properly flashed, you are now prepared for the final stages of your TPO roofing installation.
Step 6: Inspect, Test, and Finalize Installation
You have reached the final and critical stage of your TPO roofing installation. This phase focuses on comprehensive inspection and verification to ensure your new roof meets the highest standards of quality and performance.
According to fcps.edu, begin by thoroughly cleaning seam areas and carefully heat welding any remaining seams. Firmly roll each seam to guarantee watertight joints. Meticulously examine the entire membrane surface, repairing any tears, voids, or improperly lapped seams that do not meet installation requirements. If you want to understand more about the nuances of TPO roofing, consider reviewing our guide on what TPO roofing is for additional context.
As roofresource.org recommends, conduct a comprehensive inspection focusing on proper membrane adhesion and seam integrity. Check for any areas of potential weakness or improper installation. Pay special attention to penetration points, corners, and perimeter edges. Address any issues immediately to ensure the longevity and optimal performance of your roofing system.
Warning: A rushed final inspection can lead to overlooked problems that may cause significant damage and costly repairs in the future. Take your time and be thorough during this critical final stage.
Once you have completed a comprehensive inspection and addressed any potential issues, your TPO roofing installation is complete and ready to protect your building for years to come.
Ensure Your TPO Roof Lasts with Expert Installation from Liberty Roofworks
Installing a TPO roofing system involves critical steps like precise surface preparation, insulation installation, membrane positioning, and expert seam welding to prevent leaks and enhance durability. Many property owners face challenges such as poor adhesion, improper flashing, or weak seams that lead to costly repairs and decreased roof lifespan. Understanding these technical steps highlights the importance of trusting professionals who pay attention to every detail.
At Liberty Roofworks, we bring expertise in each stage of your roof’s installation and repair. Whether you need new TPO roofing or comprehensive roof maintenance, our skilled team in Charlotte, NC delivers long-lasting results you can count on. From thorough inspections to flawless seam welding and flashing, we go the extra mile to protect your investment. Take the first step toward a worry-free roof by contacting us today at Liberty Roofworks. Explore our TPO Roofing & Repair services and let us help you achieve a roofing system built to endure.
Frequently Asked Questions
What are the initial steps to prepare for TPO roofing installation?
To begin TPO roofing installation, assess and prepare the roof surface by ensuring it is clean, dry, smooth, and free from any contaminants. Conduct a thorough inspection to identify damage or structural issues and clean the substrate thoroughly before proceeding with insulation installation.
How do I install insulation and a vapor barrier for TPO roofing?
Install insulation boards on the prepared substrate, ensuring they are properly secured and free from gaps exceeding 1/4 inch. Work methodically across the roof to achieve complete coverage and consider using durable materials for optimal thermal resistance.
What should I check when laying out the TPO membrane?
When laying out the TPO membrane, ensure it is positioned with a minimum 3-inch overlap and aligned correctly over the insulation boards. Smooth out any wrinkles and double-check the overlap measurements to promote effective water drainage and prevent moisture penetration.
How can I ensure the seams of the TPO membrane are watertight?
To secure the seams of the TPO membrane, apply bonding adhesive to both the substrate and the membrane, then use heat welding techniques to create watertight joints. Systematically work across the roof surface while using a pressure roller to eliminate air pockets and ensure a complete seal.
What is the process for flashing penetrations and perimeters on a TPO roof?
Flashing around penetrations and perimeter areas involves applying bonding adhesive to both the substrate and the flashing material. Use preformed flashing accessories where needed to create watertight seals around vents, pipes, and HVAC units, ensuring complete coverage and smooth transitions.
How do I conduct a final inspection of the TPO roofing installation?
Perform a comprehensive inspection by thoroughly cleaning and inspecting seam areas, rolling seams for watertight integrity, and checking for any tears or improperly lapped seams. Address any issues before finalizing the installation to ensure your roof’s durability and performance over time.
