Did you know that over 40 percent of commercial roof leaks start with minor damage that goes unnoticed? Small issues can quickly lead to major disruptions, costing businesses thousands in repairs and lost productivity. Understanding the right steps for commercial roof repair can help you catch problems early, protect your investment, and keep your building safe from the elements.
Quick Summary
| Key Point | Explanation |
|---|---|
| 1. Thoroughly assess roof damage | Conduct a comprehensive visual inspection of roof surfaces to identify issues early, preventing costly repairs later. |
| 2. Prioritize workplace safety | Implement OSHA guidelines, ensuring all safety measures and personal protective equipment are in place before starting repairs. |
| 3. Document all findings carefully | Take photographs and detailed notes of any damage found during inspections to guide repairs and assist in future maintenance. |
| 4. Use high-quality repair materials | Select and install durable materials compatible with your existing roof to effectively address vulnerabilities and extend lifespan. |
| 5. Perform a post-repair inspection | Conduct a thorough inspection after repairs to ensure quality, adherence to standards, and to document the success of your restoration efforts. |
Table of Contents
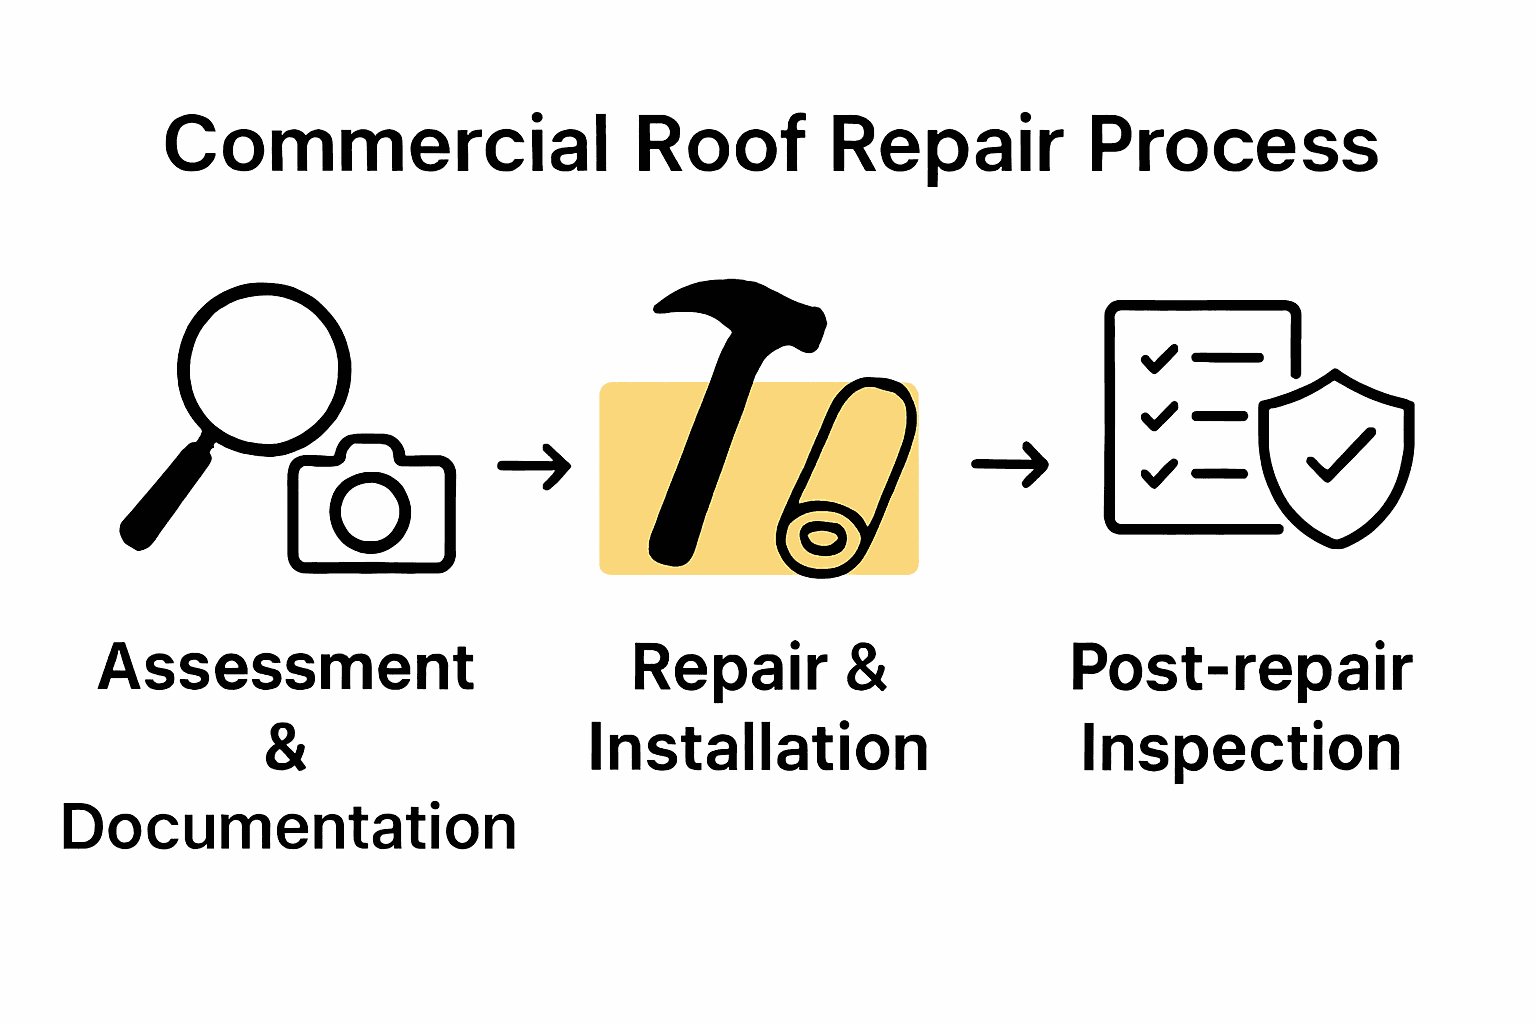
- Step 1: Assess Roof Damage Thoroughly
- Step 2: Prepare Work Area and Safety Measures
- Step 3: Remove Damaged Roofing Materials
- Step 4: Repair Structural and Surface Issues
- Step 5: Install New Roofing Components
- Step 6: Inspect Repairs and Ensure Quality
Step 1: Assess Roof Damage Thoroughly
Your commercial roof is like a protective shield for your business. Understanding its condition requires a systematic and thorough assessment to catch potential problems before they become expensive repairs.
Start by scheduling a comprehensive visual inspection of your entire roof surface. Walk carefully across the roof and look for telltale signs of wear and damage. According to experts from All For One Roofing, you want to pay special attention to several key areas:
- Membrane integrity: Check for any tears or punctures in the roofing material
- Seam conditions: Inspect where different roofing sections connect
- Flashing around edges and penetrations: Look for separation or cracking
- Drainage systems: Ensure drains and scuppers are clear and functioning
Specifically watch for signs like blistering on the roof surface, small punctures, or areas where water might pool. As research indicates, early detection is critical. A small issue today could become a major structural problem tomorrow.
Here’s a summary of key roof damage signs to watch for during your assessment:
| Area Inspected | Common Issues | What to Look For |
|---|---|---|
| Membrane | Tears Punctures |
Damaged or loose sections |
| Seams | Separation Gap formation |
Cracks where sections join |
| Flashing | Cracking Separation |
Gaps around edges or penetrations |
| Drainage | Clogs Ponding |
Blocked drains or standing water |
Pro Tip: Never attempt a roof assessment alone if you are not trained. Safety should always come first.
Your next step will be documenting everything you find. Take clear photographs of any damage and create a detailed written report. This documentation will be crucial when planning repairs and communicating with roofing professionals.
Ready to dive deeper? Learn more about professional roof inspections to understand what experts look for during a comprehensive assessment.
Step 2: Prepare Work Area and Safety Measures
Before diving into commercial roof repair, protecting yourself and your team is not just important its mandatory. According to OSHA guidelines, proper safety preparation is critical when working on elevated surfaces.
Start by thoroughly assessing the work area. According to Roofing United, your safety preparation should include comprehensive equipment and environmental checks. This means:
- Install commercial grade guardrails around unprotected roof edges
- Check all personal fall arrest systems including harnesses and anchors
- Inspect for potential hazards like weak structural points or hidden roof openings
- Verify all personal protective equipment (PPE) is available and functional
Personal protective gear is your first line of defense. Ensure every team member has:
- Hard hats to protect against falling objects
- Safety glasses for eye protection
- Steel toed boots with excellent grip
- Heavy duty work gloves
- Fall protection harnesses
Pro Tip: Never compromise on safety equipment. One missed precaution could result in serious injury.
Before anyone steps onto the roof, conduct a mandatory safety briefing. Walk through potential risks, emergency procedures, and confirm everyone understands their role in maintaining a safe work environment.
Learn more about professional roofing safety practices to ensure your team stays protected during commercial roof repairs.
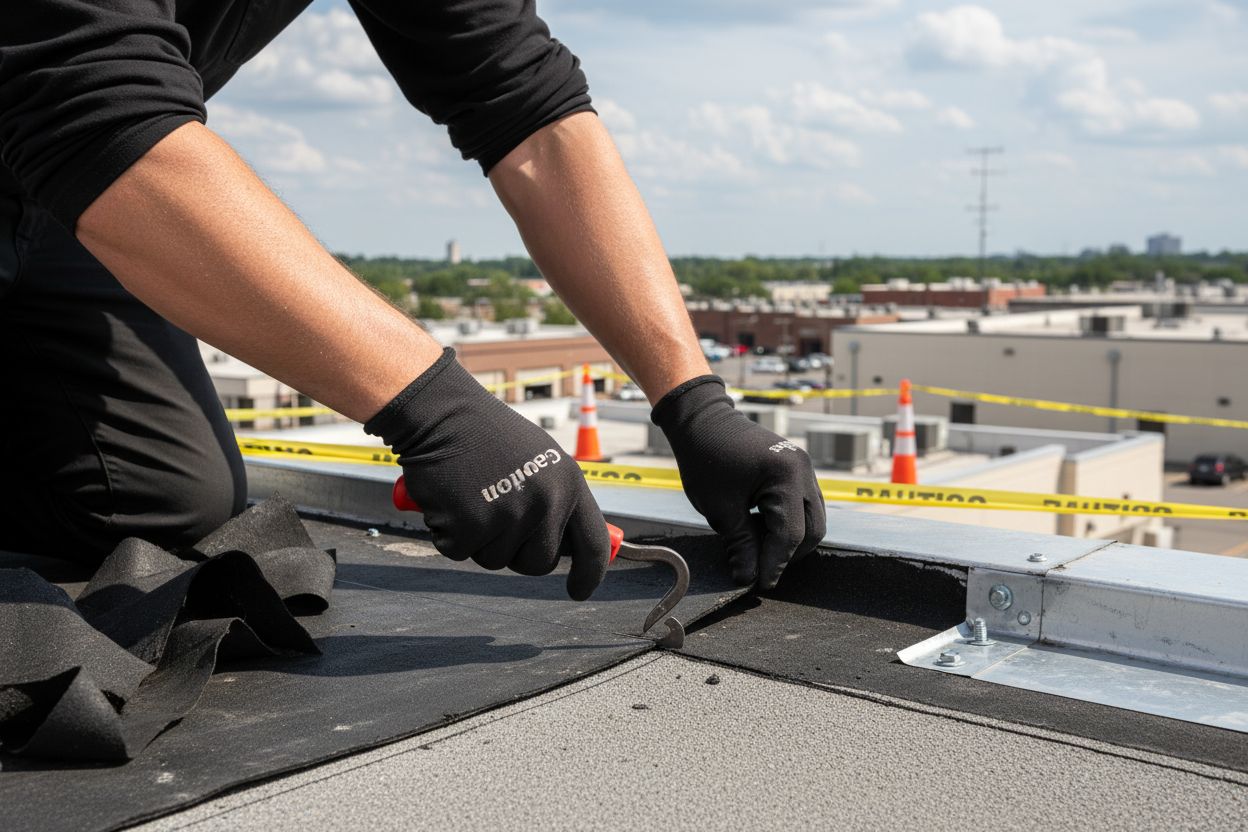
Step 3: Remove Damaged Roofing Materials
Removing damaged roofing materials is a precise process that requires careful attention to detail and systematic approach. According to research from American Weather Star, identifying and extracting compromised components is crucial before installing new roofing materials.
Begin by carefully cutting out and removing sections with visible damage. Focus on areas showing clear signs of deterioration such as split seams, punctures, or degraded membrane sections. Use specialized roofing cutting tools designed to minimize additional damage to surrounding areas.
Pay special attention to:
- Areas around rooftop equipment and penetrations
- Sections with failed flashing
- Locations showing sealant cracking
- Zones with poor drainage or water ponding
According to All For One Roofing, verifying seal integrity involves meticulously inspecting and removing failing materials around roof penetrations. This means carefully detaching old caulking and worn flashing to prepare for fresh installation.
Pro Tip: Always wear protective equipment and work methodically to prevent creating additional damage during material removal.
Work slowly and systematically. Remove damaged materials in manageable sections and maintain a clean workspace. Document each area you remove with photographs for future reference and potential insurance claims.
Learn more about identifying roof damage to understand how professionals assess and remove compromised roofing materials.
Step 4: Repair Structural and Surface Issues
Repairing structural and surface issues is the critical phase where you transform a damaged roof into a resilient protective system. According to American Weather Star, addressing aging materials and compromised components is essential for long term roof performance.
Start by focusing on key vulnerability areas. Inspect and repair sealant around roof penetrations such as vents, pipes, and HVAC units. These areas are frequent sources of potential leaks and structural weakness. Use high quality waterproof sealants that create a robust barrier against moisture intrusion.
Your repair strategy should include:
- Reinforcing metal flashings around roof edges
- Applying specialized roof coatings
- Addressing drainage problems
- Sealing potential leak points
According to The Roof Technician, weatherproofing involves more than just patching holes. It requires strategic application of protective coatings that extend membrane life and prevent future corrosion. Choose products specifically designed for commercial roofing materials to ensure maximum compatibility and longevity.
Pro Tip: Always select repair materials matching your original roof membrane type to prevent chemical incompatibility.
Work methodically and ensure each repair area is completely sealed and smooth. Uneven repairs can create future water pooling or additional stress points on your roof surface.
Learn more about professional flat roof repair techniques to understand comprehensive restoration strategies for commercial roofing systems.
Step 5: Install New Roofing Components
Installing new roofing components is your opportunity to transform a damaged roof into a robust protective system. According to American Weather Star, strategic component replacement can significantly extend your roof’s lifespan and prevent future damage.
Begin by selecting high quality replacement materials that match your existing roof membrane. Focus on installing durable components that enhance overall roof performance. These might include:
- Robust flashing around roof penetrations
- Energy efficient roof coatings
- Protective walkway pads
- Updated sealants with superior moisture resistance
The Roof Technician suggests considering energy efficient options during installation. Cool roof coatings or reflective materials can reduce your building’s energy consumption while providing excellent protection. Think of these components as an investment that pays dividends through improved performance and lower operational costs.
Pro Tip: Always confirm material compatibility before installation to prevent potential chemical reactions or premature degradation.
Pay careful attention to manufacturer specifications during installation. Precise application ensures maximum effectiveness and prevents future vulnerabilities. Take your time and work methodically to create a seamless protective layer.
Learn more about comprehensive roof installation techniques to understand the nuanced approach professional roofers take when replacing critical roofing components.
Step 6: Inspect Repairs and Ensure Quality
The final step in your commercial roof repair journey is a thorough quality inspection that validates all your hard work. According to The Roof Technician, timely post repair assessments are critical to confirming the effectiveness of your restoration efforts.
Begin with a comprehensive visual examination of the entire repaired area. Walk the roof systematically and look for any signs of inconsistency or potential future problems. Pay special attention to:
- Seam integrity around new components
- Proper drainage through scuppers and drains
- Consistent application of sealants
- Flashing alignment and attachment
- Overall surface smoothness
All For One Roofing emphasizes the importance of documenting your inspection. Take clear photographs of each repaired section and create a detailed written report. This documentation serves multiple purposes including tracking repair history and providing future maintenance references.
Pro Tip: Use a moisture meter to check for any hidden water infiltration that visual inspection might miss.
Your goal is to ensure that every repair meets professional standards and building code requirements. Look for clean lines, tight seals, and uniform surfaces that indicate quality workmanship.
Learn more about professional roof inspection techniques to understand the nuanced approach experts use when evaluating commercial roof repairs.
Get Lasting Results with Professional Commercial Roof Repair
Addressing commercial roof issues can feel overwhelming, especially when each missed sign or skipped safety step puts your investment at risk. The article you just read highlights how critical it is to assess damage thoroughly, use proper safety measures, and apply repair materials that truly match your roof’s unique structure. If you are worried about costly leaks, hidden moisture, or want to avoid structural damage, you deserve solutions that keep your business protected long-term.
At Liberty Roofworks, we believe your peace of mind comes from knowing each step is performed precisely the way it should be. Our team specializes in commercial roof repair and uses the latest industry practices to catch minor problems before they become expensive emergencies. Ready to secure your property and guarantee a weatherproof solution? Visit Liberty Roofworks now to schedule your inspection or learn more about our expert process. Act today and let us deliver long-lasting results that protect your business and your peace of mind.
Frequently Asked Questions
What are the initial steps to assess roof damage during commercial roof repair?
Assess roof damage by conducting a thorough visual inspection focusing on key areas like membrane integrity, seams, flashing, and drainage systems. Document any findings with photographs and notes to plan effective repairs.
How can I ensure safety while preparing for commercial roof repairs?
Ensure safety by installing guardrails around roof edges, checking personal protective equipment, and conducting a safety briefing with all team members about potential risks. Always prioritize safety gear to prevent injuries during the repair process.
What materials should be removed when repairing a commercial roof?
Remove damaged roofing materials such as split seams, punctures, and degraded membrane sections to ensure a solid foundation for repairs. Work methodically to prevent additional damage and document each removed area.
How do I effectively repair structural and surface issues on a commercial roof?
Effectively repair issues by inspecting and sealing around roof penetrations with waterproof sealants while reinforcing metal flashings. Address drainage problems and apply protective coatings to extend the lifespan of your roof.
What steps should I follow to install new roofing components correctly?
Select high-quality replacement materials that match the existing roofing system and install them according to manufacturer specifications. Ensure all components, such as flashing and sealants, are precisely applied to create a durable and protective layer.
How do I conduct a final inspection after repairs to ensure quality?
Conduct a final inspection by visually examining the repaired areas, checking for seam integrity, proper drainage, and smooth surfaces. Document your findings with photographs and written reports to track repair history and establish maintenance references.
