Replacing roof shingles might sound like a huge home project, but missing or damaged shingles can open the door to leaks that cost homeowners an average of $3,000 in water damage repairs every year. It is easy to imagine that shingle replacement is all about swinging hammers and throwing up new tiles, right? The real secret is that the most successful roofing projects start long before a single shingle comes off—with inspection, precision planning, and a few tricks that most DIY guides completely skip over.
Table of Contents
- Step 1: Inspect Your Roof For Damage
- Step 2: Gather Necessary Tools And Materials
- Step 3: Remove Old Shingles Carefully
- Step 4: Install New Shingles Efficiently
- Step 5: Seal And Finish For Protection
- Step 6: Conduct Final Inspection And Walkthrough
Quick Summary
| Key Point | Explanation |
|---|---|
| 1. Conduct a thorough roof inspection. | Carefully assess your roof’s condition to identify damage before planning replacement, preventing larger structural issues. |
| 2. Gather proper tools and materials. | Prepare safety gear and roofing tools in advance to ensure an efficient and safe shingle replacement process. |
| 3. Remove old shingles methodically. | Work from the roof peak down in small sections, inspecting for underlying damage to facilitate proper installation of new shingles. |
| 4. Install new shingles with precision. | Follow a systematic approach to ensure proper alignment and sealing, maximizing roof durability and effectiveness against weather. |
| 5. Perform a thorough final inspection. | Check the new roof for proper installation and sealing to confirm it provides adequate protection against moisture and leaks. |
Step 1: Inspect Your Roof for Damage
Before launching into a full shingle replacement project, you need a comprehensive roof damage assessment. This crucial first step determines the extent of your roofing issues and helps you understand whether you require minor repairs or a complete replacement. A thorough roof inspection involves carefully examining every aspect of your roof’s condition, identifying potential problems before they escalate into costly structural damage.
Start by conducting a visual inspection from ground level, using binoculars for a closer view. Look for obvious signs of shingle damage such as curling edges, missing shingles, or visible cracks. Pay special attention to areas around chimneys, vents, and skylights where water intrusion is most likely. Discoloration or dark streaks can indicate potential moisture problems or algae growth that might compromise your roof’s integrity.
For a more detailed assessment, learn more about our professional roof inspection process. If you feel comfortable and can safely access your roof, use a sturdy ladder and wear non-slip shoes. Check for soft spots that might indicate underlying wood rot or water damage. Examine shingle granules in your gutters or around your home’s foundation – excessive granule loss suggests significant shingle deterioration.
Key warning signs that demand immediate attention include:
- Widespread shingle damage covering more than 30% of the roof surface
- Multiple layers of existing shingles with visible structural deformation
- Significant water stains on interior ceilings or walls
- Visible sagging or structural irregularities in the roof deck
Documenting your findings with clear photographs helps track damage progression and provides valuable evidence if you need to file an insurance claim. Remember that professional roof inspections can uncover hidden issues that might not be visible to an untrained eye. While a DIY inspection is helpful, scheduling a professional assessment ensures a comprehensive evaluation of your roof’s condition and potential replacement needs.
Step 2: Gather Necessary Tools and Materials
After completing your roof inspection, the next critical step in your shingle replacement journey is assembling the right tools and materials. Proper preparation prevents unexpected delays and ensures a smooth, efficient replacement process. Having everything ready beforehand transforms what could be a complicated project into a manageable task.
Your primary equipment list should include safety gear as the top priority. Invest in high-quality protective equipment such as non-slip roofing shoes, a sturdy safety harness, work gloves, and safety glasses. These items protect you from potential falls and debris while working at height. If you are uncomfortable with heights or lack proper safety training, check out our professional roof replacement services to ensure a safe and expert installation.
For the actual shingle replacement, you will need specialized roofing tools. A roofing hammer, pry bar, utility knife, and chalk line are essential. Choose a hammer specifically designed for roofing with a magnetic nail holder to make the process more efficient. Include a ladder stabilizer to ensure safe roof access, and consider renting or purchasing a pneumatic nail gun to speed up the installation process. A roofing nail belt can help keep your tools organized and easily accessible while working.
Materials required for a comprehensive shingle replacement include:
- Replacement asphalt shingles matching your existing roof color and style
- Roofing nails (typically 1¼ inch galvanized roofing nails)
- Roofing underlayment or felt paper
- Drip edge flashing
- Roofing cement or sealant
- Protective tarps to cover landscaping and catch debris
Calculate the number of shingles needed by measuring your roof’s square footage and adding an extra 10-15% for cuts, waste, and potential replacements. Purchase materials from a reputable supplier and ensure they are compatible with your existing roof structure. Store materials in a dry, flat area protected from direct sunlight and moisture to maintain their quality before installation. Taking time to gather and organize your tools and materials sets the foundation for a successful shingle replacement project.
Here is a concise reference table summarizing the essential tools and materials required for a successful shingle replacement project, along with their primary purpose and important notes.
| Item | Purpose | Notes |
|---|---|---|
| Non-slip roofing shoes | Safety and traction while on the roof | Reduces risk of falls |
| Safety harness & work gloves | Personal protection during installation | Mandatory for safe roof work |
| Safety glasses | Eye protection from debris | Wear throughout the project |
| Roofing hammer/pry bar | Removing old shingles and driving nails | Roofing hammer with magnetic tip |
| Utility knife & chalk line | Cutting shingles, ensuring straight rows | Replace blades as needed |
| Ladder stabilizer | Stable and secure roof access | Prevents slips and ladder movement |
| Asphalt shingles | Main roofing material | Match color and style to existing |
| Roofing nails | Securing shingles and underlayment | 1¼ inch galvanized recommended |
| Roofing underlayment | Moisture barrier beneath shingles | Overlap by at least 4 inches |
| Drip edge flashing | Directs water away from roof edges | Install along perimeter |
| Roofing cement/sealant | Seals vulnerable areas and nail heads | Use caulking gun for precision |
| Protective tarps | Protects landscaping and collects debris | Cover before removal process |
Step 3: Remove Old Shingles Carefully
Removing old shingles is a delicate process that requires precision, patience, and careful attention to detail. This critical step sets the foundation for a successful roof replacement and demands methodical execution. Your goal is to strip away the existing shingles without causing additional damage to the underlying roof structure.
Begin by creating a systematic removal strategy, working from the roof’s peak downward in small, manageable sections. Learn more about proper shingle removal techniques to ensure you protect the roof deck. Use a roofing shovel or specialized shingle removal tool to gently lift and pry shingles, starting at the ridge and moving downslope. Wear protective gloves and safety glasses to shield yourself from sharp edges and potential debris. Move slowly and deliberately, paying close attention to how the shingles are connected and removing them in complete sections whenever possible.
As you remove shingles, inspect the underlying roof deck for signs of water damage, rot, or structural weakness. Look for soft spots, discoloration, or areas where the wood appears compromised. These sections will require additional repair before new shingles can be installed. A thorough inspection at this stage can prevent future leaks and ensure the longevity of your new roof.
Critical considerations during shingle removal include:
- Protecting landscaping and surrounding areas with heavy-duty tarps
- Maintaining a clean work area to prevent potential slip hazards
- Checking local regulations regarding roof debris disposal
- Keeping a sturdy ladder positioned for safe roof access
Professional roofers recommend working in small sections and immediately covering exposed areas to prevent water infiltration. If you encounter complex damage or feel uncertain about the removal process, consider consulting a professional roofing team. The goal is not just removing old shingles but preparing a solid, clean foundation for your new roofing system. Take your time, work carefully, and prioritize both safety and thorough preparation.
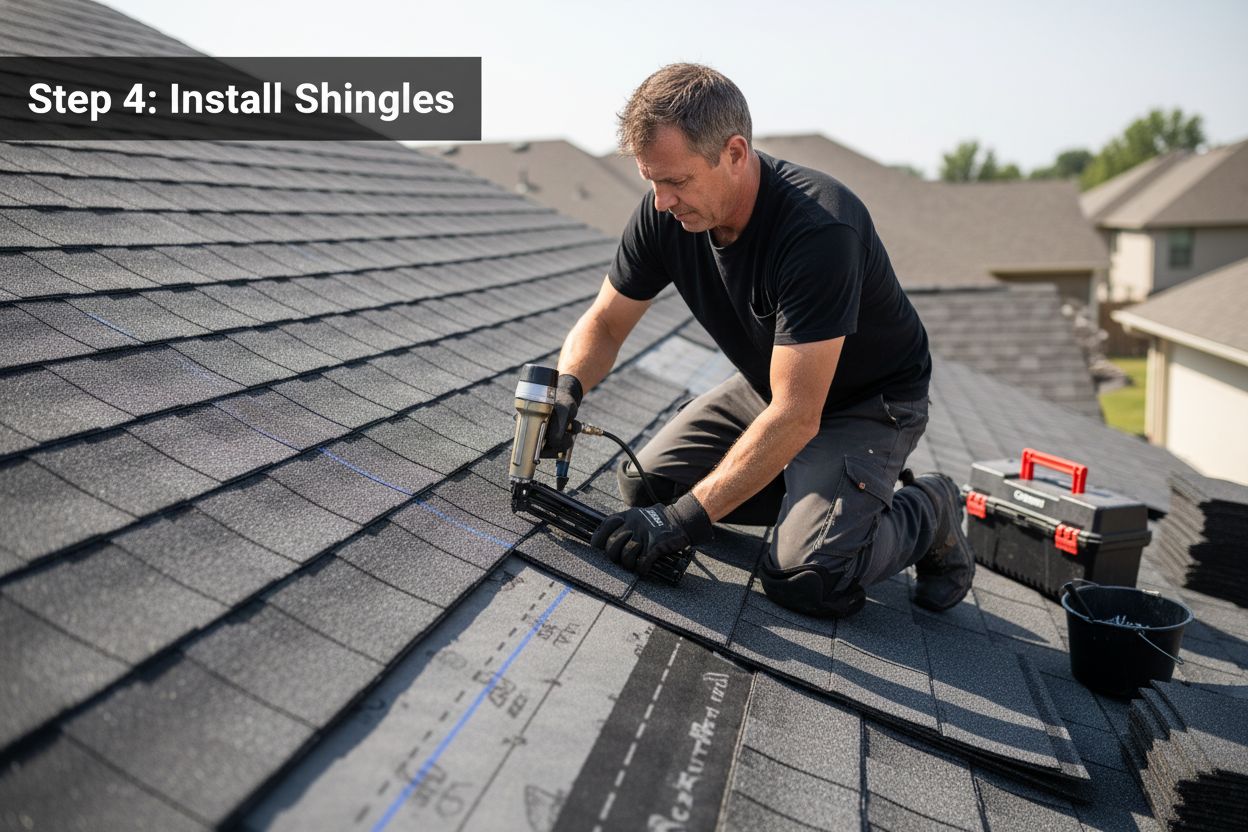
Step 4: Install New Shingles Efficiently
Installing new shingles represents the most critical phase of your roof replacement project, transforming your preparation and hard work into a durable, protective roofing system. This step demands precision, patience, and a systematic approach to ensure a watertight and long lasting installation. Explore our comprehensive roof installation guide for additional professional insights into this complex process.
Begin by installing a high-quality roofing underlayment along the entire roof deck, which serves as a critical moisture barrier. Start at the bottom edge of the roof and work upward, ensuring each row overlaps the previous one by at least 4 inches. Secure the underlayment with roofing nails positioned every 12 to 16 inches, creating a smooth, consistent base for your shingles. Next, install drip edge flashing along the roof’s perimeter to direct water away from the roof structure and prevent potential water damage.
Shingle installation requires a methodical approach. Begin at the roof’s bottom edge and work horizontally, maintaining consistent alignment and spacing. Each row of shingles should overlap the previous row by approximately 5 inches, creating a cascading water-shedding surface. Use a chalk line to ensure straight, even rows and prevent potential aesthetic and functional irregularities. Nail each shingle precisely, typically using four to six nails per shingle, positioned in the designated nail strip to maintain manufacturer warranty requirements.
Key considerations during shingle installation include:
- Maintaining consistent nail placement and depth
- Checking manufacturer specifications for specific installation requirements
- Ensuring proper ventilation around roof edges and peaks
- Cutting shingles carefully to fit around roof protrusions
Pay special attention to areas around chimneys, vents, and skylights, as these represent potential water intrusion points. Use roofing cement to seal edges and create additional water resistance. Work slowly and carefully, prioritizing accuracy over speed. A well-installed shingle roof can protect your home for decades, making each careful placement a long-term investment in your property’s structural integrity.
Step 5: Seal and Finish for Protection
The final stage of shingle replacement focuses on creating a comprehensive protective barrier that ensures your roof’s durability and performance. Sealing and finishing transforms individual shingles into a cohesive, water-resistant system that shields your home from environmental challenges. Explore our professional sealing techniques to understand the nuanced approach professionals take during this critical phase.
Begin by carefully inspecting all shingle edges, paying special attention to areas around roof penetrations like chimneys, vents, and skylights. Apply roofing cement or specialized sealant along these critical transition zones, creating an additional moisture barrier that prevents water infiltration. Use a caulking gun for precise application, ensuring a smooth, consistent seal that fills potential microscopic gaps between shingles and surrounding structures. Work methodically, applying sealant in thin, even layers to avoid bulky or uneven applications that could compromise water resistance.
Next, focus on reinforcing the roof’s most vulnerable points. Apply additional roofing cement along the edges of each shingle row, particularly at the roof’s perimeter and along ridgelines. This extra layer of protection helps secure shingles against wind uplift and prevents potential moisture penetration. Use a putty knife or specialized roofing tool to smooth the sealant, creating a clean, professional finish that enhances both the roof’s aesthetic and functional qualities.
Critical finishing steps include:
- Cleaning all work surfaces and removing excess sealant
- Checking for any loose or improperly positioned shingles
- Ensuring complete coverage of nail heads with sealant
- Verifying proper drainage along roof edges
Complete your project by conducting a thorough visual inspection from multiple angles. Look for any inconsistencies in shingle alignment, sealant application, or potential areas of concern. A well-sealed roof not only protects your home from water damage but also enhances its overall structural integrity and aesthetic appeal. Take your time during this final stage, as meticulous attention to detail now can prevent costly repairs in the future.
Step 6: Conduct Final Inspection and Walkthrough
The final inspection represents the critical moment of validation for your entire shingle replacement project, transforming your hard work into a comprehensive roofing solution. This comprehensive evaluation ensures every aspect of your new roof meets professional standards of quality, functionality, and durability. Learn more about professional roof inspection techniques to understand the meticulous process professionals follow.
Begin your walkthrough by systematically examining the roof from multiple vantage points. Carefully walk the roof’s surface, checking for any uneven shingle placement, protruding nails, or areas that seem improperly sealed. Use a critical eye to assess the overall alignment, ensuring each shingle row maintains a consistent, straight line. Pay special attention to areas around roof penetrations like chimneys, vents, and skylights, as these represent potential weak points in your roofing system. Gently press on shingles to confirm they are securely fastened and demonstrate no unexpected movement or flexibility.
Transition your inspection to the interior of your home, focusing on detecting any potential signs of improper installation. According to building experts, checking attic spaces for water stains, moisture traces, or unexpected light penetration can reveal hidden installation issues. Look for any evidence of water infiltration, unusual drafts, or changes in insulation condition. Use a bright flashlight to illuminate potential problem areas, examining the underside of the roof deck for any signs of moisture, rot, or structural compromise.
Critical inspection checkpoints include:
- Verifying complete coverage and proper overlap of all shingles
- Checking sealant application around roof edges and penetrations
- Ensuring no exposed nail heads or unsealed joints
- Confirming proper gutter alignment and drainage
Document your findings with detailed photographs and notes, creating a comprehensive record of your roof’s condition. If you identify any concerns during this walkthrough, address them immediately or consult a professional roofing contractor. A thorough final inspection not only validates your hard work but also provides peace of mind, knowing your home is protected by a meticulously installed roofing system.
This checklist table summarizes the critical inspection checkpoints to review during your final walkthrough, helping you verify the quality and completeness of your shingle replacement project.
| Inspection Checkpoint | What to Look For | Why It Matters |
|---|---|---|
| Shingle coverage & overlap | Full, even layer; proper overlap | Prevents water infiltration |
| Sealant around edges & penetrations | Continuous, uniform sealant application | Blocks leaks at vulnerable locations |
| Nail heads & joints | No exposed nails or open joints | Reduces risk of moisture intrusion |
| Gutter alignment & drainage | Correct pitch; clear pathways | Ensures effective roof water drainage |
| Roof surface alignment | Straight shingle rows, no protrusions | Maintains structural integrity |
| Fastening of shingles | Securely attached; no loose edges | Protects against wind and weather |
| Interior signs of leaks | No water stains, drafts, or light | Detects hidden installation issues |
Ready to Secure Your Home with Expert Shingle Replacement?
Tackling a complete shingle replacement means more than just following a checklist. You want to protect your home from water damage, and ensure everything from underlayment to the final shingle is installed right. If you worry about hidden roof flaws after storms, or simply want lasting results that keep your family safe, you deserve a specialist who gets every detail right. At Liberty Roofworks, our team understands what it takes to spot hard-to-find structural issues, install new shingles efficiently, and seal every vulnerable area for true peace of mind. Our approach matches the trusted steps outlined in our Complete Shingle Replacement Guide for Homeowners, with all work handled by experienced professionals rather than DIY risks.
Stop wondering if you missed something during your shingle replacement. Get the job done right the first time, with premium materials and proven expertise. Explore our full range of roof replacement services and let us safeguard your home from leaks and costly repairs. If you want a reliable local roofing expert in Charlotte, act now by visiting Liberty Roofworks. Request your professional inspection or roof replacement quote today and experience total satisfaction at every step.
Frequently Asked Questions
What are the signs that I need to replace my roof shingles?
You should consider replacing your roof shingles if you notice widespread shingle damage, such as missing shingles, curling edges, or significant water stains on interior ceilings. Additionally, if over 30% of your shingles are damaged or you see sagging in the roof deck, it’s time for a replacement.
How do I safely remove old shingles without damaging the roof deck?
To safely remove old shingles, start from the peak of the roof and work down in small sections. Use a roofing shovel or pry bar to carefully lift the shingles while wearing protective gear. Inspect the underlying roof deck for signs of water damage as you go to ensure a solid base for new shingles.
What tools and materials do I need for a shingle replacement project?
You will need safety gear like non-slip roofing shoes, gloves, and safety glasses. For the installation, gather a roofing hammer, pry bar, utility knife, chalk line, and roofing nails. Materials include replacement asphalt shingles, underlayment, drip edge flashing, and roofing cement.
How can I ensure my new shingles are installed correctly?
To ensure correct installation, begin with a high-quality underlayment and follow a systematic approach. Maintain consistent alignment and spacing while overlapping shingles as directed and securing them with the correct number of nails. Inspect your work for proper sealing around edges and roof penetrations after installation.
