A new roof is one of the biggest investments for any american homeowner, yet nearly 35 percent of roofs in the United States are replaced prematurely due to avoidable errors. Knowing where to start saves time, money, and countless headaches throughout your project. This step by step guide walks you through each essential phase, offering clear tips and practical advice so you finish with a roof built to last.
Table of Contents
- Step 1: Assess Roof Condition And Gather Materials
- Step 2: Remove Old Roofing And Prepare Surface
- Step 3: Install Underlayment And Flashing
- Step 4: Lay And Secure New Roofing Material
- Step 5: Inspect Installation And Ensure Quality
Quick Summary
| Main Insight | Detailed Explanation |
|---|---|
| 1. Assess Roof Condition | Conduct a thorough roof inspection to identify any damage and necessary repairs before installation. |
| 2. Gather Installation Materials | Create a checklist of all required materials, including roofing shingles, underlayment, and safety equipment, adding 10-15% more for waste. |
| 3. Safe Removal Practices | Use enclosed trash chutes for debris disposal and never expose more decking than can be covered within the day to prevent water damage. |
| 4. Proper Underlayment Installation | Install underlayment with overlapping rows to ensure a watertight seal, paying attention to vulnerable areas like valleys and edges. |
| 5. Thorough Post-Installation Inspection | Check for proper alignment and sealing around roof penetrations, and consider a professional inspection within 30 days for peace of mind. |
Step 1: Assess Roof Condition and Gather Materials
Before launching into a new roof installation project, thoroughly evaluating your current roof and collecting the right materials will set you up for success. This critical first step ensures you understand the scope of work and have everything necessary to complete the project efficiently.
Start by conducting a comprehensive roof inspection. According to GSA, it is “essential to examine the substrate surfaces to ensure they are sound, dry, clean, and free from projections.” Look for signs of damage like sagging areas, water stains, missing shingles, or rotted wood. Check your attic for moisture spots, which might indicate underlying roof problems.
As you prepare for installation, Asphalt Roofing recommends protecting surrounding areas during your project. This means covering landscaping, securing attic contents, and preparing plumbing vents and gutters for potential disruption. Your materials checklist should include:
- Roofing shingles or chosen roofing material
- Roofing underlayment
- Roof decking repair materials
- Nails and fasteners
- Safety equipment (harness, non slip shoes)
- Measuring tape
- Roofing hammer
Pro tip: Always purchase 10 15 percent more materials than your calculated roof area to account for cuts, waste, and potential mistakes. This buffer will save you time and prevent unexpected trips to the hardware store.
By meticulously assessing your roof and gathering the right materials upfront, you will streamline your installation process and minimize potential complications. The next step involves preparing your workspace and removing the existing roof covering.
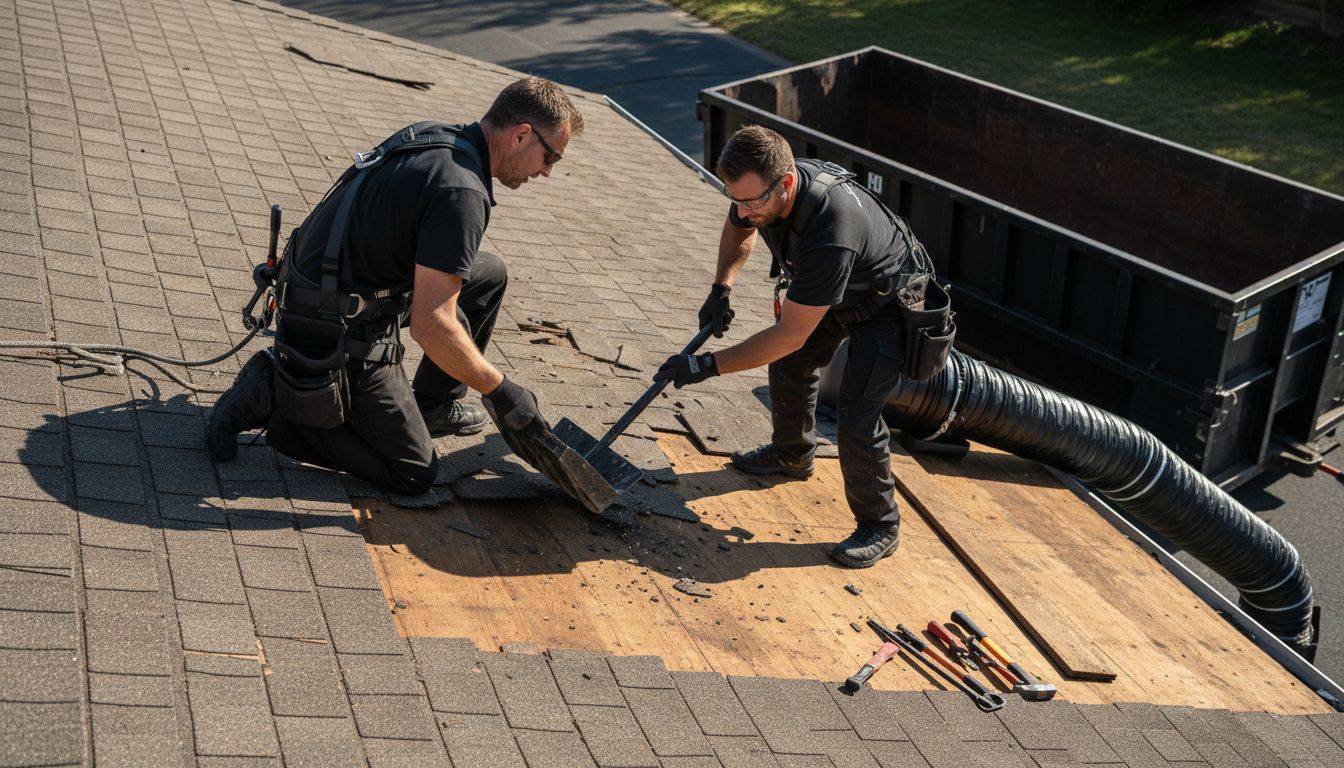
Step 2: Remove Old Roofing and Prepare Surface
Removing your existing roof and preparing the surface is a critical phase of roof installation that demands careful planning and execution. This step transforms your roof from an aging structure to a clean slate ready for a robust new covering.
According to GSA, professional roofing contractors should be strategic about debris removal. The key recommendation is to use “enclosed trash chutes or large bucket-type containers” to manage roofing materials, ensuring “no debris is thrown from the roof edge.” This approach minimizes potential damage to your landscaping and prevents safety hazards.
Start by setting up proper waste management systems before removing any roofing materials. Rent a large dumpster and position it close to your home for easy disposal. Wear protective gear including safety glasses, work gloves, and non slip shoes. Carefully remove existing shingles using specialized roofing tools like a roofing shovel or tear off tool, working systematically from the top of the roof downward.
Warning: Never remove more roofing than you can adequately cover and waterproof within the same day. Exposed roof decking is vulnerable to water damage and can compromise your entire installation if left unprotected.
Once the old roofing is removed, inspect the roof decking carefully. Look for signs of rot, water damage, or structural weakness. Replace any damaged wood and ensure the surface is smooth, clean, and structurally sound before proceeding. Repair any underlying issues to create a solid foundation for your new roof.
Pro tip: Take photographs of the exposed roof deck before adding new materials. These can be valuable for insurance documentation and future reference about your home’s structural condition.
With the old roofing removed and the surface prepared, you are now ready to move on to the next critical step of installing new underlayment and roofing materials.
Step 3: Install Underlayment and Flashing
Installing underlayment and flashing represents a crucial defense mechanism for your roof, creating a robust barrier against water intrusion and potential structural damage. This step transforms your exposed roof deck into a protected surface ready to withstand harsh weather conditions.
According to GSA, it is essential to install underlayment and flashing “to ensure a watertight seal” and “prevent water infiltration and protect the roof structure.” Begin by carefully rolling out your roofing underlayment horizontally across the roof deck, starting from the lowest point and working upward. Overlap each row by at least four inches to create a continuous protective layer.
Asphalt Roofing advises being meticulous during this process. “Remove all old fasteners from the surface” and carefully inspect existing metal flashings. When installing new flashing around chimneys, vents, and roof edges, use galvanized metal or specialized flashing materials designed for maximum water resistance.
Warning: Improper underlayment installation can lead to significant water damage. Ensure each section is securely fastened and free from wrinkles or air bubbles that could compromise water protection.
Pay special attention to critical areas like roof valleys, dormers, and intersections where different roof planes meet. These locations are most vulnerable to water penetration and require extra layering and precise flashing installation. Use roofing cement or specialized adhesives to create additional seals at these potential weak points.
Pro tip: Take your time during underlayment and flashing installation. This foundational layer is your roof’s primary defense against moisture intrusion. A few extra minutes of careful work can prevent thousands of dollars in potential water damage repairs.
With underlayment and flashing securely in place, you are now prepared to move forward with installing the primary roofing materials that will complete your new roof system.
Step 4: Lay and Secure New Roofing Material
Laying and securing new roofing material is the moment where your roof transformation truly comes to life. This critical stage transforms your prepared surface into a weatherproof shield that will protect your home for years to come.
According to GSA, it is crucial to install the new roofing system “using cold-applied mastics” and ensure “all materials are applied in accordance with the manufacturer’s specifications to achieve optimal performance and longevity.”
Begin by selecting the appropriate starting point for your roofing material typically the bottom edge of the roof. For asphalt shingles, start with a starter strip that provides a solid foundation for subsequent rows. Align each row carefully, ensuring consistent overlap and maintaining straight lines. Asphalt Roofing recommends being meticulous about removing old fasteners to create a clean installation surface.
Warning: Improper material placement can lead to significant vulnerabilities in your roof’s protective capabilities. Each piece must be carefully nailed or secured according to manufacturer specifications.
Pay special attention to roof edges, valleys, and intersections. These areas require extra precision and often need additional sealant or specialized flashing to prevent water infiltration. Use roofing nails specifically designed for your chosen material and space them according to manufacturer guidelines.
Pro tip: Work systematically and maintain consistent tension while laying roofing materials. Minor misalignments can compound into significant issues over time. Take your time and double-check your work as you progress across the roof surface.
With your new roofing material securely in place, you are now ready to complete the final touches that will ensure a professional and watertight installation.
Step 5: Inspect Installation and Ensure Quality
Inspecting your newly installed roof represents the final critical step in ensuring a durable and reliable roofing system. This comprehensive evaluation will help you confirm that every detail of your installation meets professional standards and provides maximum protection for your home.
According to GSA, a thorough post installation inspection should begin by examining “the underside of the roof deck from the attic to detect leaks.” Focus particularly on flashing points which are “the most vulnerable points” for potential water infiltration.
Begin your inspection by walking the roof perimeter and checking for uniform shingle alignment. Look for any raised edges, gaps between materials, or areas where nailing seems inconsistent. Carefully examine all roof penetrations such as chimneys, vents, and skylights to ensure proper sealing and flashing. Pay special attention to roof valleys where water channels most intensely.
Warning: Do not rush this inspection. Even minor imperfections can lead to significant water damage if left unaddressed.
Utilize a moisture meter if possible to detect any hidden water intrusion points. Check the attic interior for signs of potential leakage including water stains, mold growth, or dampness around roof deck edges. Photograph any areas of concern for potential future reference or professional consultation.
Pro tip: Consider scheduling a professional roof inspection within 30 days of installation. An expert can identify subtle issues that might escape an untrained eye and provide additional peace of mind about your new roofing system.
With a comprehensive quality inspection complete, you have successfully navigated the entire roof replacement process and created a robust protective shield for your home.
![]()
Take the Worry Out of Your Roof Installation with Liberty Roofworks
Installing a new roof can feel overwhelming, especially when you consider all the steps involved such as assessing the roof condition, removing old materials, and making sure underlayment and flashing are done right to protect your home. The risk of water damage from an imperfect installation or overlooked details like flashing around vents can add stress. At Liberty Roofworks, we understand these challenges and the desire for a flawless, worry-free roof replacement.
You do not have to manage this complex process alone. Whether you need a full new roof installation or help with critical repair points after storm damage, our expert team in Charlotte, NC, delivers exceptional craftsmanship every time. We specialize in residential roof repair and replacements using quality materials and precise installation techniques. Avoid the headaches of DIY mistakes by trusting Liberty Roofworks to give your home a strong, durable roof that stands up to the elements.
Ready to protect your home with confidence? Visit Liberty Roofworks today to explore our full range of services including New Roof Installations and Residential Roof Repair & Replacements. Contact us now for a professional consultation and make sure your roofing project starts right and finishes strong.
Frequently Asked Questions
How do I assess the condition of my current roof before installation?
Start by conducting a thorough inspection for any signs of damage, such as sagging areas or missing shingles. Look for moisture spots in your attic and ensure the underside of the roof deck is clean and sound before proceeding with your project.
What materials do I need to gather for a new roof installation?
Collect essential materials such as roofing shingles, underlayment, nails, and safety equipment. Always purchase 10-15% more materials than your calculated roof area to account for mistakes and waste.
How should I remove my old roofing materials?
Carefully take off existing roofing using specialized tools like a roofing shovel, starting from the top and working downward. Set up waste management systems like dumpsters to handle debris safely, ensuring that no debris is thrown from the roof edge.
What is the best way to install underlayment and flashing?
Roll out underlayment from the lowest point of the roof upwards, overlapping each row by at least four inches. Implement flashing around chimneys and vents, ensuring a watertight seal to prevent water intrusion.
How can I ensure my new roofing material is laid correctly?
Start from the bottom edge of the roof and align each row carefully, checking for consistent overlap. Secure each piece according to manufacturer specifications to maintain the roof’s integrity and protect against water damage.
What should I inspect after completing the roof installation?
Inspect the roof for uniform shingle alignment and check flashing points for potential leaks. Look for gaps or raised edges and verify that all materials are securely fastened to prevent water penetration.
